How to Dye Easter Eggs Naturally
I’ve always wanted to have a go at dying Easter eggs naturally, using vegetables and spices, and this year we finally did it. A couple weeks ago, the boys and I did a trial run, so there wouldn’t be any surprises on the big day itself, and I wanted to share our results with you.
We found some white eggs at our local Waitrose, so we worked with those. I haven’t tried it with brown eggs. In Germany white eggs are much more widely available and what I am use to dying, so I was very pleased to find some here. After much research, we decided to experiment with red cabbage, beetroot, blueberries, turmeric and spinach. You’ll also need some vinegar, which helps to set the colours.
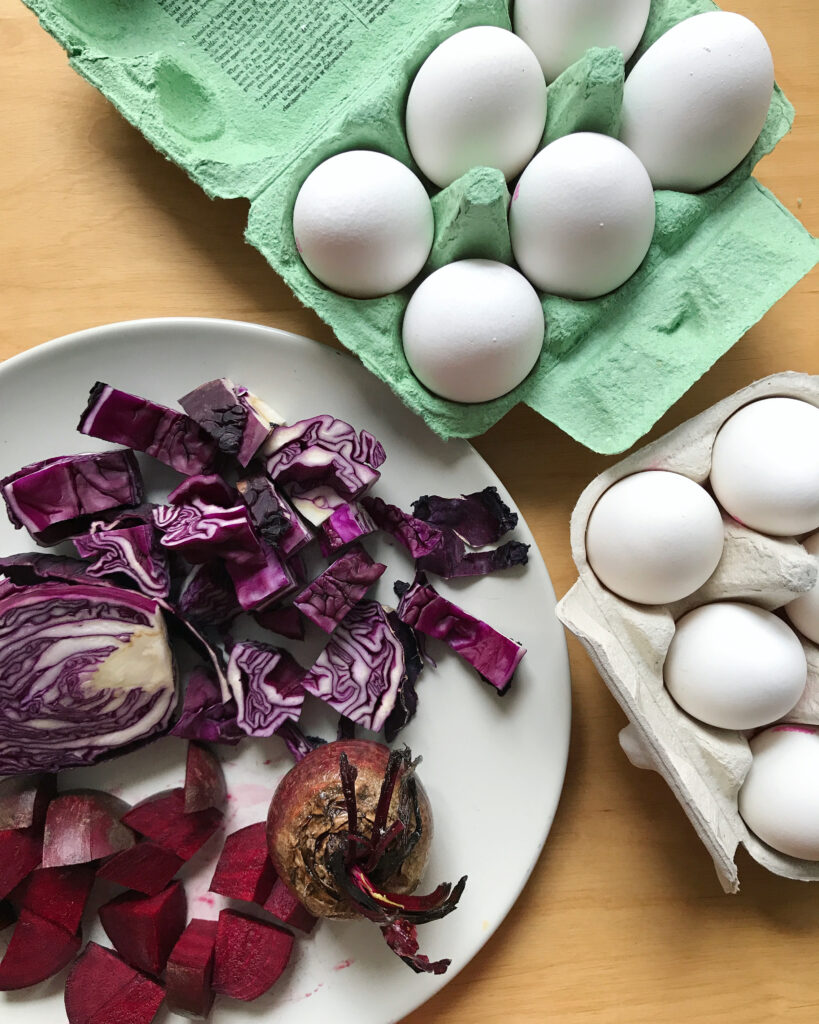
The first step was prepping our veg. For the cabbage, beetroot and spinach, we chopped up the veg and popped them each in a saucepan of water. The blueberries obviously didn’t need chopped up, so they went straight in. Then bring to the boil and let them simmer to release the colours, about 20 minutes for the cabbage and beetroot and 10 minutes for the spinach and blueberries. Then we strained them each in to a small, deep bowl and left them too cool. For the turmeric, we dissolved two tablespoons of ground turmeric powder in boiling water and left it to cool.
While your dyes are cooling, boil your eggs. I always boil my Easter eggs for ten minutes.
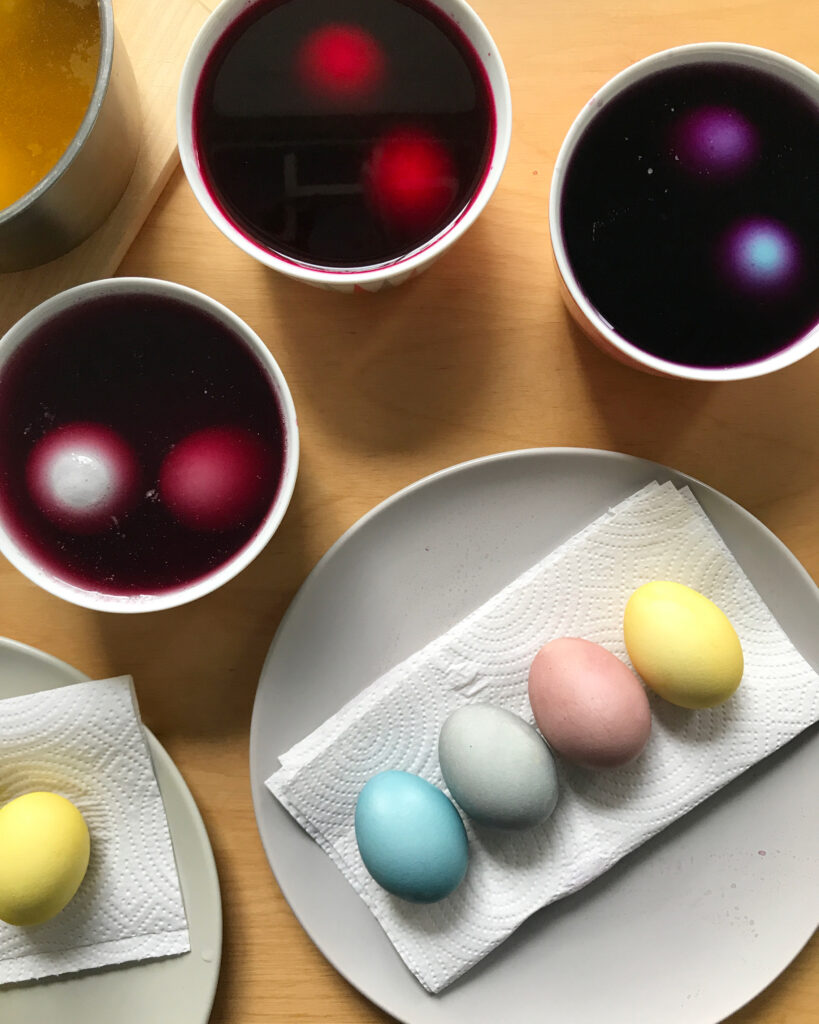
Once the dyes have cooled, add a tablespoon of vinegar to each bowl of dye. Don’t be tempted to add more, or you may end up pickling your eggs! Especially since you will be leaving your eggs to soak for longer than when using commercial egg dyes. I read somewhere that in spinach, the vinegar actually bleaches the colour instead of setting it – to be on the safe side, we made two bowls of spinach dye, one with and one without vinegar. We placed a couple eggs in each bowl of dye. They need to be fully submerged to get full coverage of the eggs. You can either do this while the eggs are still warm, or wait for them to cool. Then you need to wait.
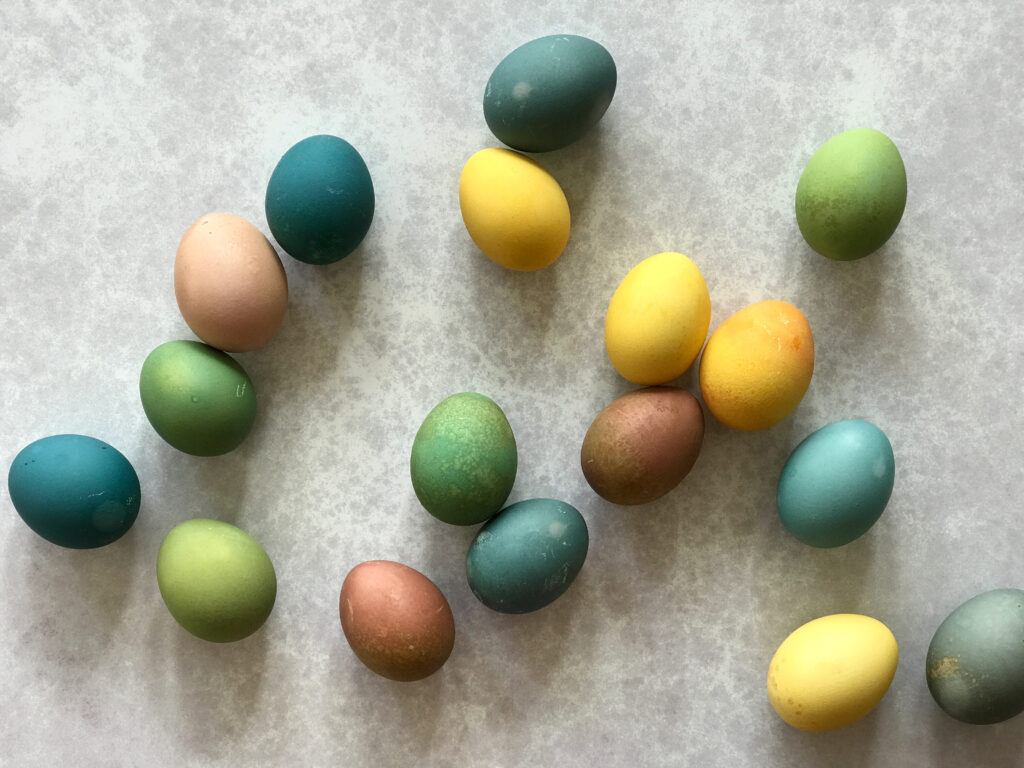
These were our eggs after 30 minutes. The red cabbage eggs were starting to take on a nice blue colour, the blueberries have a disappointing grey hue, the beetroot were a pale mauve, and the turmeric as expected were nice and yellow. Neither of the spinach dyes had done anything at all, so I didn’t bother photographing them.
Here on the bottom row were the eggs after one hour (with the top row being the earlier ones for comparison). As you can see, the blue and the yellow had intensified and deepened and the mauve had turned brownish. The grey blueberry eggs were not doing much at this point so I actually switched them to the cabbage dye to try and salvage them, hence no second photo of the blueberry egg. The spinach eggs also continued to do nothing, so we abandoned them altogether and switched to plan B for getting green eggs.
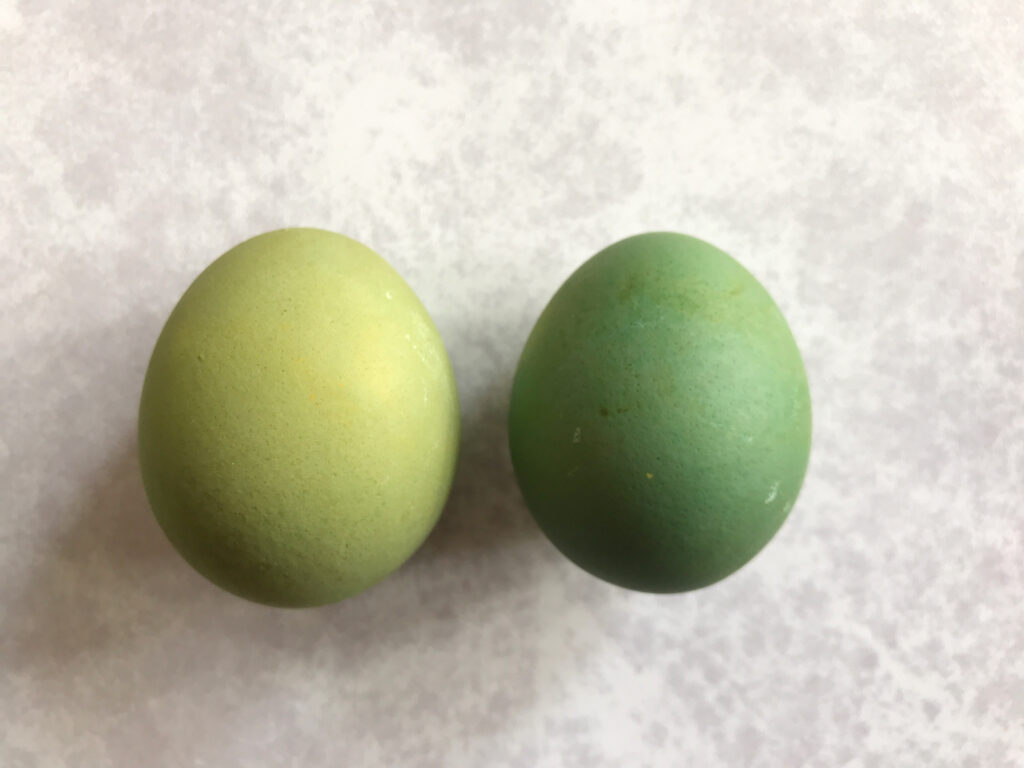
To get green eggs, we placed the abandoned spinach eggs in the turmeric for half an hour, then switched them to the red cabbage. Half an hour in the cabbage gave us a pale green, and about double that time gave us a darker green.
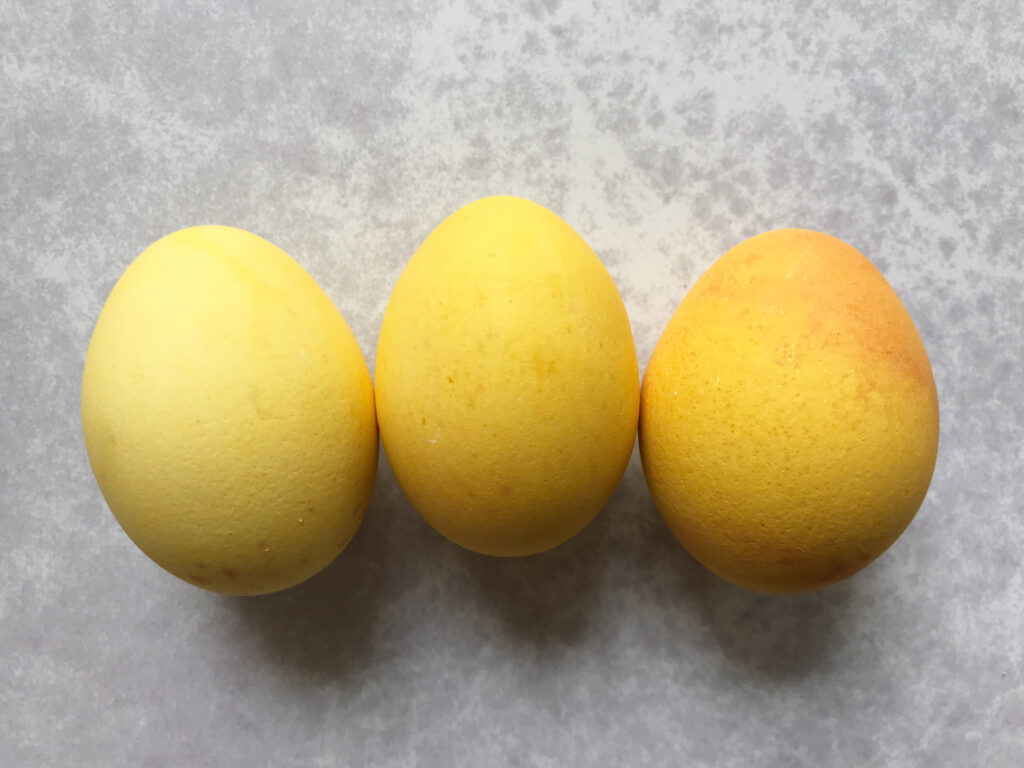
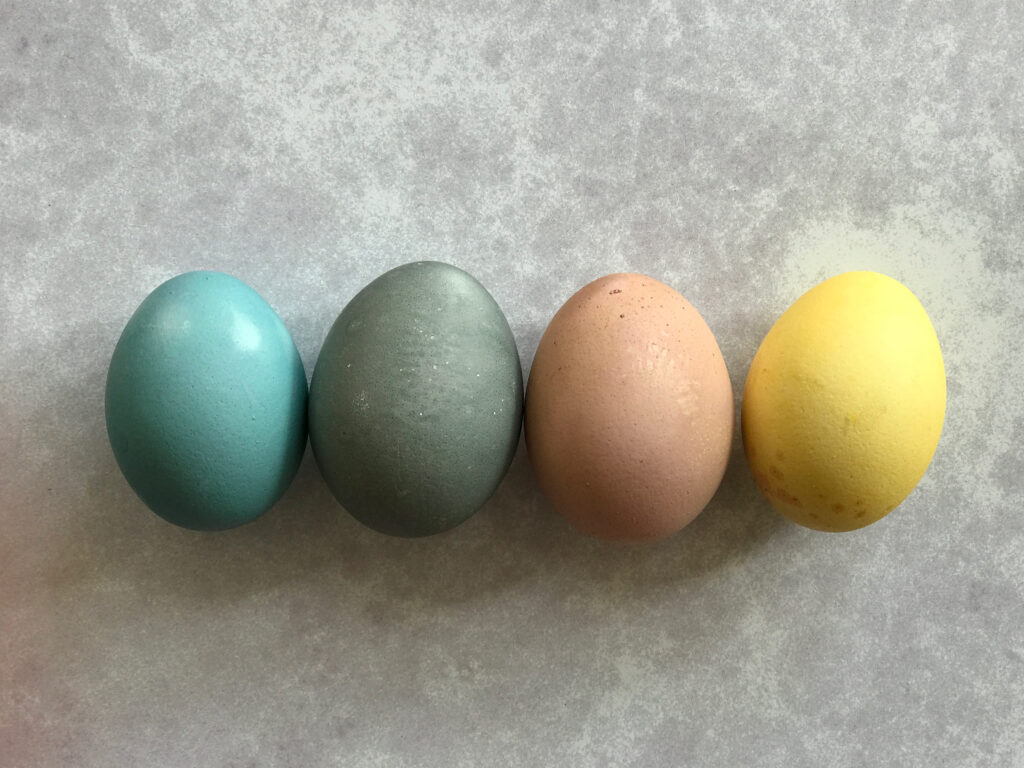
While we were doing the green eggs, we also let some of the blue and yellow cabbage and turmeric eggs soak for another hour to see if they would get even deeper in colour. There was no difference to the blue, but the yellow did get a fraction darker and started going orange at one end where it was sitting on the dregs of the undissolved turmeric powder.
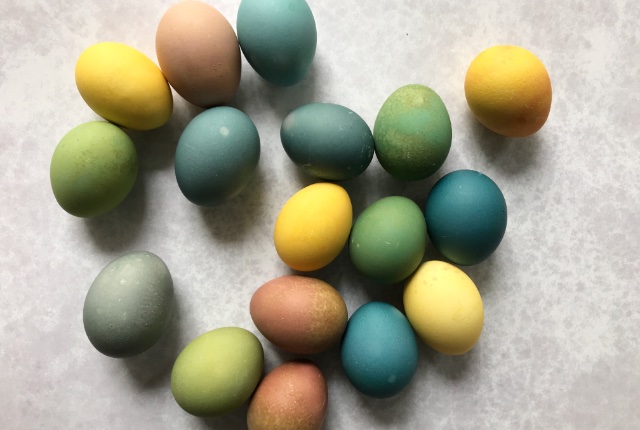
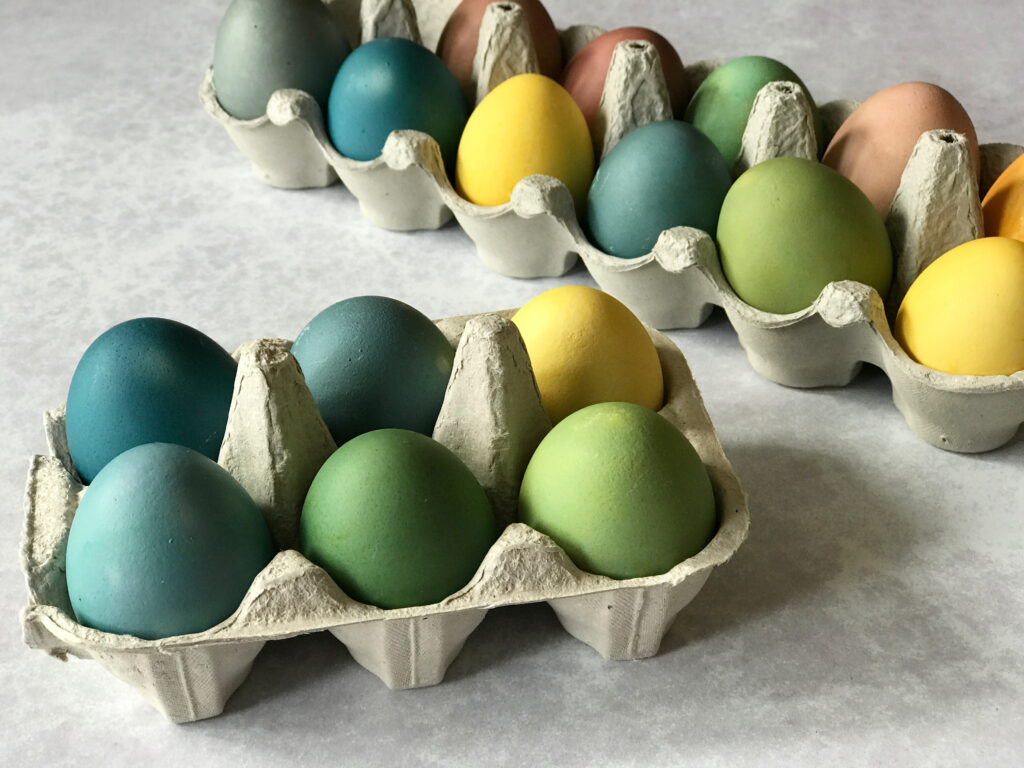
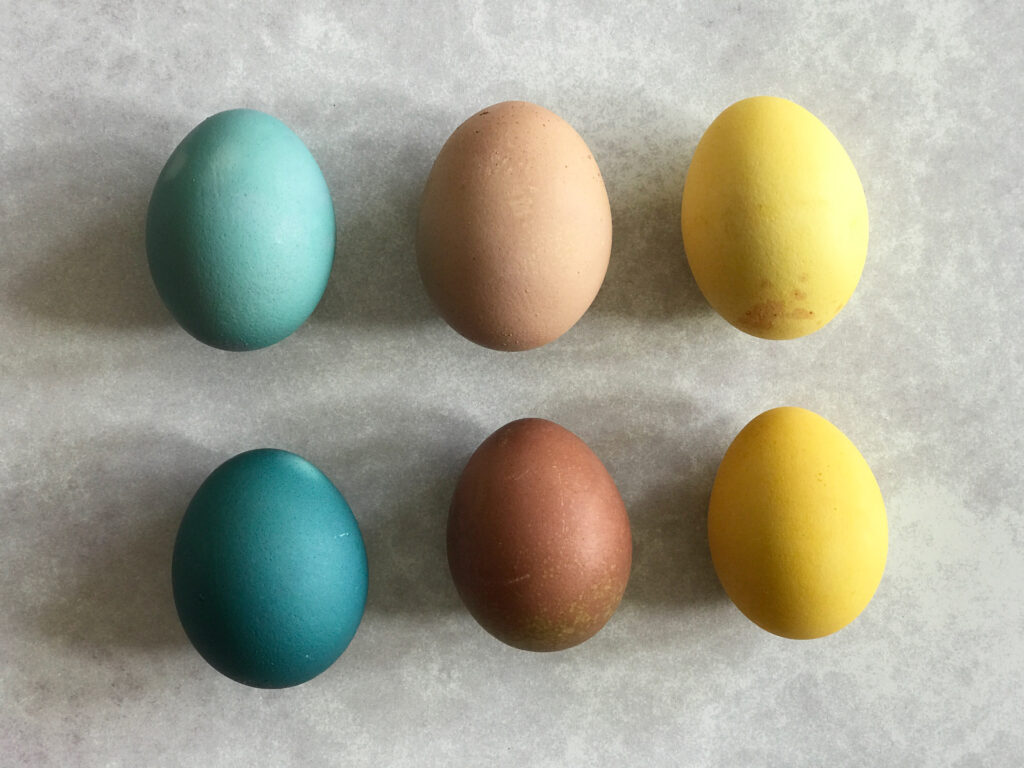
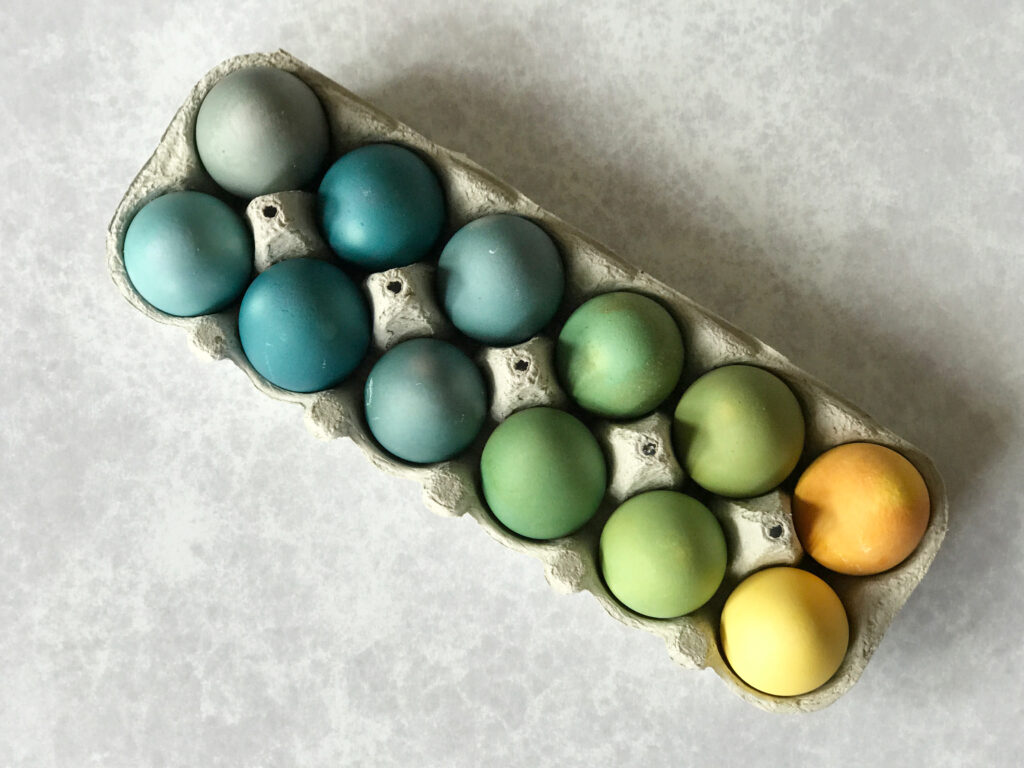
These were our final results:
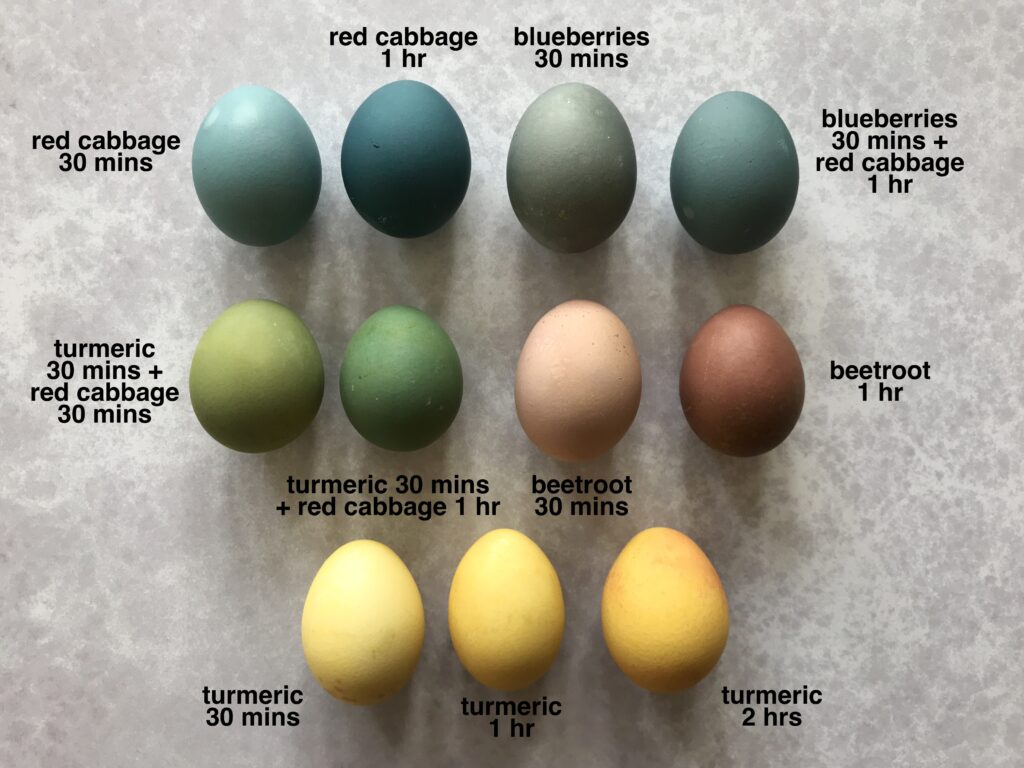
The blueberries and beetroot were really disappointing. The combination of the blueberry and red cabbage did give a nice smokey grey, but the beetroot was just brown. As my husband said, “You’ve dyed a white egg brown! Could have just bought a brown egg.” Particularly ironic, considering how much beetroot dyes everything else red that touches it. But the red cabbage and the turmeric both got really good results, and then the combining them to get the different greens was really good too. So if you are wanting to have a go at natural Eater egg dyes and want to keep it simple at first, then red cabbage and turmeric are a good starting point. I did read that different types of onion skin will give you nice colours, but I can’t eat onions so it seemed a bit of a waste buying them just for the skins. Maybe next year I’ll get my friends to save onion skins for me so we can have a go!
Have you tried decorating Easter eggs with natural dyes? If you have any good tips, do share them in the comments. And if you want to share any pics of your own egg dying adventures, please feel free to tag me on Instagram or Twitter.
For more Easter fun, including craft ideas and recipes, check out our archive of Easter posts!


Pingback: Planning for April – The Bear & The Fox