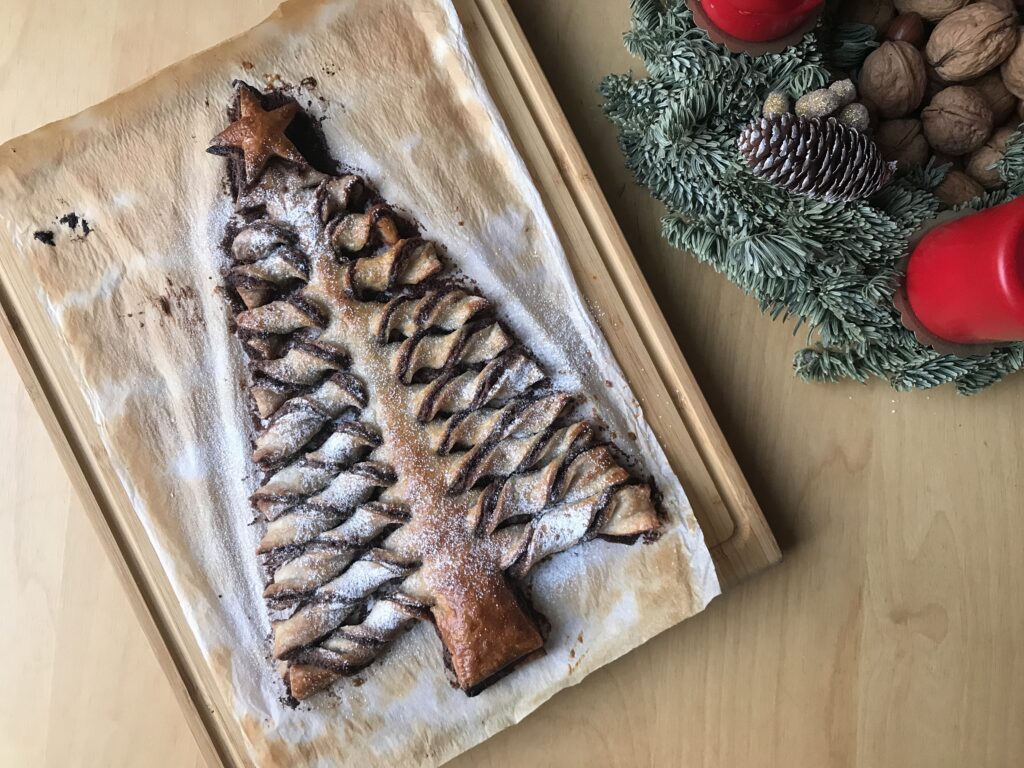
Chocolate Filled Puff Pastry Christmas Tree (GF)
Looking for a quick an easy treat to make for a special Christmas breakfast? These chocolate filled puff pastry trees take next to no time to prepare, but definitely deliver on the wow factor. We make this every year now for Christmas Even breakfast.
They were all over Pinterest during lockdown, so I in no way claim any credit for originating these, but I just wanted to show you how we created ours. I used the gluten free ready made rolls of puff pastry from Jus-Rol for this, and while I find they don’t puff up as much as regular puff pastry, it turned out just fine and was super yummy too.
Ingredients
- Two packs of ready rolled puff pastry pastry
- One jar of chocolate spread of your choice
- 1 egg, whisked
- Icing sugar
Tip: Take your puff pastry out the fridge about 20 before you want to use it, to let it get closer to room temperature, so that it doesn’t crack when you unroll it.
Directions
Step 1
Pre-heat your oven too 200 C (or 180 C for a fan oven).
Unroll the first pack of puff pastry and place it on a baking tray. It usually comes rolled in grease proof paper already, so I just used that, otherwise you’ll need to line the tray with paper first.
Step 2
Generously cover the sheet of pastry with chocolate spread. I found that using the back of a tablespoon worked best. I used about half a jar of spread.
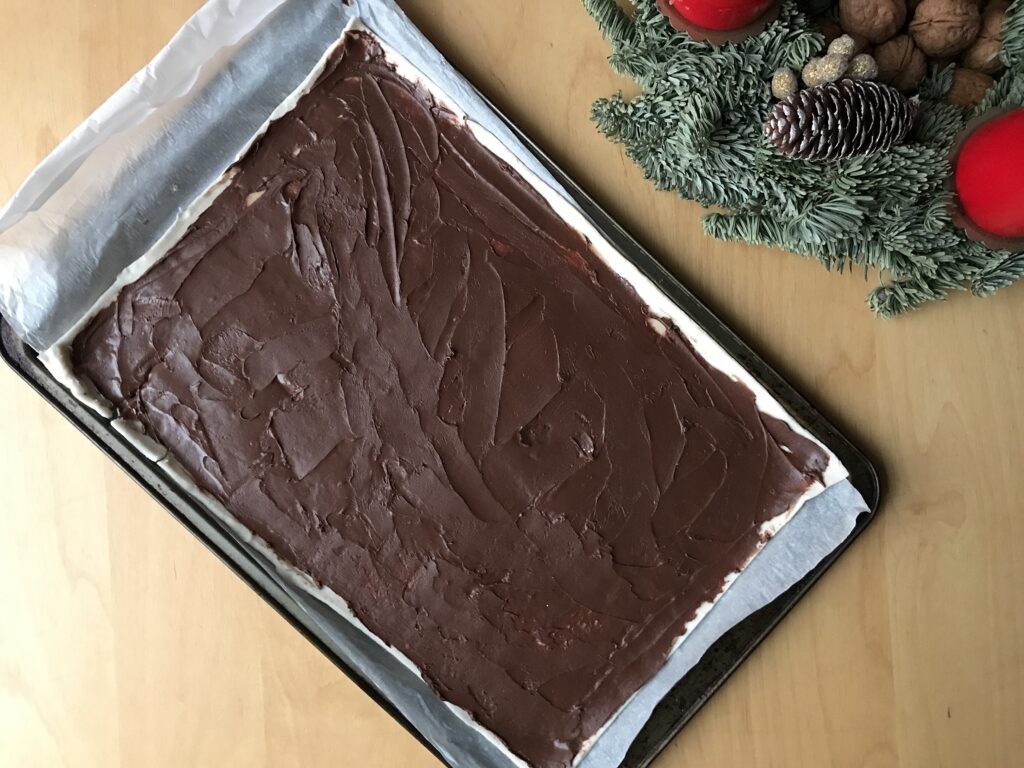
Step 3
Unroll the second pack of puff pastry and carefully place on top of the chocolate covered sheet of pastry, so that the two sheets align.
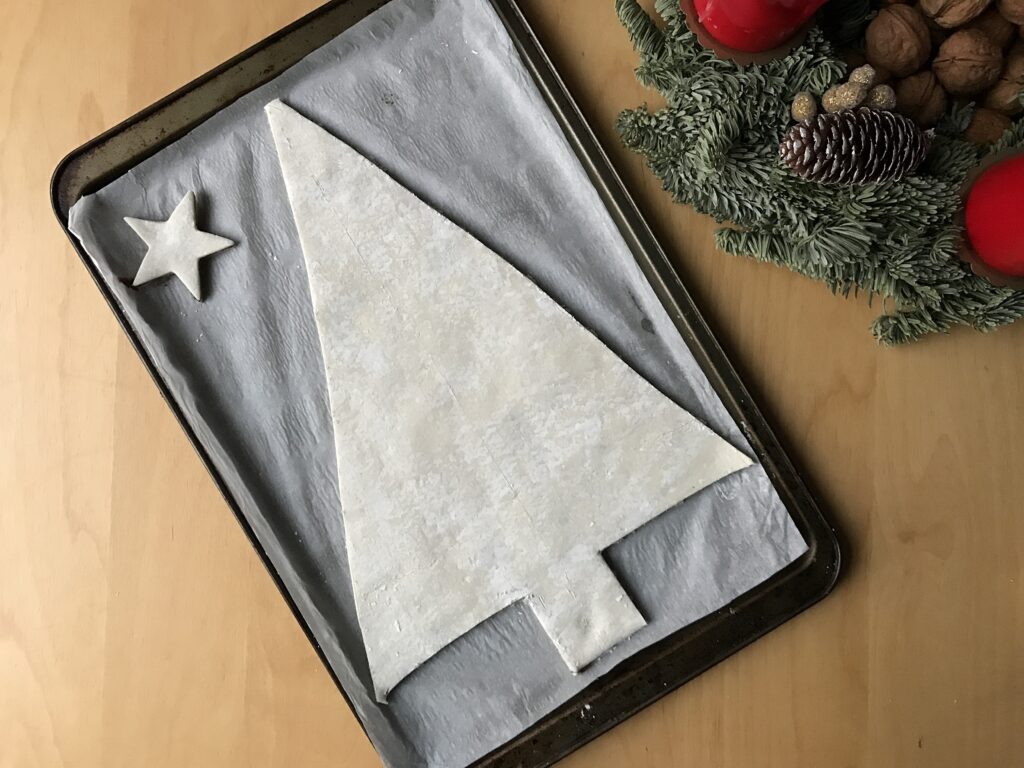
Step 4
With a knife, cut the outlines of a tree and tree trunk through both layers of pastry, as shown in the photo below. If you look closely, you can see where I drew a very light line down the middle of the sheets of pastry for guidance. Cut a star out of the pastry scraps – I used a cookie cutter for this.
Tip: Don’t throw away the scraps! You can make mini chocolate twists out them.
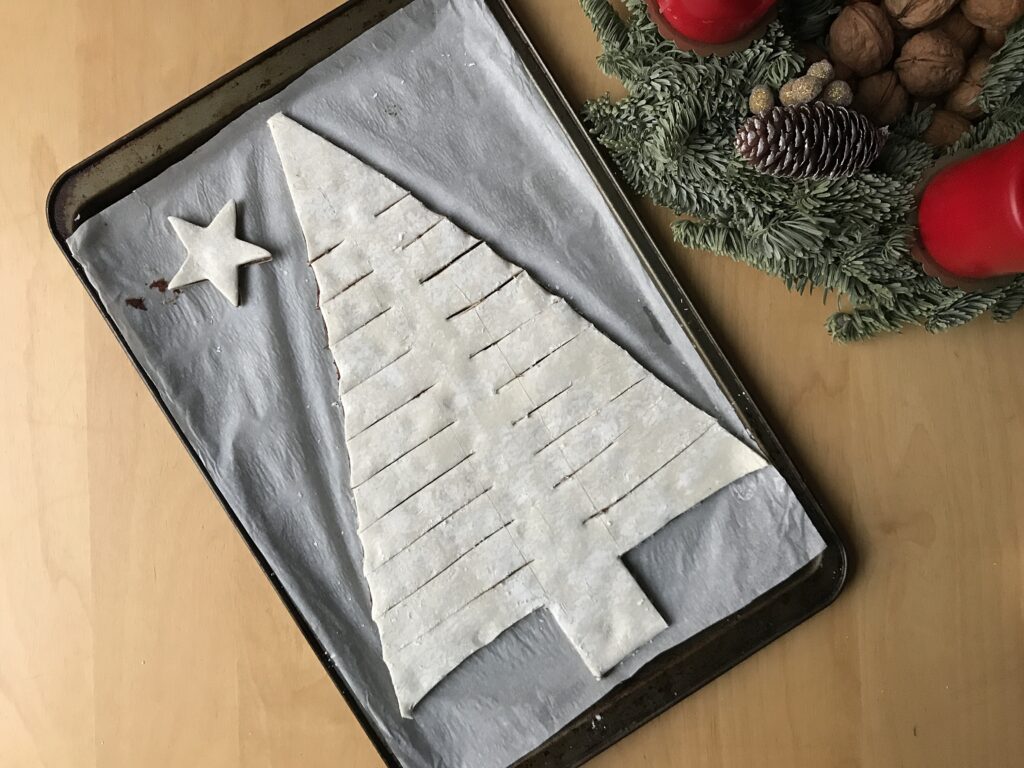
Step 5
Cut strips from the outside edge of the ‘tree’ in to the middle, leaving about 2cm in the middle of the tree that are uncut. See photo below for reference.
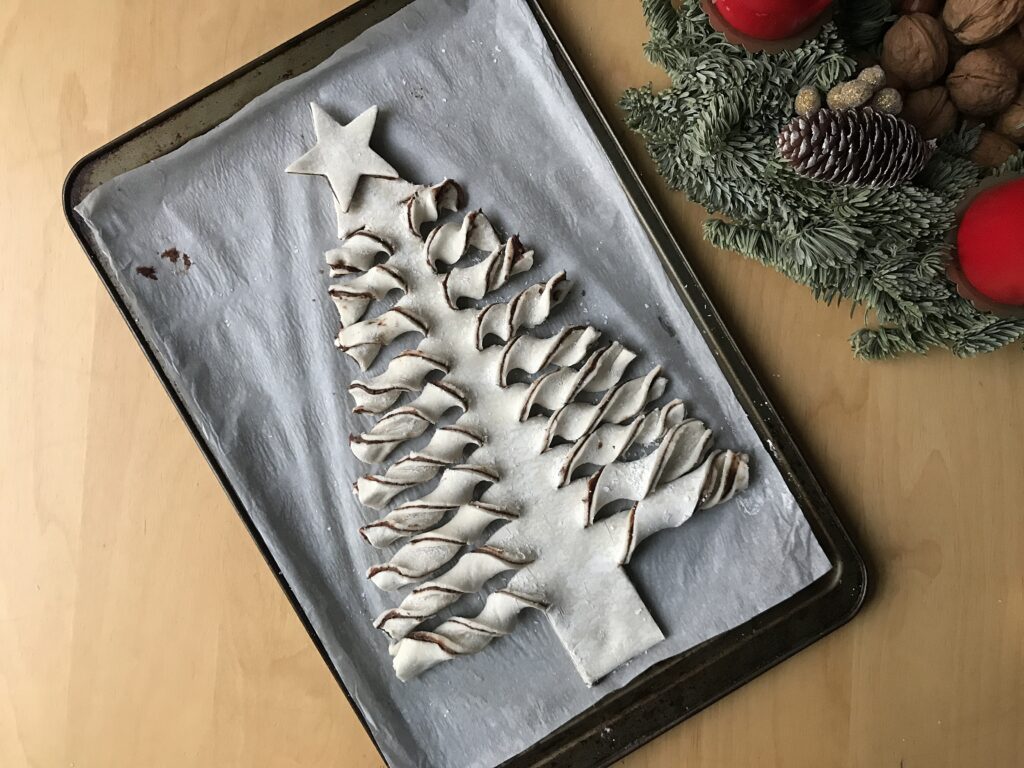
Step 6
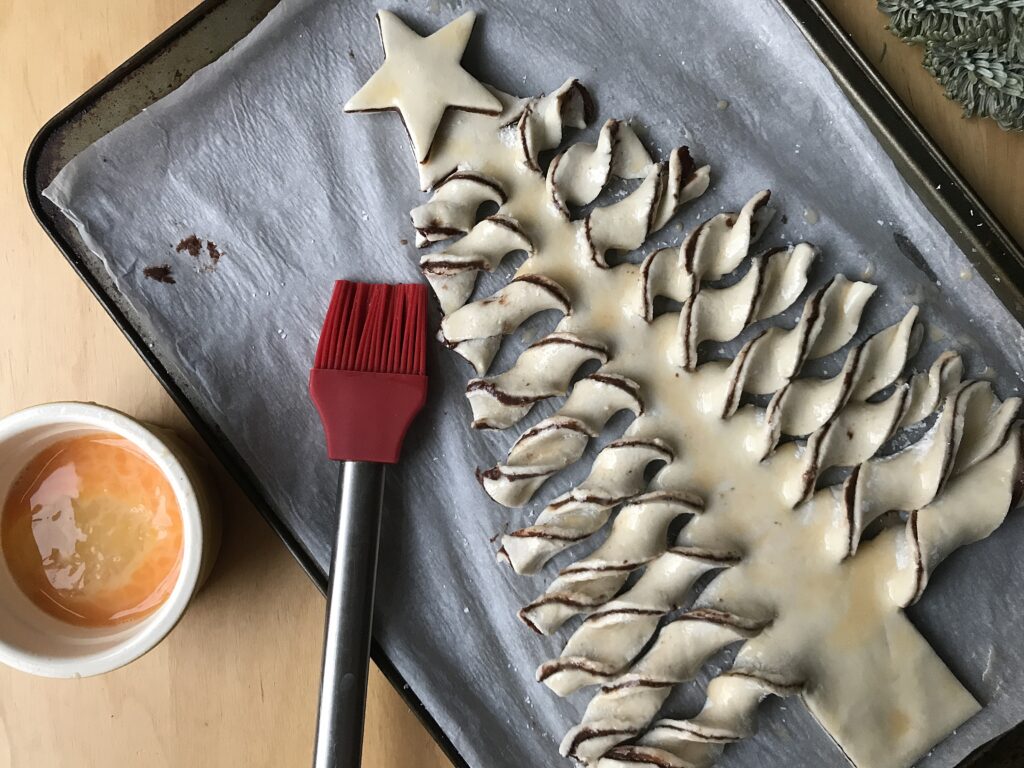
Twist each of the strips around themselves a couple of times. Place the star at the top of the tree.
Step 7
Brush the whole tree with the whisked egg.
Step 8
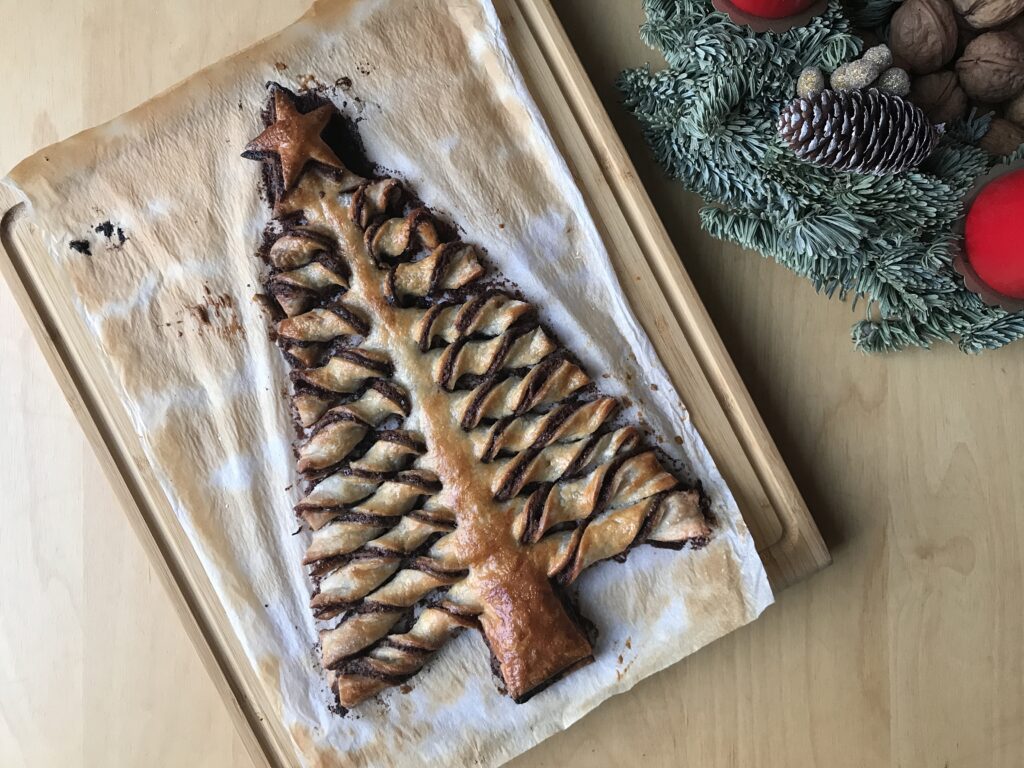
Bake in the oven for 15 to 20 minutes or until pastry is all puffed and golden (depends a bit on your oven, and the brand of pastry you use).
Step 9
Leave to cool, then sprinkle with sifted icing sugar before serving.
Happy faces all round guaranteed!
If you make your own chocolate Christmas tree, I would love to see some photos, so please feel free to tag me in on Twitter or Instagram. And check out our Christmas archives for other fun activities to do with the kids!
As always, all recipes, tutorials and other resources on this blog are free to enjoy and share, but if you feel able to and would like to make a small donation to help keep this blog running, then it would be very much appreciated. Just hit the support button. Thank you!
(First published in 2021, last updated in 2023)