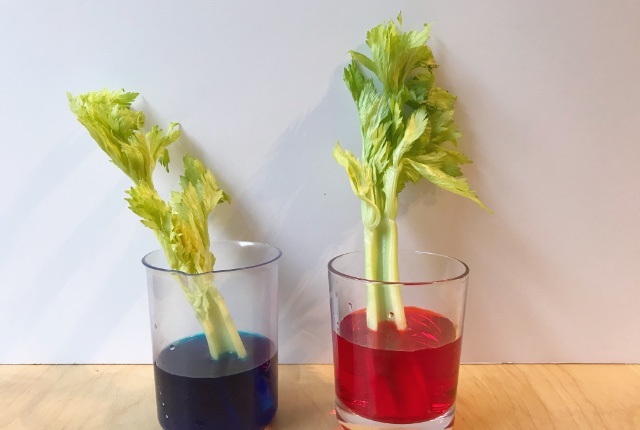
Celery Science Experiment
Today is our first science day of summer camp. All of the experiments are perfectly safe to do at home, and use everyday household items and ingredients. There are no hazardous materials, no explosions (sorry if you were hoping for explosions!) However, there will be one or two experiments with some ‘adults only’ elements, so please always read through the instructions from start to finish before you begin.
There are two ways you can approach these experiments. One is to simply carry out the instructions and marvel at the results. The other is to approach the experiments like a proper scientist: ask a question, make a hypothesis (i.e. what you think is going to happen), state your methods, record your observations, analyse your results. This not only makes it take up more time – always a bonus in my eyes if you are trying to fill the hours – but it also makes it more fun and your kids are more likely to remember what they’ve learned. I have created a ‘Science Experiment Report’ sheet, which you are free to download for personal use when doing the experiments. Don’t worry if you don’t have a printer, you can use the download as a template to write out you own sheet. Depending on age, kids can either write and/ or draw their observations.
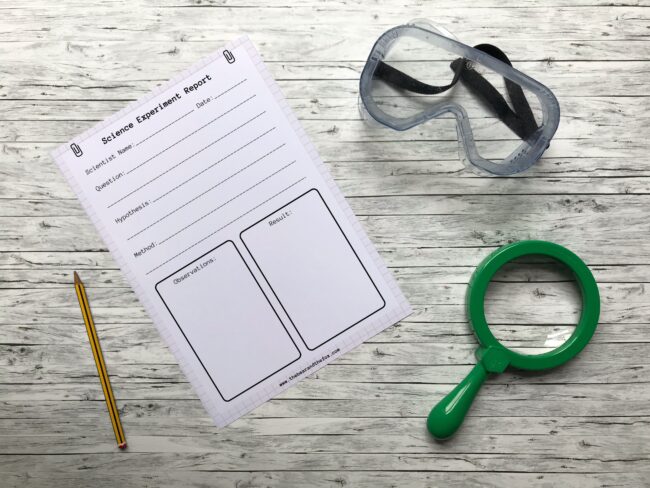
>>Download Science Experiment Report Sheet
All the experiments will include photos or videos of the results. While I recommend the grown-ups read through everything beforehand so you know what to do and what to expect, I suggest not showing your kids so they can have a guess themselves at what will happen, and it’s also more fun if you don’t know in advance what the result will be. I’ll put in a spoiler alert so you know when there’s a big reveal coming up.
So, let’s get started with our first experiment…
Celery Science Experiment
You will need:
- Fresh celery stalks with leaves attached
- Food colouring
- Water
- One or more glasses/ tumblers/ empty jam jars
- Knife (optional)
Safety tips: Be careful when handling food colouring as it can stain furniture and clothes. Knives should only be handled by adults or under supervision, depending on the ages of the children.
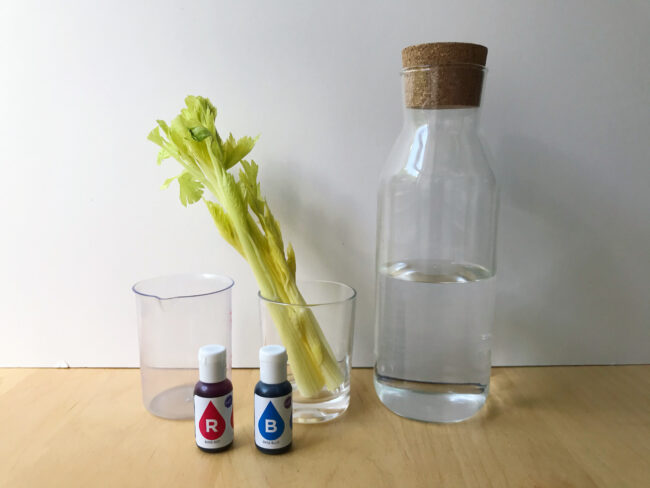
Before you get too excited, I have to mention that this is not an experiment with an instant effect. You’ll need to leave a couple of hours after setting it up to see results. I chose it because it is very easy and fail safe, so a good introduction to science at home. You should be able to see it starting to work after 1-2 hours, but it will look best after 12 hours so it’s a good one to set up in the morning and then check on throughout the day. Or set it up in the afternoon/ evening and check on it the next morning.

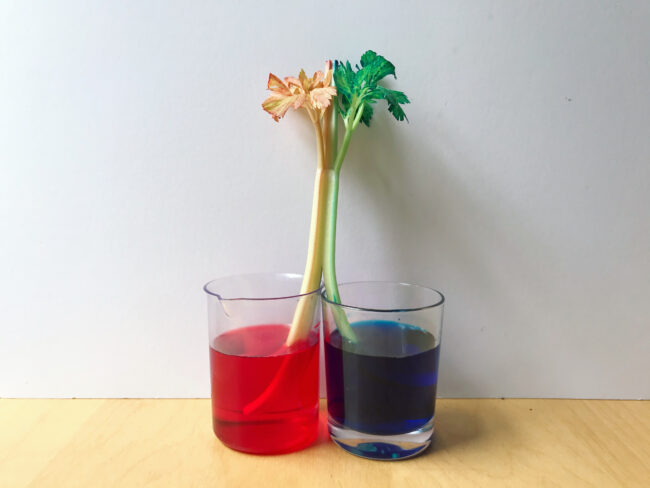
Step 1: Fill the glass jar(s) with a couple of inches of water and add some food colouring. We found that blue and red worked best. We did a couple at a time so that we could compare the colours.
Step 2: Cut about an inch off the bottom of your celery stalks and place lace a stalk with leaves still attached in each jar.
That’s it. Now you have to wait. What do you think will happen? Check after a couple of hours to see if anything has happened. You will get the best results after 12-24 hours, but keep checking in between and recording any changes in your report.
! SPOILER ALERT !
V
V
V
V
V
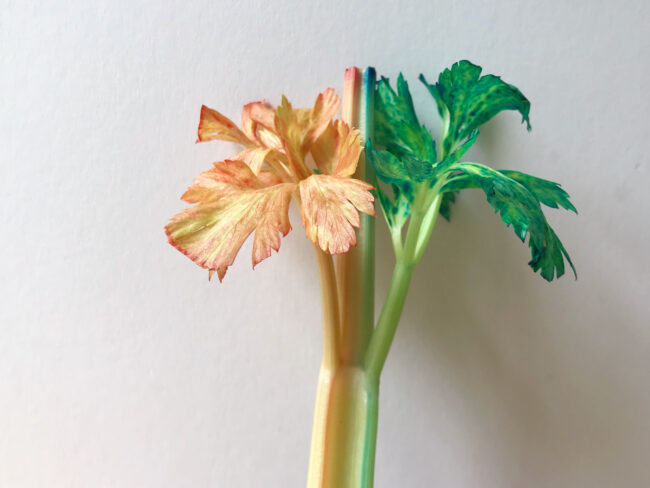
After a couple of hours, you should see the leaves of the celery start to change colour. The colour will intensify the longer you leave the celery in the water. If you look closely, you will also notice the stalks changing colour slightly – you will notice it more if you hold them next to a stalk that hasn’t been in water – but it’s the leaves that show the most dramatic change.
We set ours up after dinner, and left it over night. This is our celery after 14 hours…
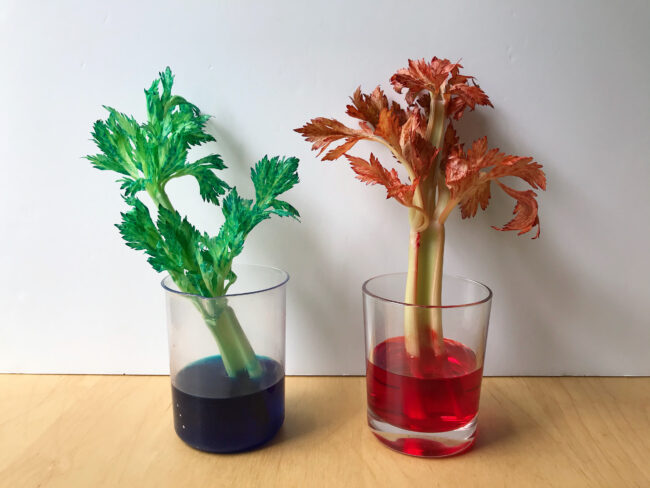
And this is it after 24 hours…
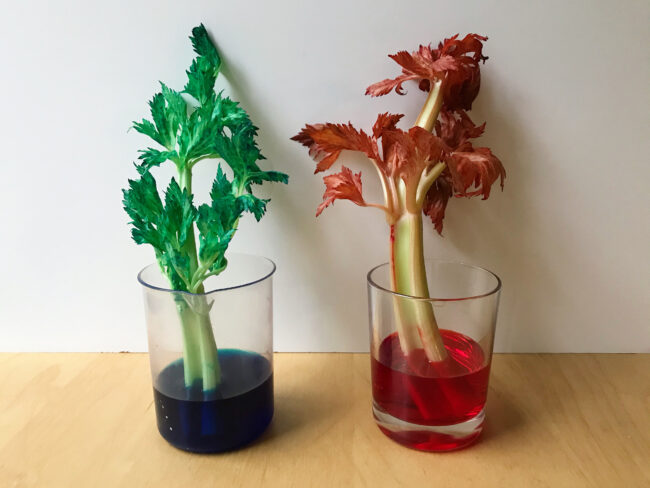
It’s very subtle, but the colour of the leaves got a bit more intense after the 24 hours, you can see it especially on the red leaves.
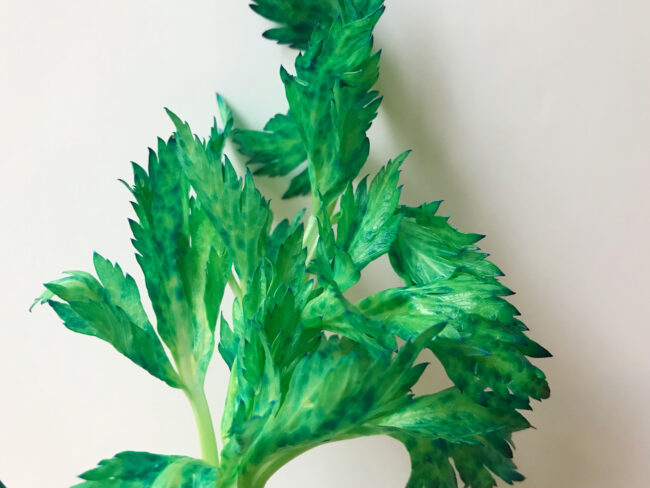
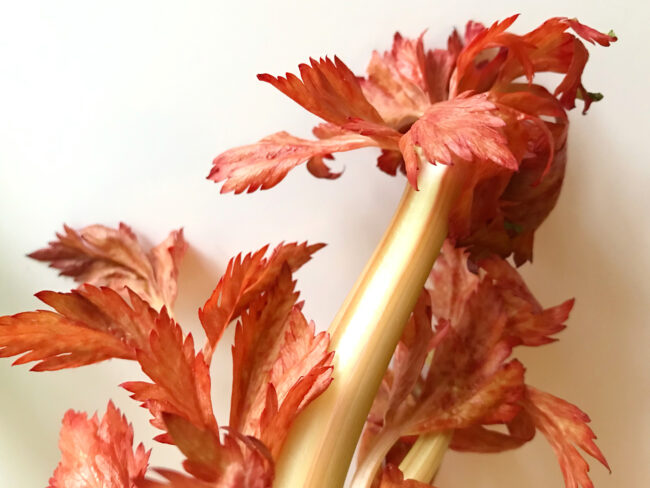
Questions to ask yourselves:
Why do you think the leaves have changed colour? What has happened? Do different colours work better than others? Try splitting a celery stem length ways and putting each side of the stem in a different coloured jar of water? What do you think will happen now?
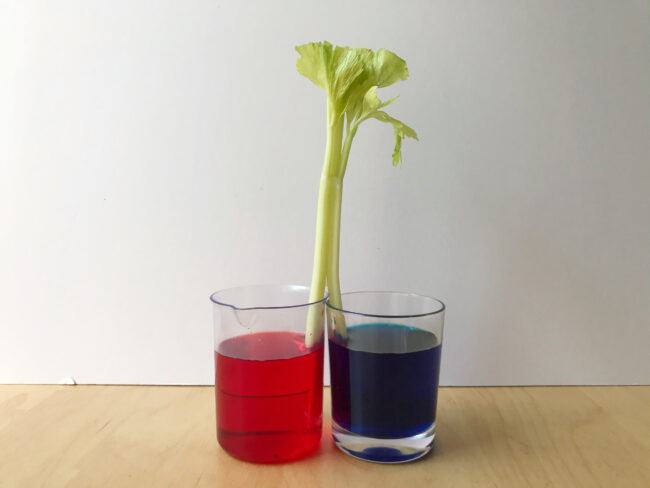
My boys had two predictions for what could happen. a) The celery leaves would end up purple, from the red and blue mixing. Or b) the celery would end up half red and half blue. Scroll down to see which one it was.
! SPOILER ALERT !
V
V
V
V
V
Explanation
Certain types of plants called vascular plants – to which celery belongs – have a type of tissue inside them called xylem. These are like tiny tubes, and their job is to transport water from the roots of the plant to the stems and leaves, as well as nutrients. Think of them like straws which the plant uses to suck up water. The scientific name for this is capillary action (you can read a more detailed explanation of capillary action on Wikipedia). This process is usually invisible to us, but by adding food colouring to the water it becomes visible and we can see exactly how it travels in to the celery’s stem and then into the leaves.
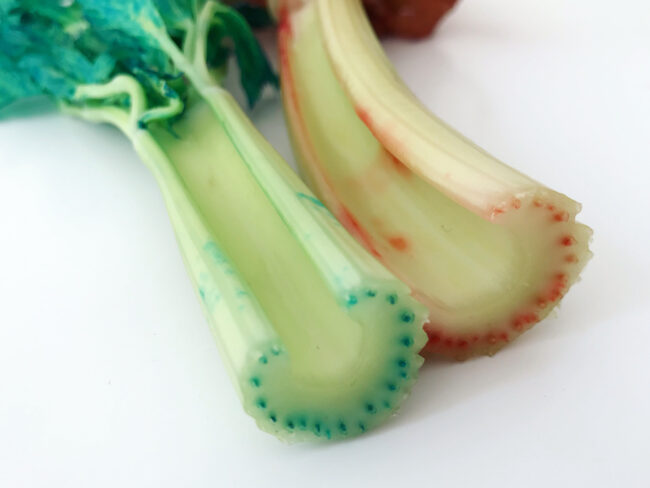
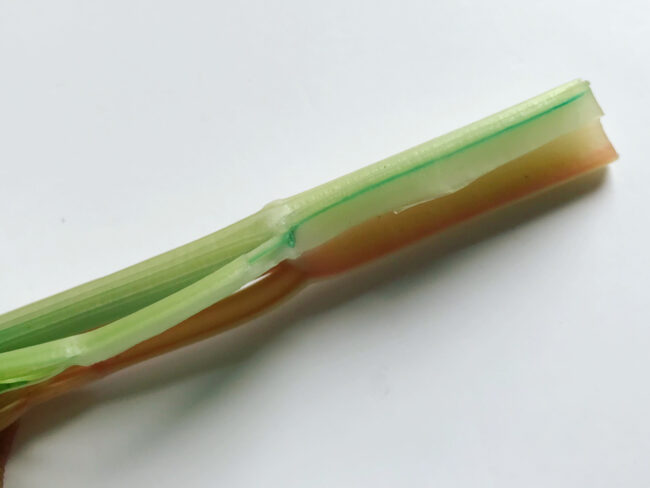
If you cut across one of the celery stalks, you can see exactly where the tiny tubes start, as they will have been highlighted by the food colouring. And if you carefully split a stalk lengthways, you can even see a whole tube.
If you enjoyed today’s activity, please feel free to leave a comment or tag me in on Twitter and Instagram. Remember to use the hashtag #BearAndFoxSummerCamp if you are sharing any photos.
[line]
All Summer Camp activities are free to make them accessible to as many people as possible. However, if you enjoy the activities and are able to, you can support me with a donation on Ko-fi. Just hit the button below. Every little helps and is much appreciated. Thank you.



Sarina J
What a great experiment and the celery leaves look so cool afterwards!
Pranali
Excellent experiment to keep kids busy and wondering. My 6 years old would love doing that. Thank you for the idea.
Pingback: Dancing Raisins Experiment – The Bear & The Fox
Pingback: Leakproof Bag Experiment – The Bear & The Fox
Pingback: Seed Germination Experiment – The Bear & The Fox
Pingback: Rising Water Experiment – The Bear & The Fox
Pingback: Lava Lamp Experiment – The Bear & The Fox
Pingback: Floating Egg Experiment – The Bear & The Fox
Pingback: Shiny Penny Experiment – The Bear & The Fox
Pingback: How long does it take for celery to absorb food coloring? | – FromHungerToHope