Recycled Cardboard Christmas ‘Gingerbread’ Village
I have a tendency to hoard cardboard from delivery boxes and such like, much to my husband’s dismay who thinks we have too much stuff in the house, but it came in very handy when the boys and I decided to make a little Christmas ‘gingerbread’ village last weekend for our living room mantlepiece.
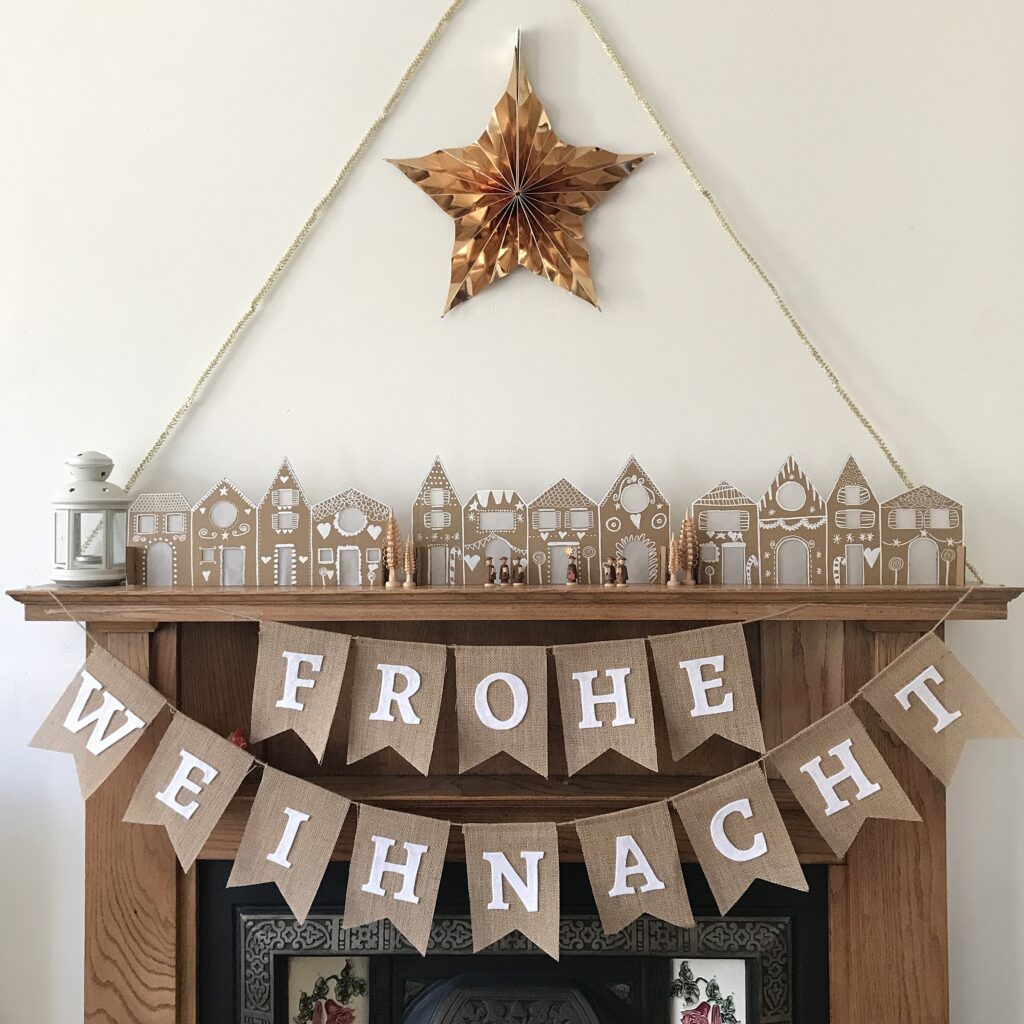
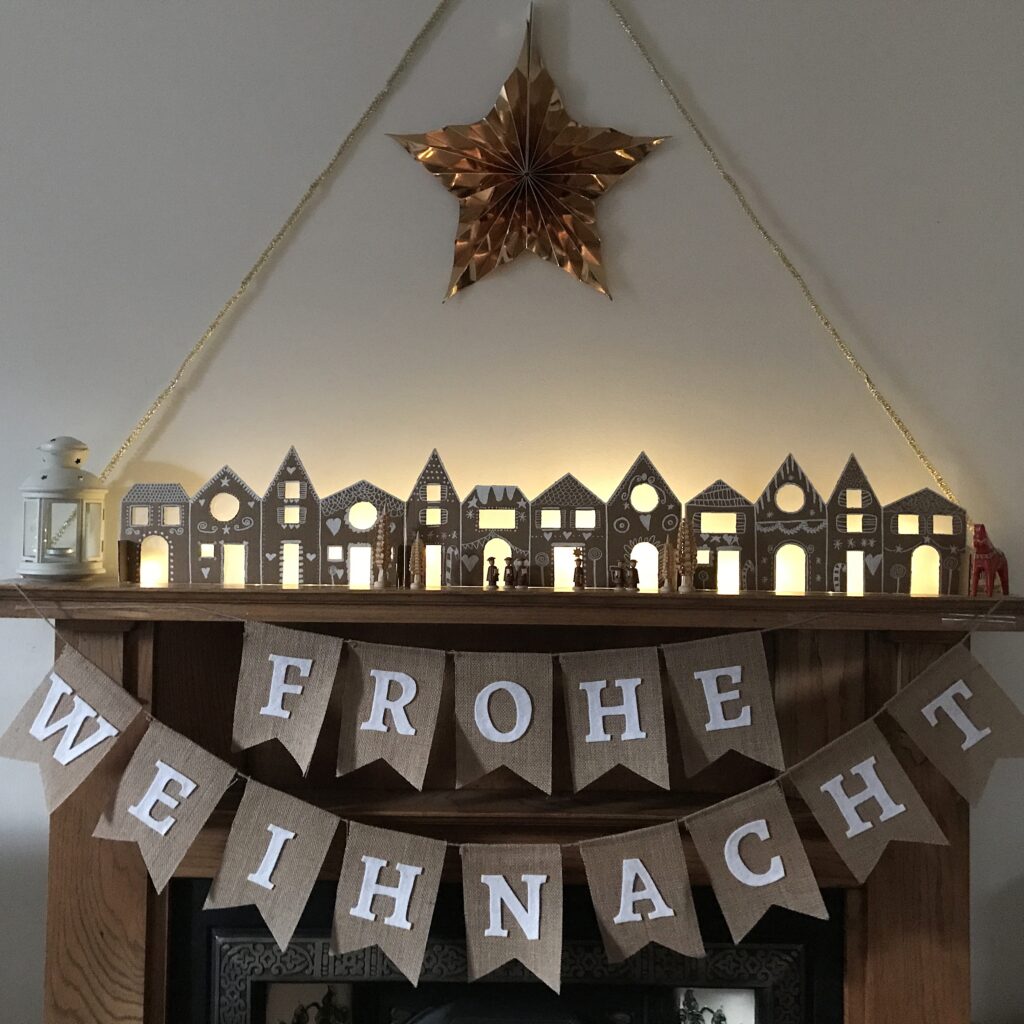
I think it’s turned out super cute, and it packs away flat too so it’s easy to store for future years (the stands that slot in at each end just slide out again for storage). I did think about making 3D houses at first, but decided against it because not only will it be easier to store these the way we made them, it was also a lot quicker so more doable/ realistic that we would finish the project. The lights behind it are optional, but make it look even more Christmassy. Keep reading to find out how to make your own.
Supplies Needed
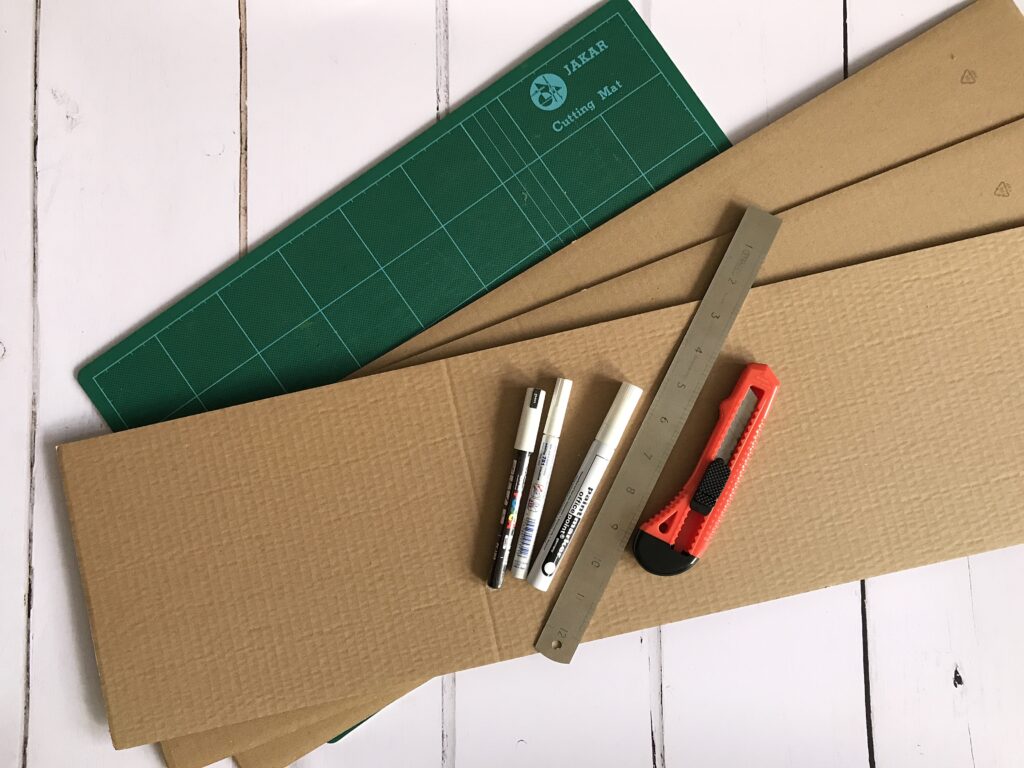
You will need:
- Pieces of brown cardboard, the size depends a bit on what space you are making them for. We used three pieces sized 40cm x 20cm
- White paint pen. I’ve tried out several brands and sizes in the past, and found the ones from Posca with a 0.9-1.3mm tip worked best. You could also use white acrylic paint with a very thin paintbrush.
- Craft knife and cutting board.
- Ruler.
- A pencil.
- Tracing paper or white tissue paper.
- Scissors.
- Glue stick.
Directions
Step 1
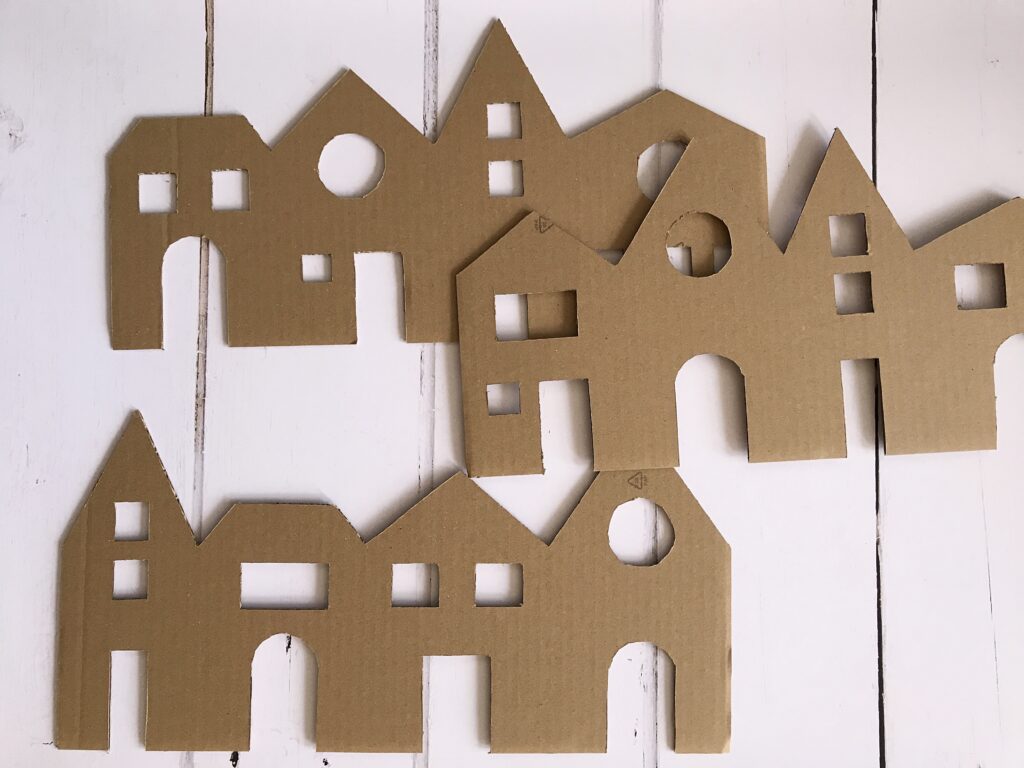
Cut a piece of cardboard wide enough for a row of a couple of houses. For our mantlepiece, I wanted something approximately 120cm wide but decided to split this in to three pieces at 40cm wide each as a) I didn’t have a piece of cardboard that wide, and b) doing it in three pieces will make it easier to store. I had some cardboard which was already 20cm high, which seemed like a good height for on top of the mantlepiece. But you can make yours bigger or smaller, depending on where you are going to put/ store them.
Note: You could also make lots of individual houses. The reason I went for rows of houses was because I wanted to put lights behind them so didn’t want too many gaps between the houses.
Step 2
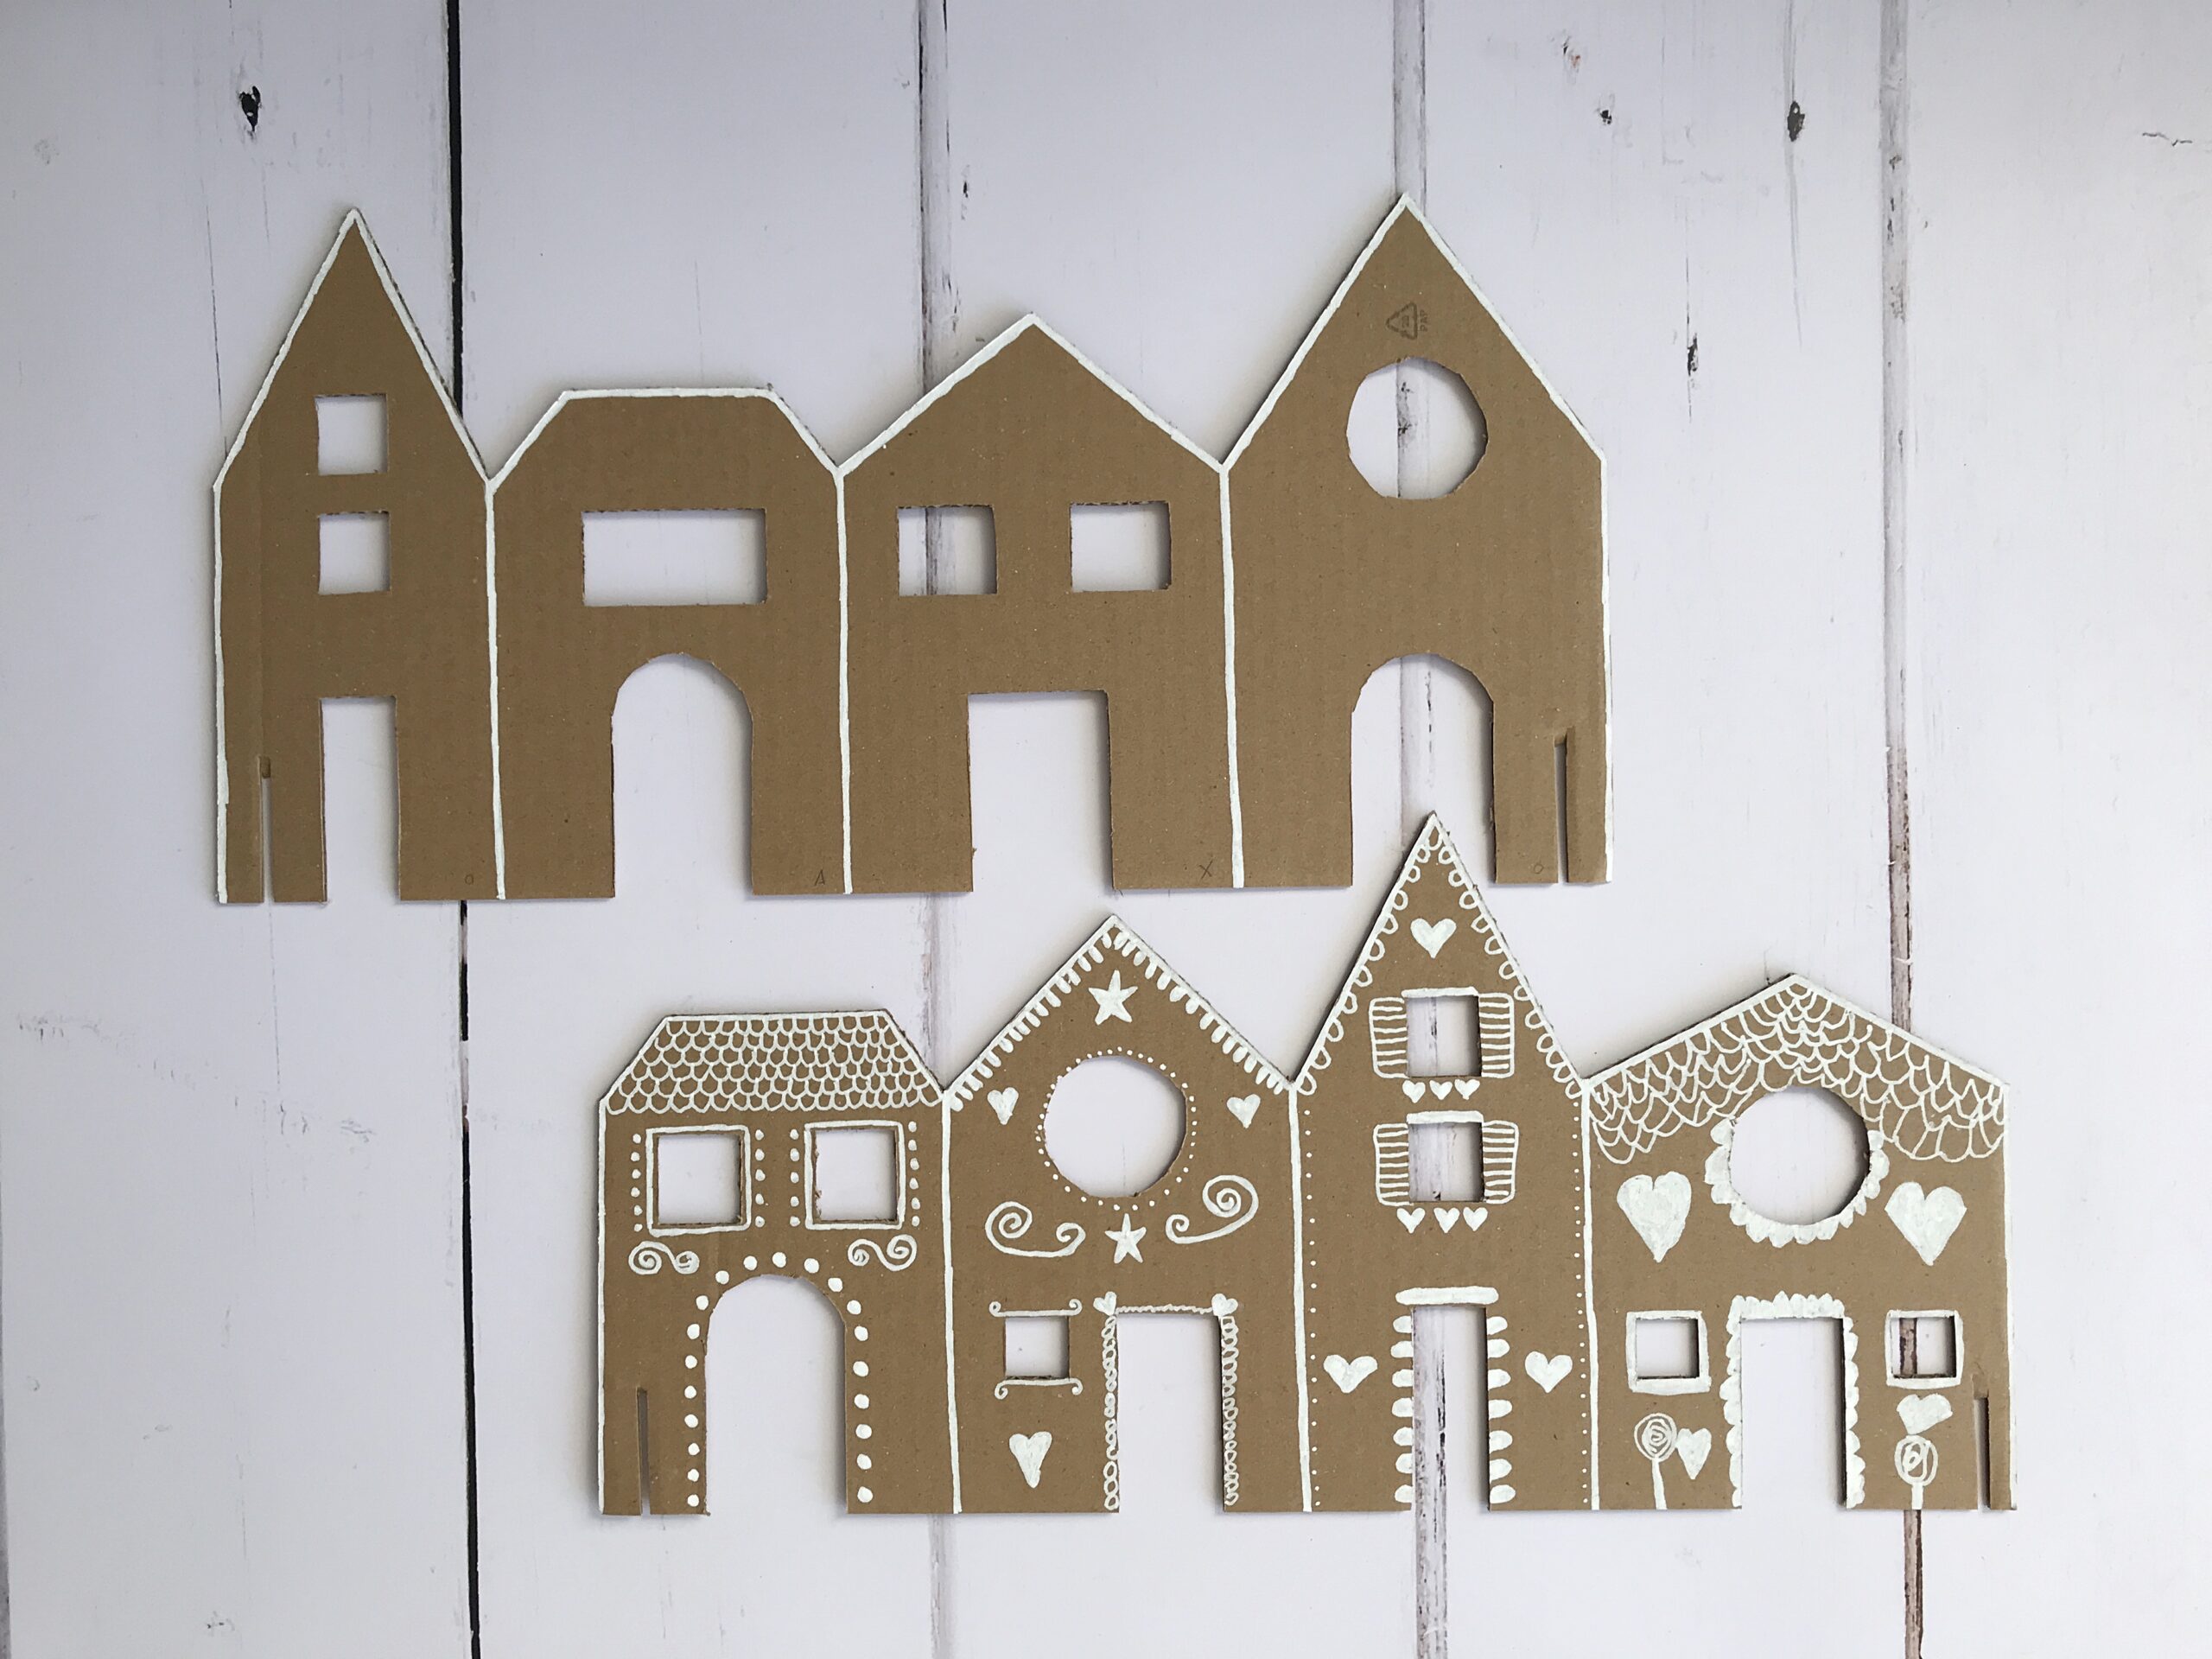
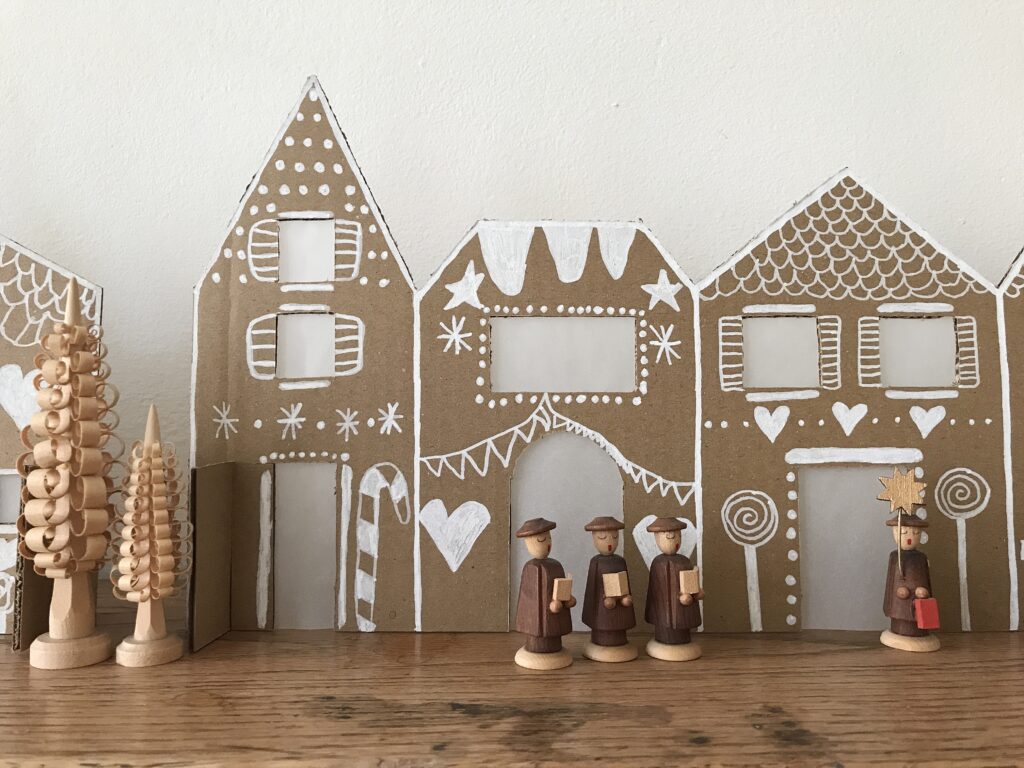
Sketch out the outlines of some house in pencil. Use a ruler if you need to, to get the lines straight. The 40cm x 20cm cardboard was a good size for four houses, which I made between 8cm and 12cm wide each, with different roof heights, so they wouldn’t all look identical. Don’t forget to add doors and windows. For the round windows and the tops of the arched doors, I drew around a milk bottom top! You can get the kids involved in this stage of the project too, though I did the prep work for ours while my boys were at school.
Note: Don’t add any doors or windows too close to the left and right outer side of each row of houses, as you will need some space to cut slits for the stands.
Step 3
This step is definitely one for the grown ups – with a craft knife, cut around the outlines of the roofs, then carefully cut out the doors and windows. Don’t forget to put a cutting board or something similar underneath to protect your work surface.
Step 4
Now comes the fun part – use white paint to add in details. Roof tiles, window shutters, door and window surroundings, edging, hearts, snowflakes, candy canes…whatever you fancy. We used paint pens for this, but you could also use acrylic paint and a very thin paint brush. The pens were great though, because they dried much quicker than regular paint.
Note: I’ve tried out various paint pens in the past, and found that the Posca PC-3M bullet shaped paint pens with a 0.9-1.33mm tip work best for me. You can buy them in packs of 3 from Amazon (Affiliate Link), which is great if there will be more than one of you using them.

Step 5
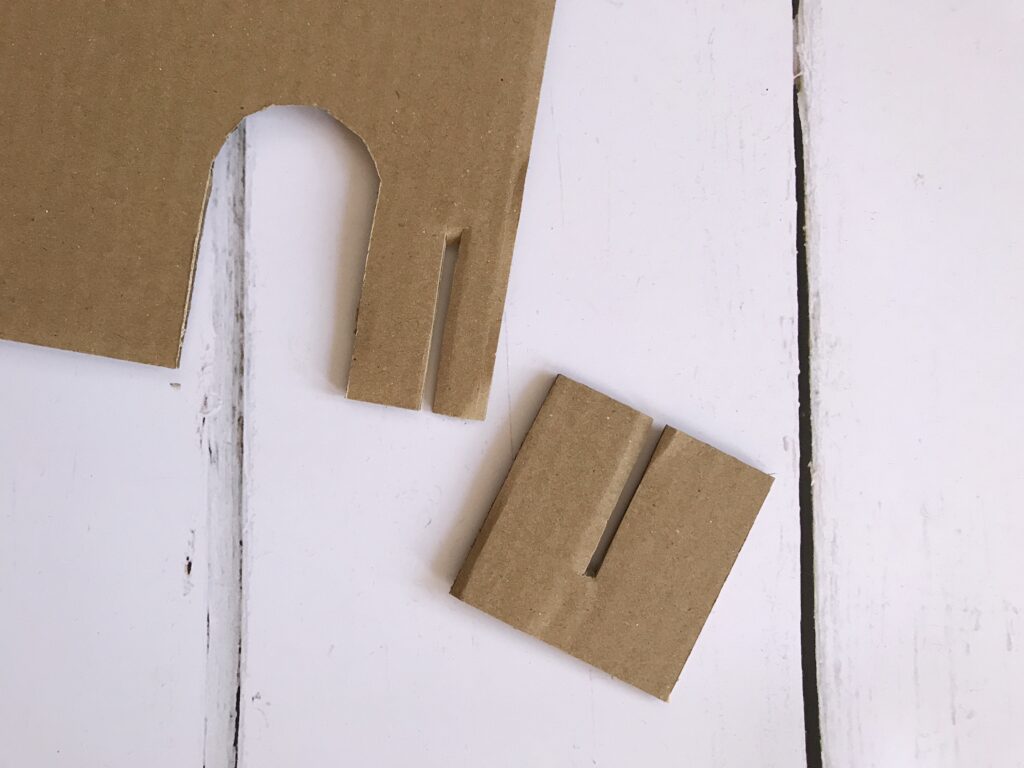
To make your houses stand up, cut a small slit approx. 3-4cm long into the bottom of the outer side of each row of houses, as shown in the photo below. Cut a square of cardboard with a matching slit down the middle for each side too. Four our size of houses, the squares were 6cm x 6cm, but you may need to make yours bigger or smaller depending on the size of your houses. Slide the squares in to the rows of houses, slotting the two slits together.
Step 6
This final step is optional, but if you e.g. want to put lights behind the houses, or want to hide anything else that might be behind them, then you’ll want to cover up the doors and windows with some translucent paper. I found tracing paper perfect for this, as it holds its shape quite well. You could also tissue paper, though it may be a bit more fiddly to work with as it tears more easily than tracing paper. Simply cut pieces of tracing or tissue paper that are a little bigger than your doors and windows, and glue them behind each opening.
And voila, your Christmas village is ready! Place it in a pride position, and put some small battery powered fairy lights behind the houses for extra Christmassy vibes.
If you make your own Christmas village, I would love to see some photos, so please feel free to tag me in on Twitter or Instagram. And check out our Christmas archives for other fun activities to do with the kids!
As always, all recipes, tutorials and other resources on this blog are free to enjoy and share, but if you feel able to and would like to make a small donation to help keep this blog running, then it would be very much appreciated. Just hit the support button. Thank you!
This post contains affiliate links. If you buy anything via this link, I will receive a small commission – at no extra cost to you – which also helps to keep tis blog running.

Pingback: 60 DIY Cardboard Ideas for Inexpensive Christmas Crafts - GODIYGO.COM
Pingback: 5 Joyful Ways To Save Money For Any Holiday Season! - PennyFruit financial coaching | Kara Smith
Pingback: 14 Cardboard Christmas Decorations To Make Sustainably - Moral Fibres
Pingback: Planning for December – The Bear & The Fox