Citrus Peel Star Garland
We love making our own Christmas decorations, and where we can we try to reuse materials that would otherwise get thrown out. There’s nothing like decorations that look pretty AND make you feel good about being eco friendly. One of my favourite decorations to make at Christmas, is garlands out of citrus peel. We eat a lot of citrus fruits at this time of the year, and those peels would otherwise just end up in the bin.

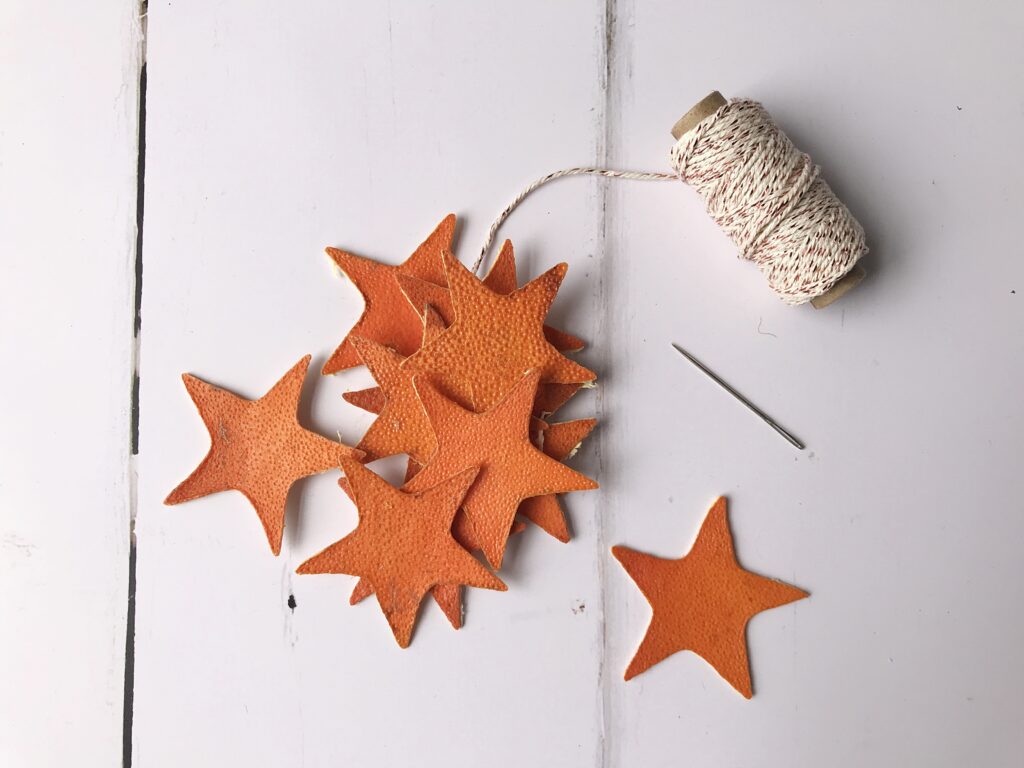
What you’ll need:
- Citrus fruits
- A small star cookie cutter (other shapes, e.g. hearts, could also work)
- A board to cut on
- Some old magazines or newspapers and some heavy books
- A large eyed needle
- Some twine
- A small knife (optional but useful)
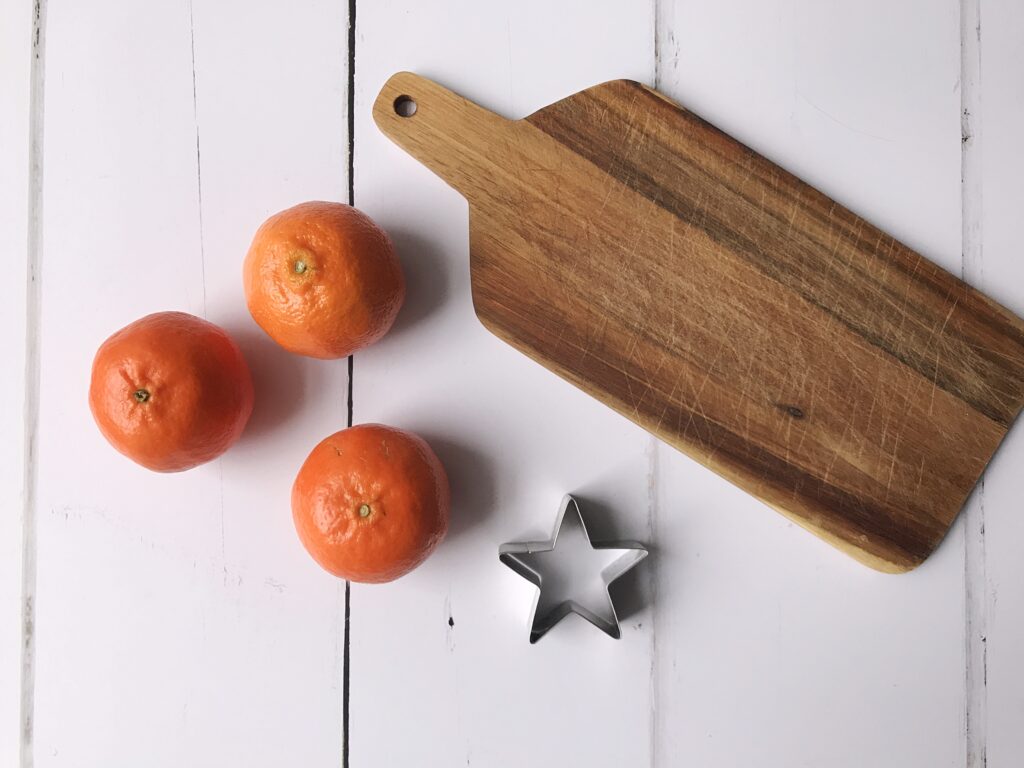
We have found that the best fruit to use for these, are large satsumas, tangerines or clementines with loose skin, e.g. those that are labeled ‘easy peel’, though you could also have a crack at using lemons or limes to add some more colour.
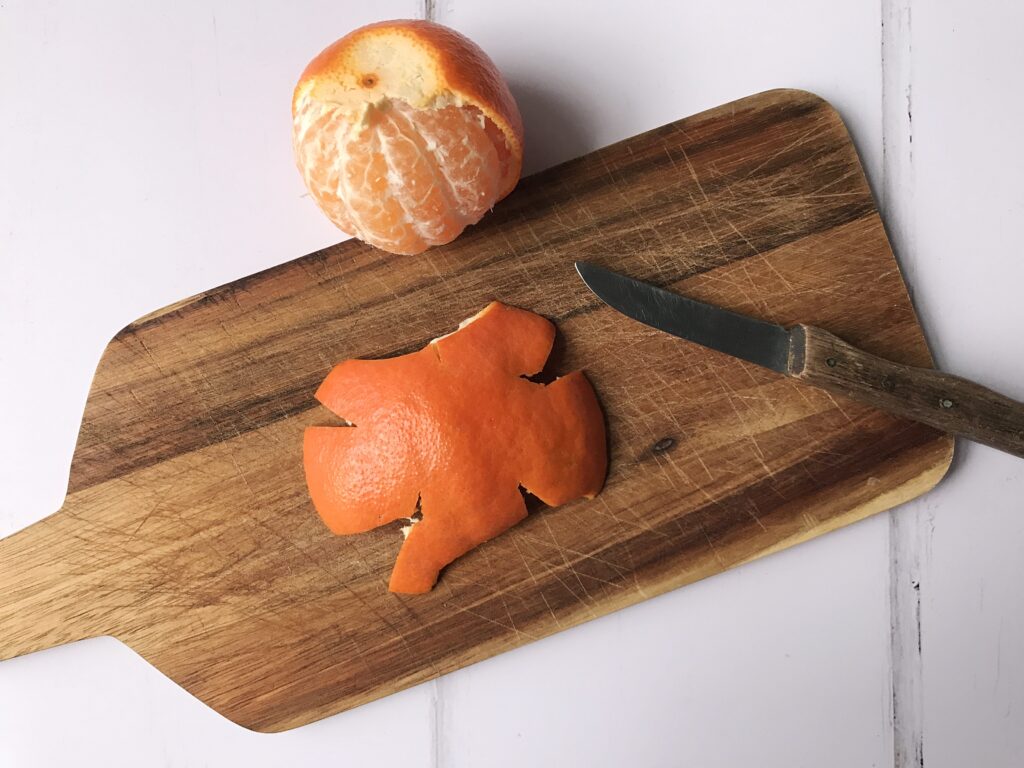
Step 1
First, you’ll need to peel your citrus fruits. This can be a little tricky to do whilst keeping the peel intact. What we found that worked, was slicing off the top and bottom and then cutting once round so that you get two halves of peel, then carefully easing your fingers in between the fruit and the peel and loosening it until the peel comes off.
Once you have the peel off, you’ll need to flatten it. This is where the peel can easily tear, so to avoid this, make a couple of small cuts around the edges as shown in the photo below. One of the reasons that the star shape works so well, is that the points of the star fit nicely in between the cuts.
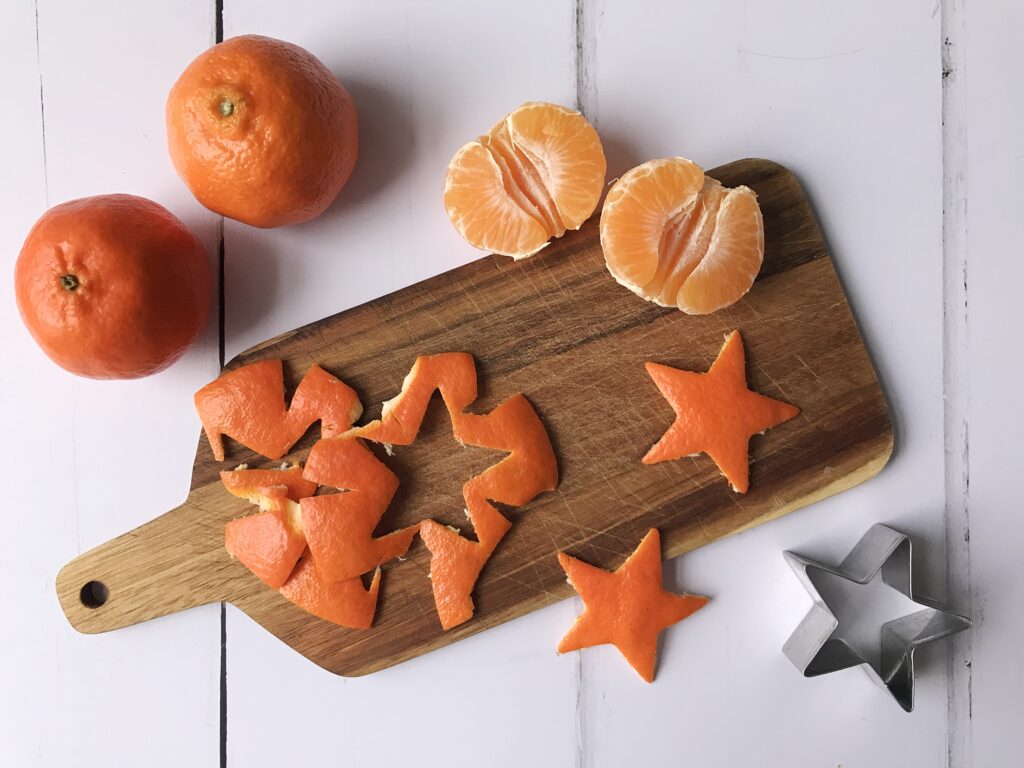
Step 2
Now comes the fun part, and this is where you can get the kids involved. Use the cookie cutter to cut out a star from the peel! You should get 1-2 stars per fruit, depending on the size and how well you get the peel off. Also, just to add, we didn’t peel all these in one go, I collected the peels over the course of a week and we cut out a couple of stars each time and left them to dry. Which takes me to step 3…
Step 3
Place your cut out stars in between the pages of an old magazine or newspaper, places some heavy books on top, and leave them to dry for a couple of days. This not only flattens the stars, but prevents them going mouldy when you hang up your final garland.
Here you can see some of our stars after they were flattened. As mentioned above, we cut out a few at a time and then added them to the magazine. Below you can see some flattened stars and some freshly cut stars next to each other, to show the difference.

Step 4
Once your stars are flattened and dried, it’s time to string them up. This is probably best done by grown ups, or perhaps older kids under supervision. We don’t want any stabbed little fingers!
The dried peel should be fairly easy to pierce with the needle. The peel an still be a little bit delicate, so be careful not to tear it when handling it.
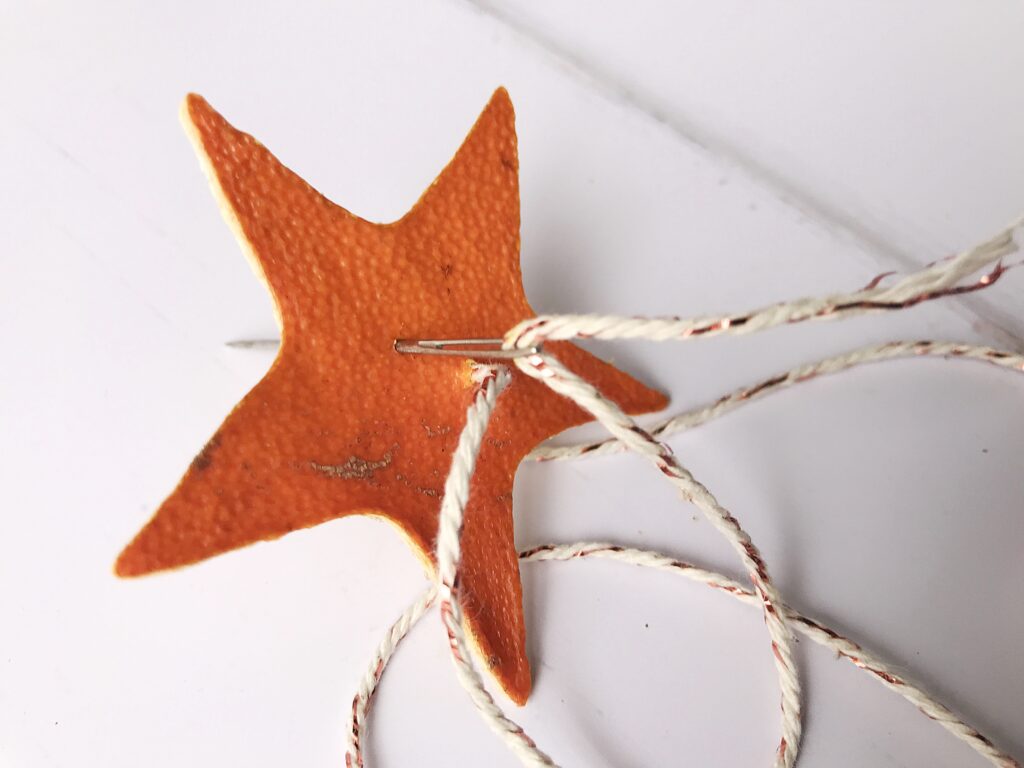
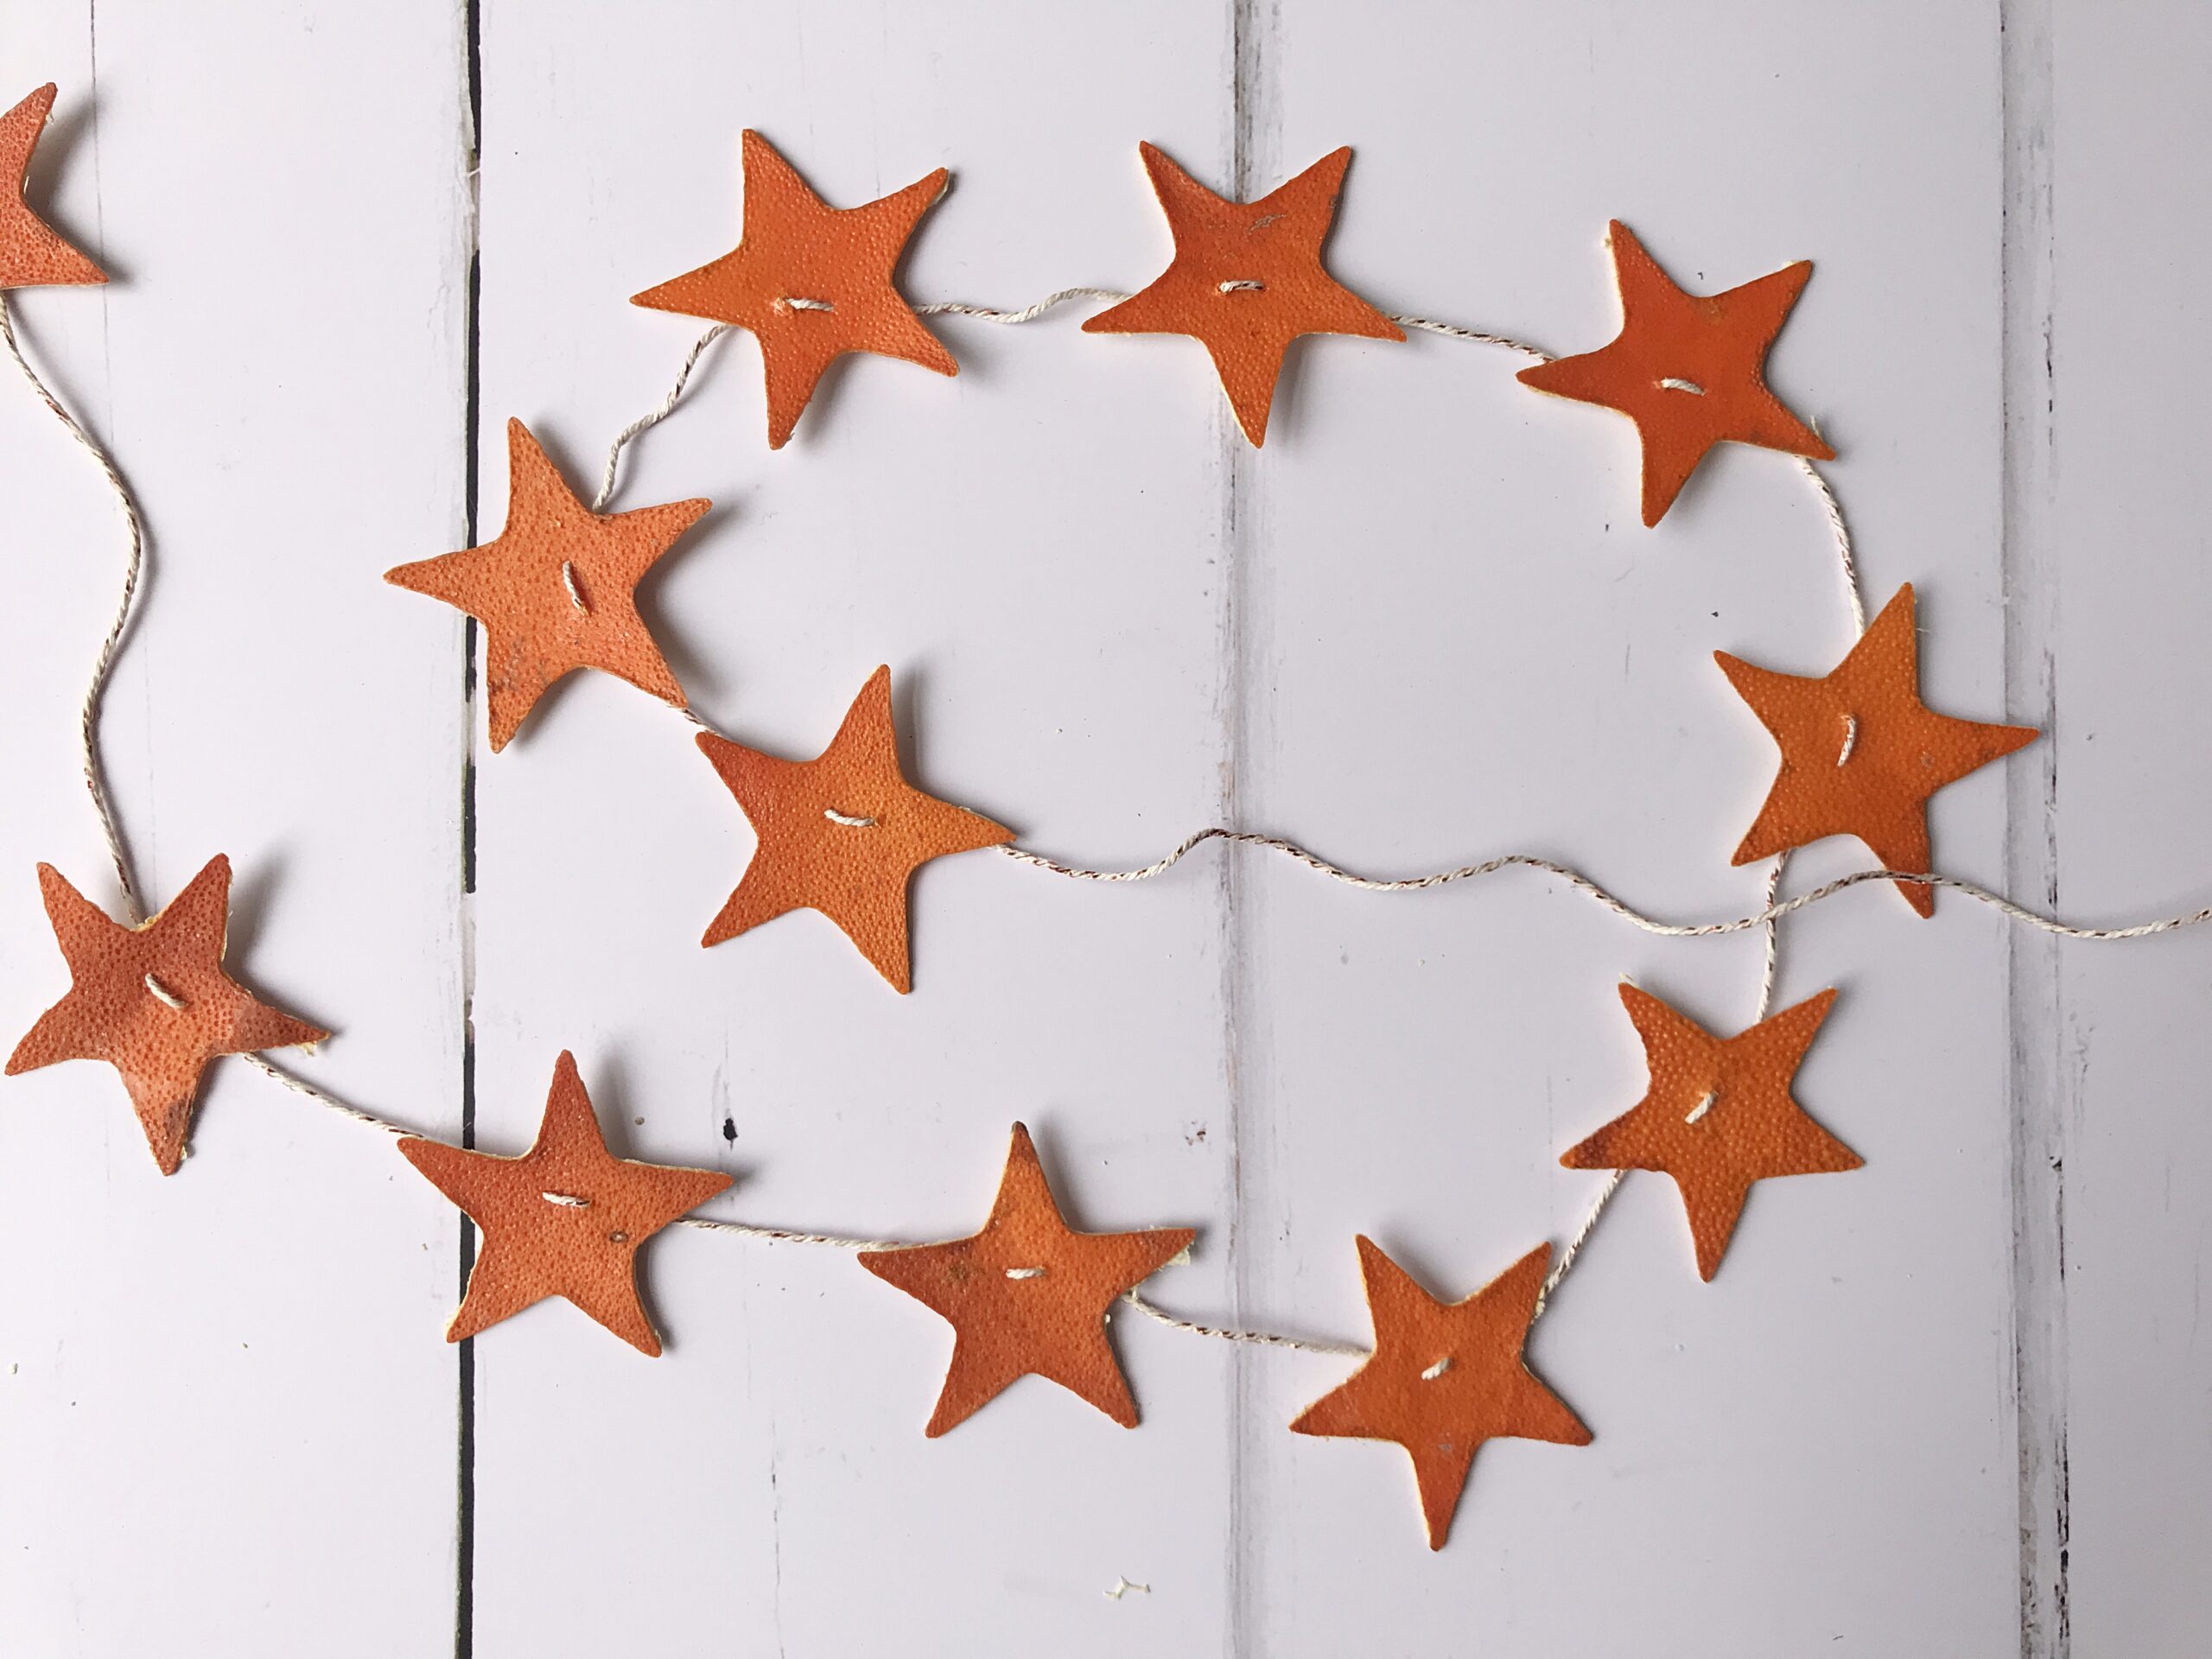
You can see in the photo below how we threaded the twine through each star twice, so that the stars lie flat when they’re strung up. You can get the kids involved again to help space out the stars too. And voila! That’s it. Your garland is done.

If you make your own garland, I would love to see some photos, so please feel free to tag me in on Twitter or Instagram. And check out our Christmas archives for other fun activities to do with the kids!
As always, all recipes, tutorials and other resources on this blog are free to enjoy and share, but if you feel able to and would like to make a small donation to help keep this blog running, then it would be very much appreciated. Just hit the support button. Thank you!