Easy DIY Dreamcatcher
Just over a year ago, my older boy and I went on a weekend retreat together, which included some craft sessions where we were challenged to create something with the things we had collected on a nature walk. He really wanted to make a dreamcatcher to decorate with his feathers and pinecones. There are plenty of online tutorials on how to weave a dreamcatcher, but they all seemed too complicated for a 5 year old, so I decided to just make some kid-friendly freestyle ones with him.
Today I’m going to show you how you can make one of these easy dreamcatchers of your own. I didn’t have any pinecones to hand, so this one just has feathers. You can use either real feathers, if you find some, or colourful feathers from a craft shop.
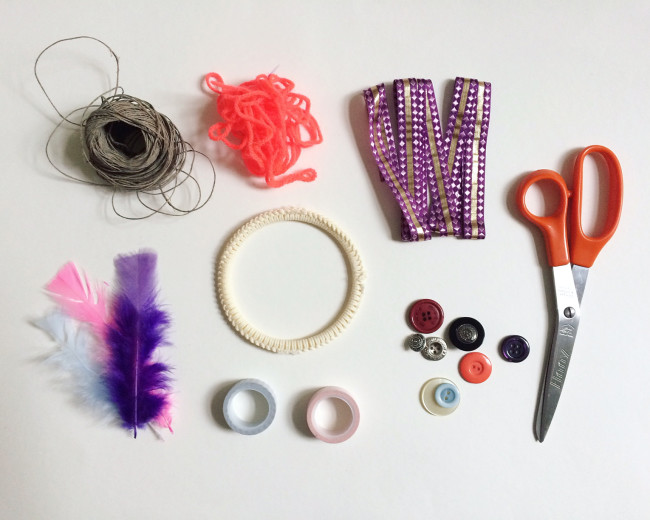
Here’s what you’ll need:
- a small ring*
- some colourful ribbon or pipe cleaners
- string and/or wool
- big, colourful or shiny buttons
- feathers
- small pine cones (optional)
- washi tape
- a pair of scissors
You can use any kind of ring, wood, wicker, plastic, metal. Craft shops sell all kinds of rings. This one is actually part of a multi-purpose hanger from Ikea, made up of 18 small rings, which my friend Harriet from little art, who was co-running the retreat, had cut up into craft supplies. It is about 10cm in diameter, and the size and textured surface made it perfect for little hands to work with.
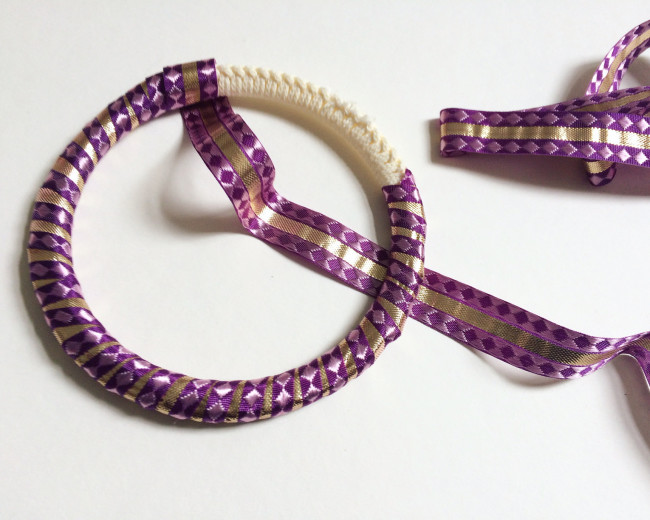
Step 1: Take some colourful ribbon, and wrap it tightly around the ring. You could also use some colourful pipe cleaners for this (I didn’t have any to hand when recreating the dreamcatcher for this tutorial), which is what my boy used at the retreat.
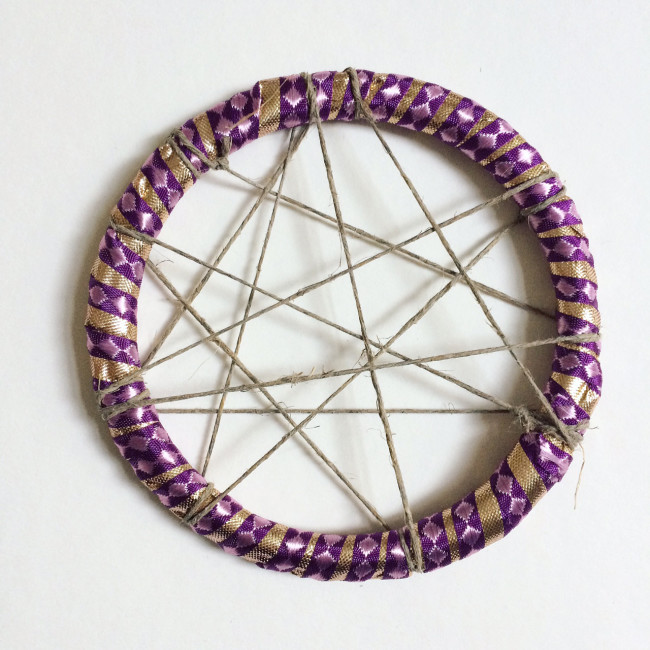
Step 2: Take a length of string or wool and tie one end of it to the ring, making a couple of knots to secure it. Then wrap it in a criss-cross fashion all over the ring, wrapping it around each point a couple of times to keep it in place. Make another couple of knots at the end to secure. Kids may need some help with the knots, to make sure it’s tight.
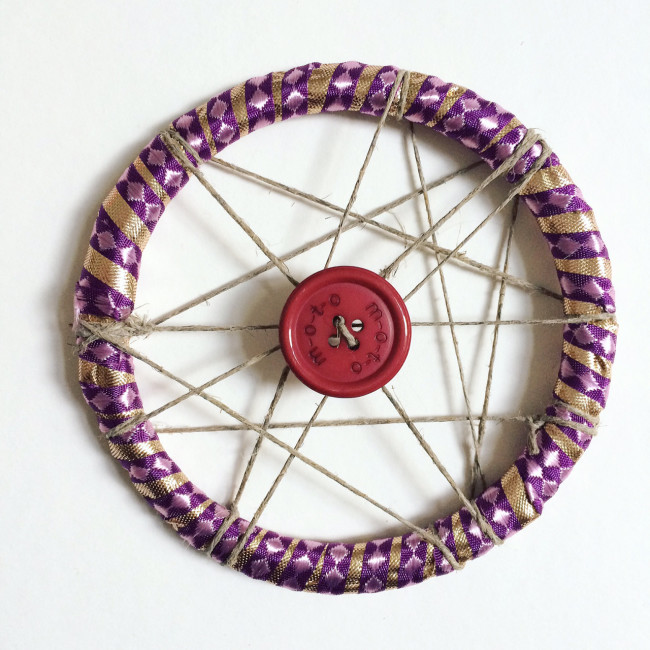
Step 3: Choose a nice big button and tie it on to the middle of your dreamcatcher, using string, wool or a piece of pipe cleaner.
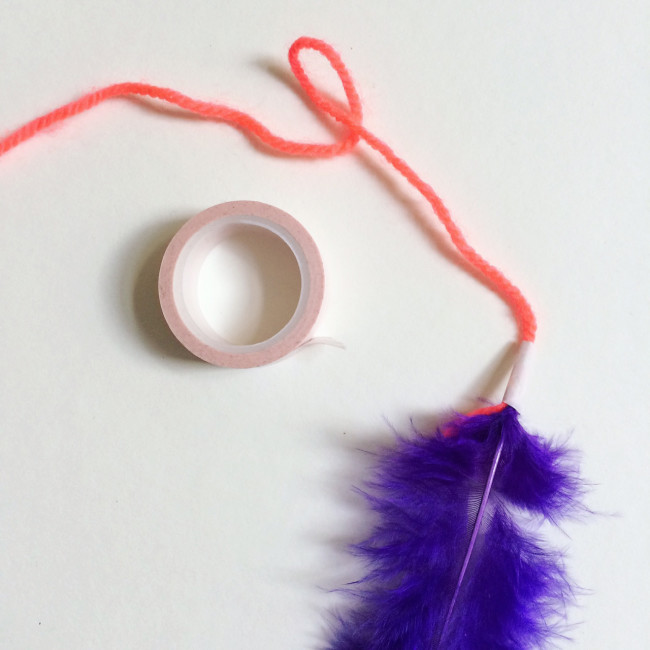
Step 4: To make the feather hangers, just wrap a piece of washi tape around the end of the feather and a piece of wool or string, making sure it’s long enough to hang down as far as you want. For the small pine cones, I just wrap the wool around the bottom of the pine cone a couple of times and tied a knot.
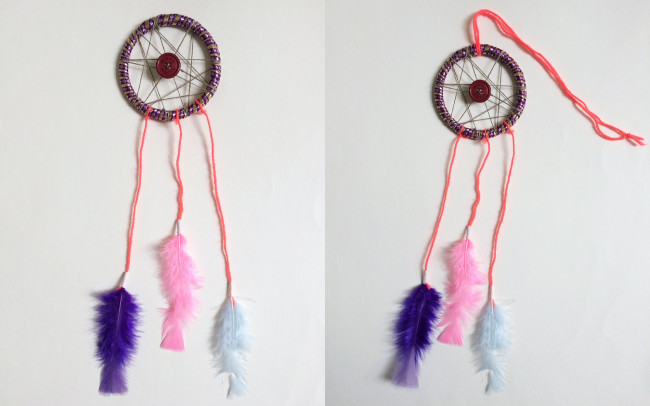
Step 5: Tie the feathers (and pine cones, if using) on to the bottom of dreamcatcher ring. Three or four are best, or it will get too crowded. You can hang them at the same or at different heights, as you like.
Step 6: Finally, tie a piece of wool or string to the top of the dreamcatcher, to hang it up.
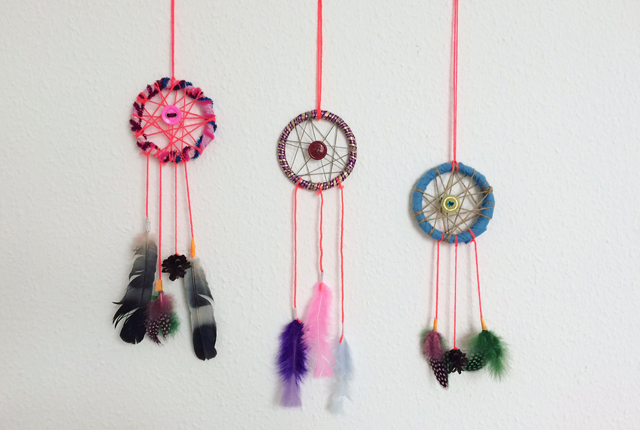
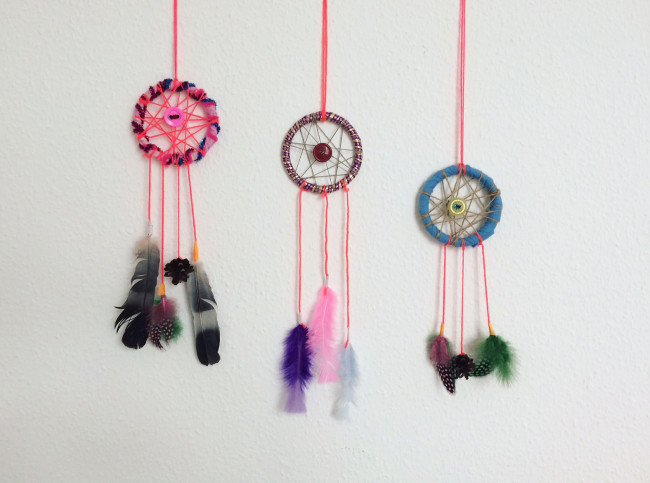
Here’s our trio of dreamcatchers: the one on the left is the one my boy made at the retreat, with pipe cleaners round the ring, real feathers and pine cones we found on our nature walk. It hangs in the boys’ bed room. The one on the right is the one I made at the retreat, which is pretty similar to the one from this tutorial, using feathers from the craft supplies at the retreat but also sneaking in one little pine cone. It hangs in our bedroom. The one in the middle is the one I made here to show you, and now hangs in the boys’ playroom.
If you make your own dreamcatcher, I would love to see photos! You can share your pics with me over on Facebook or tag me on Instagram.
Beki
Great how to and really easy to follow. Sounds like a lovely project
Sarah | What The Kids Wore
These are beautiful and a lovely craft idea for little ones
Sarah - let them be small
love these – they’re fab and so effective. Great job x
Jordanne | Thelifeofaglasgowgirl
This looks like such a fun activity. Lately I’ve been trying different craft projects with my little one so this sounds perfect! Thanks so much for Sharing and making it kid friendly.
Jordanne || Thelifeofaglasgowgirl.co.uk
Lyndsey OHalloran
They look lovely and a nice craft to do too
suzy Mccullough
What a lovely craft idea for doing with your kids. It looks lovely and I like the concept
Kerry Norris
What a lovely idea. I’ll have to have a go at making these with my daughter x
Fashion and Style Police
This is a great craft idea. Thanks for the inspiration. I am stealing this…
boho
I will try too. That looks so simple and cute. Love your page, thank’s for sharing!