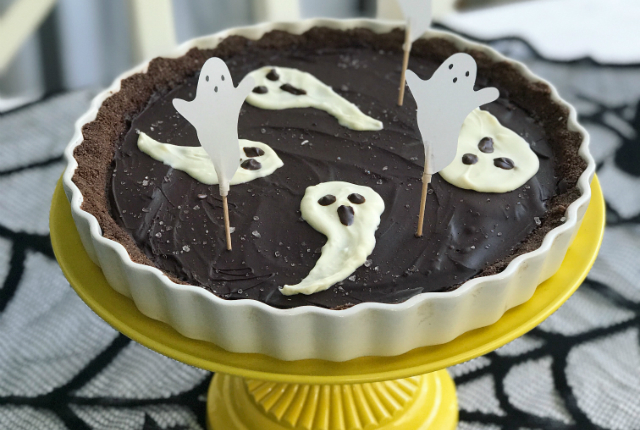
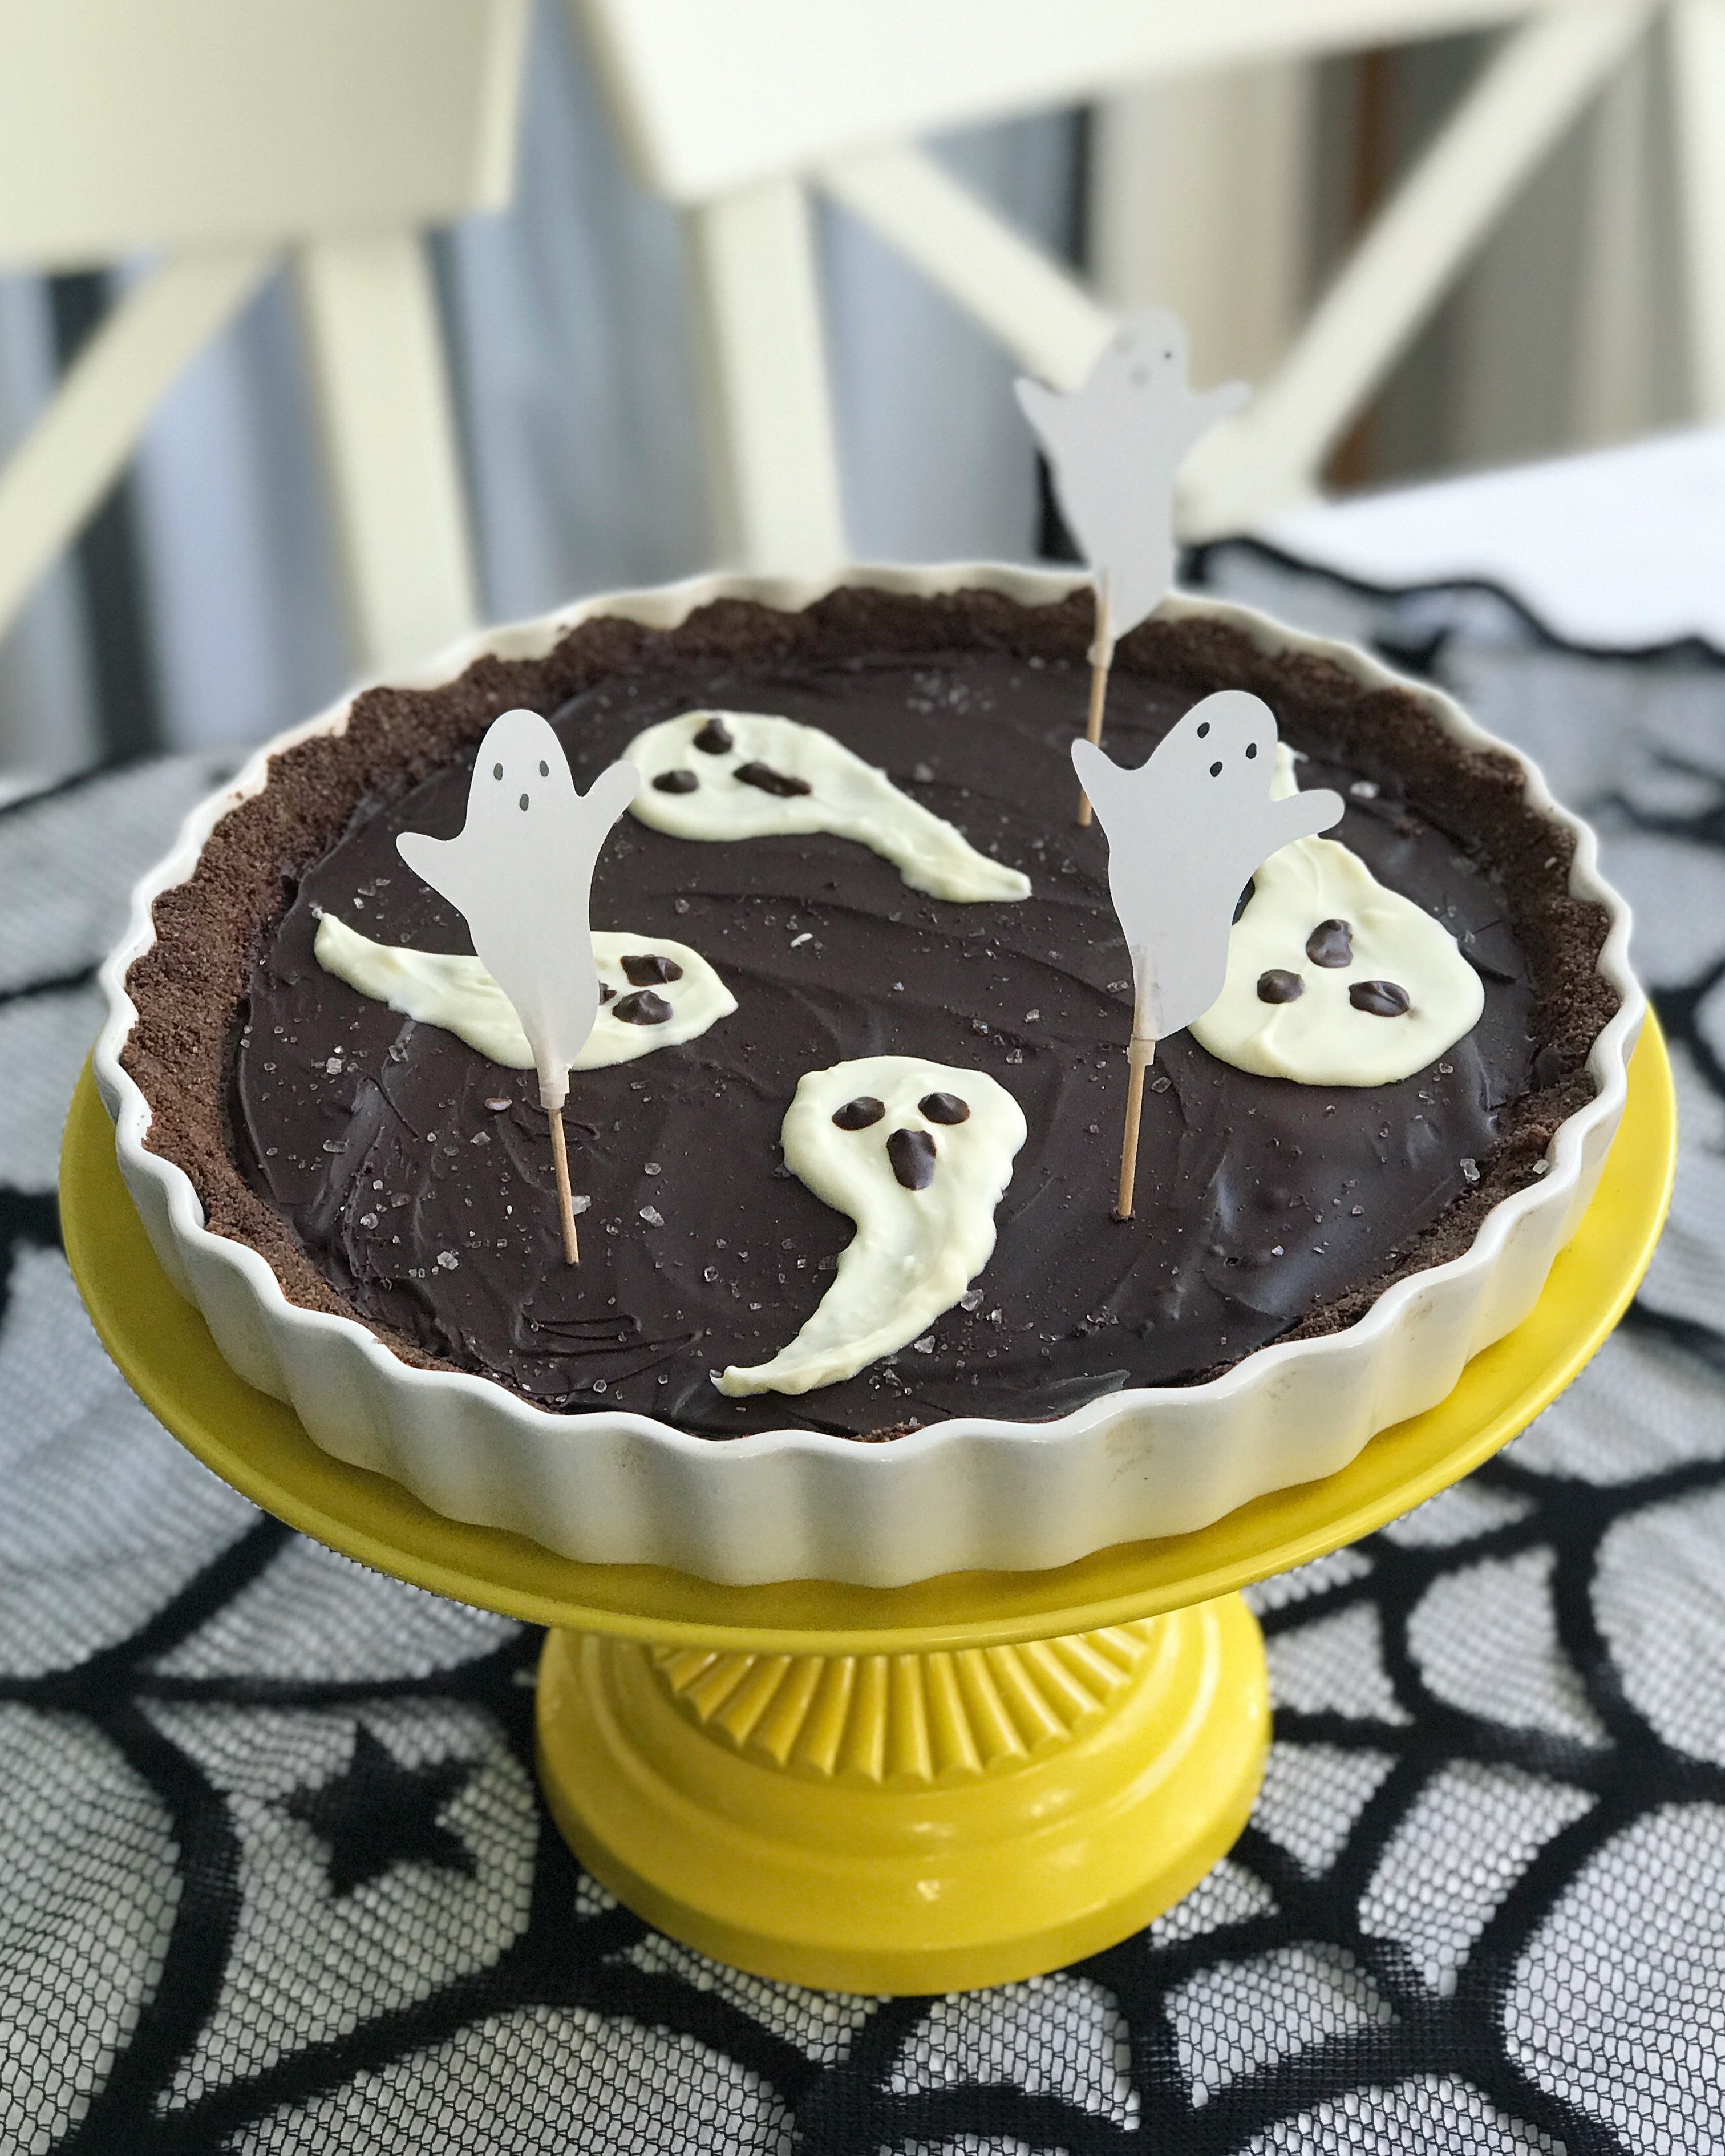
Salted Caramel Tart (GF)
So, usually I make pumpkin pie for our Hallowe’en party every year, but after seeing a great cake decor idea on the front cover of Tesco magazine last week, I decided to break with tradition and make a salted caramel tart instead. I used my own caramel recipe, rather than the Tesco one, because it’s tried and tested and I know it will work, but I did use their ghostly decor idea. This recipe involves a lot of chilling in between stages (around 4-5 hrs at least), so it’s best to start it the day before. Our party was on Sunday afternoon, so I made the base on Saturday afternoon, the filling on Saturday evening, and the topping on Sunday morning.
Ingredients
For the Base:
- 250g gluten free digestive biscuits (or regular if you don’t require gluten free)
- 2 Tbsp unsweetened cocoa powder
- 80g butter
For the Filling:
- 200ml double cream
- 80g unsalted butter
- 300g caster sugar
- 150ml water
- 1/4 tsp sea salt
For the Topping:
- 100g dark cooking chocolate
- 1/4 tsp sea salt
- 50g white cooking chocolate
Directions
For the Base:
- Put the biscuits in a sturdy freezer bag and bash them with a rolling bin until you have fine crumbs. My kids love joining in with this!
- Mix the biscuit crumbs in a bowl with the cocoa powder.
- Melt the butter and mix with the crumbs until well combined.
- Press the mixture in to a pie dish (approx. 24cm in diameter), making sure to press it up the sides.
- Chill in the fridge until set (about 1-2 hrs).
For the Filling:
- Heat the butter and cream over a low heat until the butter has melted and set aside.
- Heat the sugar and water in a saucepan over a low heat until the sugar has completely dissolved and you have a sirup.
- Turn up the heat slightly until the sirup begins to bubble and, gently stirring, keep cooking until it begins to caramelise and turns golden brown. This can take around 10 minutes. This step is a bit tricky – if you turn the heat up too high, there is a danger the sirup will burn, but if the heat is too low then the water content will just evaporate before the sirup can caramelise and you will be left with a saucepan full of slushy sugar. But don’t let this put you off! Just watch your saucepan closely. Once the sirup starts to change colour, the caramelisation happens pretty fast.
- Take the saucepan with the caramalised sirup off the heat, and slowly add the cram and butter mixture bit by bit. Careful, as it will bubble and spit like crazy! So don’t add too much at once. Keep stirring until you have a smooth caramel mixture.
- Add in the salt and stir again until the salt has fully dissolved.
- Pour the caramel in to the tart case and set aside to cool. Once it has cooled down a little, chill in the fridge again, for at least 2 hours.
For the Topping:
- Break or chop up the dark chocolate and melt it in a heatproof bowl set over a saucepan of simmering water. Make sure the water doesn’t boil and doesn’t touch your saucepan!
- Set a tablespoon of the melted chocolate aside, and pour the rest on top of the tart. Use the back of a tablespoon to spread it to the edges and to smooth it out.
- Sprinkle the salt on top, then set aside to let the chocolate cool.
- While the dark chocolate is cooling, melt the white chocolate in a clean bowl in the same way.
- Leave to cool a little, then fill it in to a piping bag (or a freezer bag with the tip of a corner cut off) and pipe four to five elongated tear shapes on to the top of the tart. I used the back of a teaspoon to smooth them out.
- Use the reserved melted dark chocolate to add eyes and mouths – I dabbed them on with the end of a paper straw.
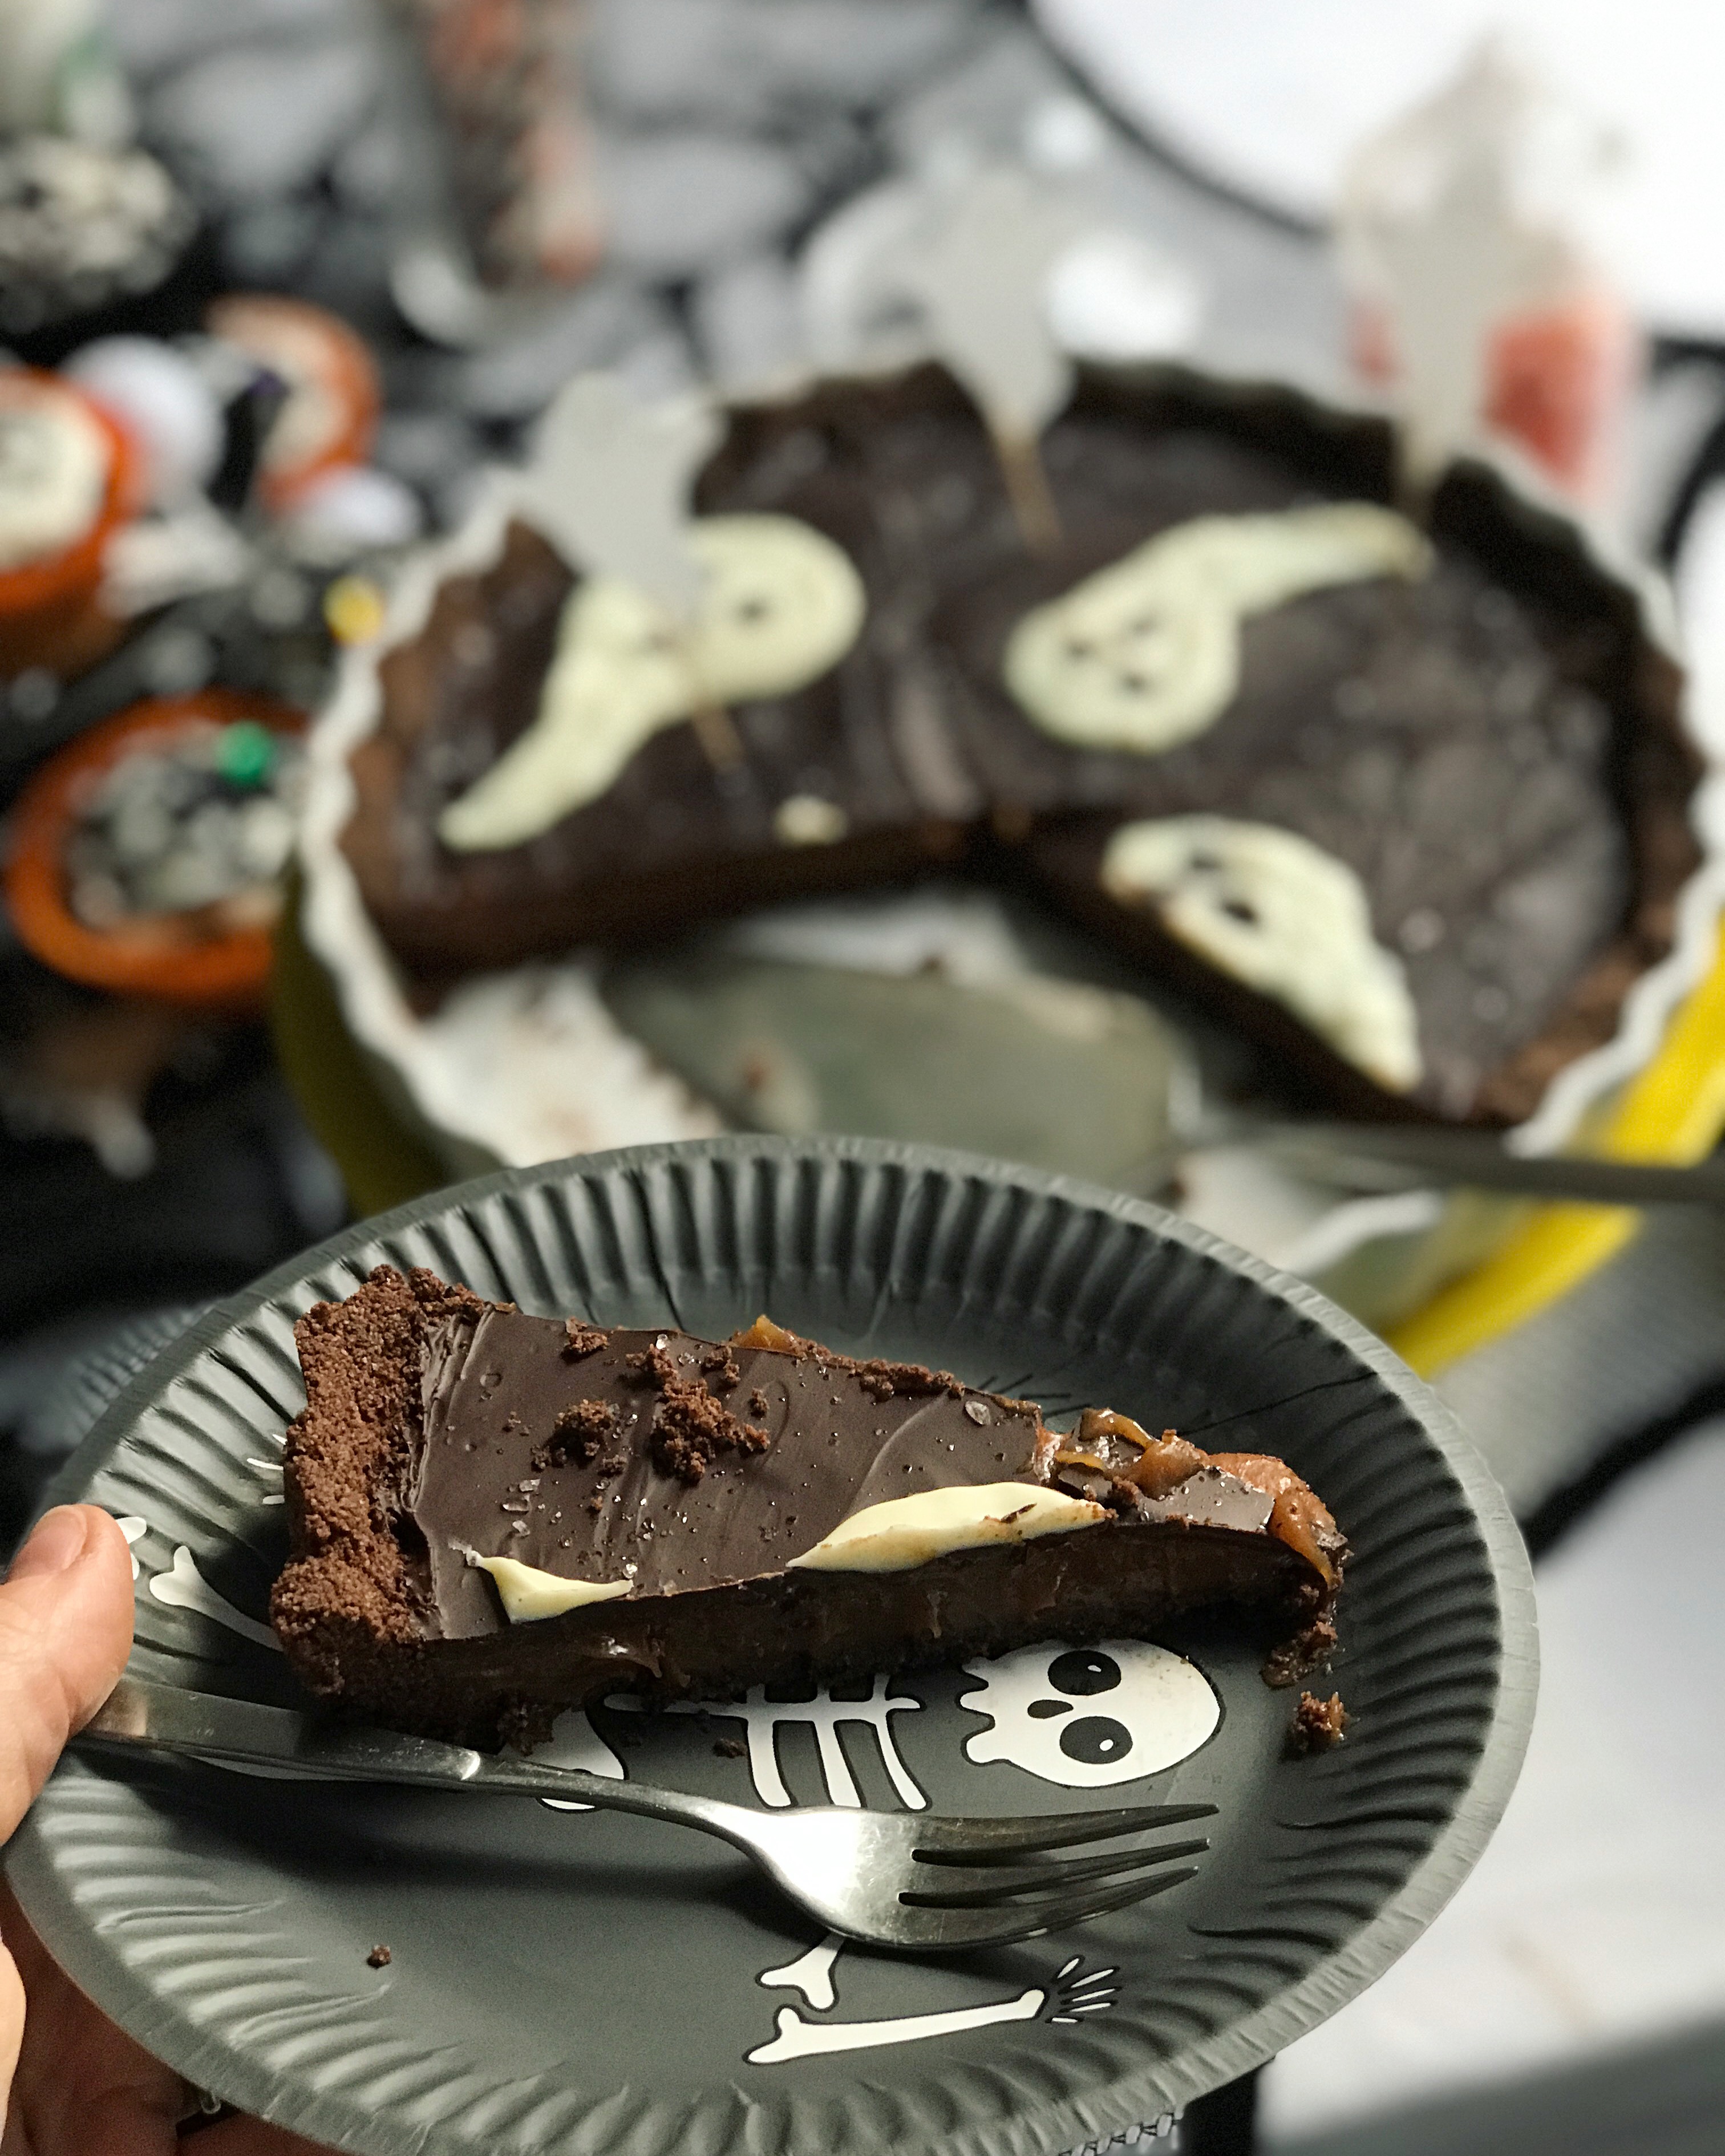
- Put the finished tart back in the fridge for at least 1 hour. Remove at least half an hour before you intend to serve it – the longer it’s put of the fridge, the softer the caramel will get.
Word of warning: despite the salt, this tart is super sweet! It’s really yummy, and went down a treat, but everyone agreed you had to have a cup of tea or coffee to go with it as it was to sweet just on its own. The little toothpick ghosts are cupcake toppers by Meri Meri, which I bought as part of a set from John Lewis for last year’s Hallowe’en party, but you could easily make your own out of some white paper.
- For the Base:
- 250g gluten free digestive biscuits (or regular if you don’t require gluten free)
- 2 Tbsp unsweetened cocoa powder
- 80g butter
- For the Filling:
- 200ml double cream
- 80g unsalted butter
- 300g caster sugar
- 150ml water
- 1/4 tsp sea salt
- For the Topping:
- 100g dark cooking chocolate
- 1/4 tsp sea salt
- 50g white cooking chocolate
- For the Base:
- Put the biscuits in a sturdy freezer bag and bash them with a rolling bin until you have fine crumbs. My kids love joining in with this!
- Mix the biscuit crumbs in a bowl with the cocoa powder.
- Melt the butter and mix with the crumbs until well combined.
- Press the mixture in to a pie dish (approx. 24cm in diameter), making sure to press it up the sides.
- Chill in the fridge until set (about 1-2 hrs).
- For the Filling:
- Heat the butter and cream over a low heat until the butter has melted and set aside.
- Heat the sugar and water in a saucepan over a low heat until the sugar has completely dissolved and you have a sirup.
- Turn up the heat slightly until the sirup begins to bubble and, gently stirring, keep cooking until it begins to caramelise and turns golden brown. This can take around 10 minutes. This step is a bit tricky – if you turn the heat up too high, there is a danger the sirup will burn, but if the heat is too low then the water content will just evaporate before the sirup can caramelise and you will be left with a saucepan full of slushy sugar. But don’t let this put you off! Just watch your saucepan closely. Once the sirup starts to change colour, the caramelisation happens pretty fast.
- Take the saucepan with the caramalised sirup off the heat, and slowly add the cram and butter mixture bit by bit. Careful, as it will bubble and spit like crazy! So don’t add too much at once. Keep stirring until you have a smooth caramel mixture.
- Add in the salt and stir again until the salt has fully dissolved.
- Pour the caramel in to the tart case and set aside to cool. Once it has cooled down a little, chill in the fridge again, for at least 2 hours.
- For the Topping:
- Break or chop up the dark chocolate and melt it in a heatproof bowl set over a saucepan of simmering water. Make sure the water doesn’t boil and doesn’t touch your saucepan!
- Set a tablespoon of the melted chocolate aside, and pour the rest on top of the tart. Use the back of a tablespoon to spread it to the edges and to smooth it out.
- Sprinkle the salt on top, then set aside to let the chocolate cool.
- While the dark chocolate is cooling, melt the white chocolate in a clean bowl in the same way.
- Leave to cool a little, then fill it in to a piping bag (or a freezer bag with the tip of a corner cut off) and pipe four to five elongated tear shapes on to the top of the tart. I used the back of a teaspoon to smooth them out.
- Use the reserved melted dark chocolate to add eyes and mouths – I dabbed them on with the end of a paper straw.
- Put the finished tart back in the fridge for at least 1 hour. Remove at least half an hour before you intend to serve it – the longer it’s put of the fridge, the softer the caramel will get.
Sabina Green
This looks very naughty but nice. I would love to try out this recipe, the little ghosts on top look great.
Sonia Cave
This really looks the part, and I bet it tastes good too. I am not a salt person, so it took me a whole long time to get into the salted sweet things, but they actually work well and taste good!
Laura: Adventures with J
Oh I saw this too! It does look super yummy. I haven’t found a way to make vegan caramel yet though…must try harder!
Anosa
I think this is such a great alternative especially for those who are not into pumpkin spiced anything.
Michelle Kellogg
That looks absolutely delicious! I love the ghost decor as well. Very Halloween :)
Talya
Oh my word this looks divine could you send some across the internet to me please??!
Sonia
This looks absolutely delicious! I love salted caramel anything especially when mixed with chocolate! Yummy!
Lucy Mackcracken
I spotted this recently in the Tesco magazine too, I love the spooky design for a Halloween party
Louise
Ooh, this looks so nice! I’ve never tried salted caramel anything before, but clearly I should do!
Louise x
Jen
This looks delicious! I love salted caramel. Perfect for Halloween!