
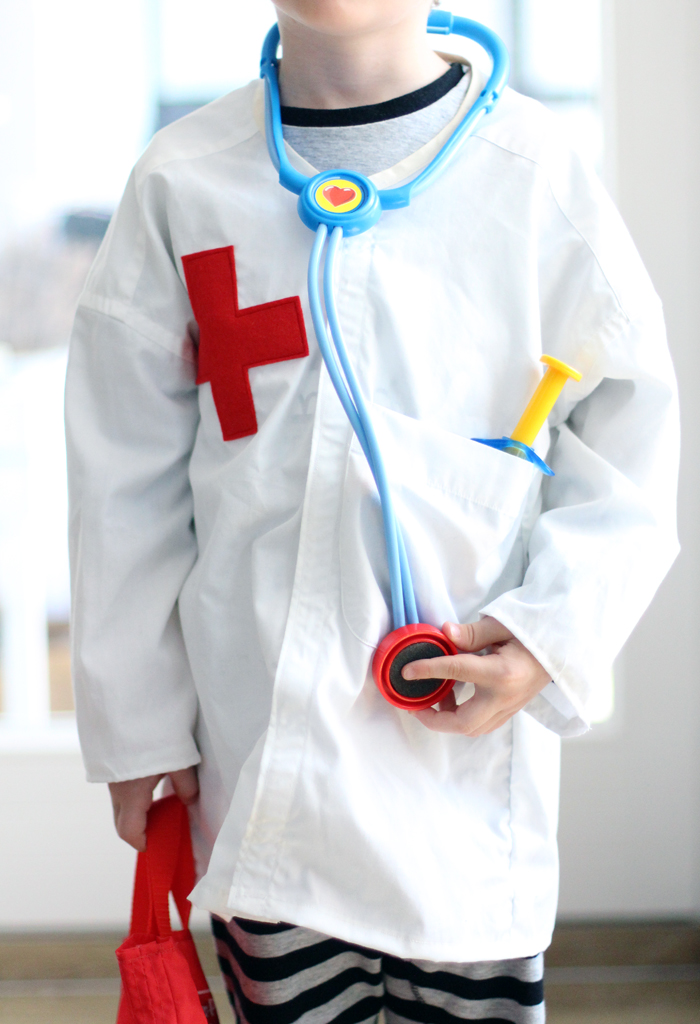
Up-cycling daddy’s old shirt in to a doctor’s coat for dressing up
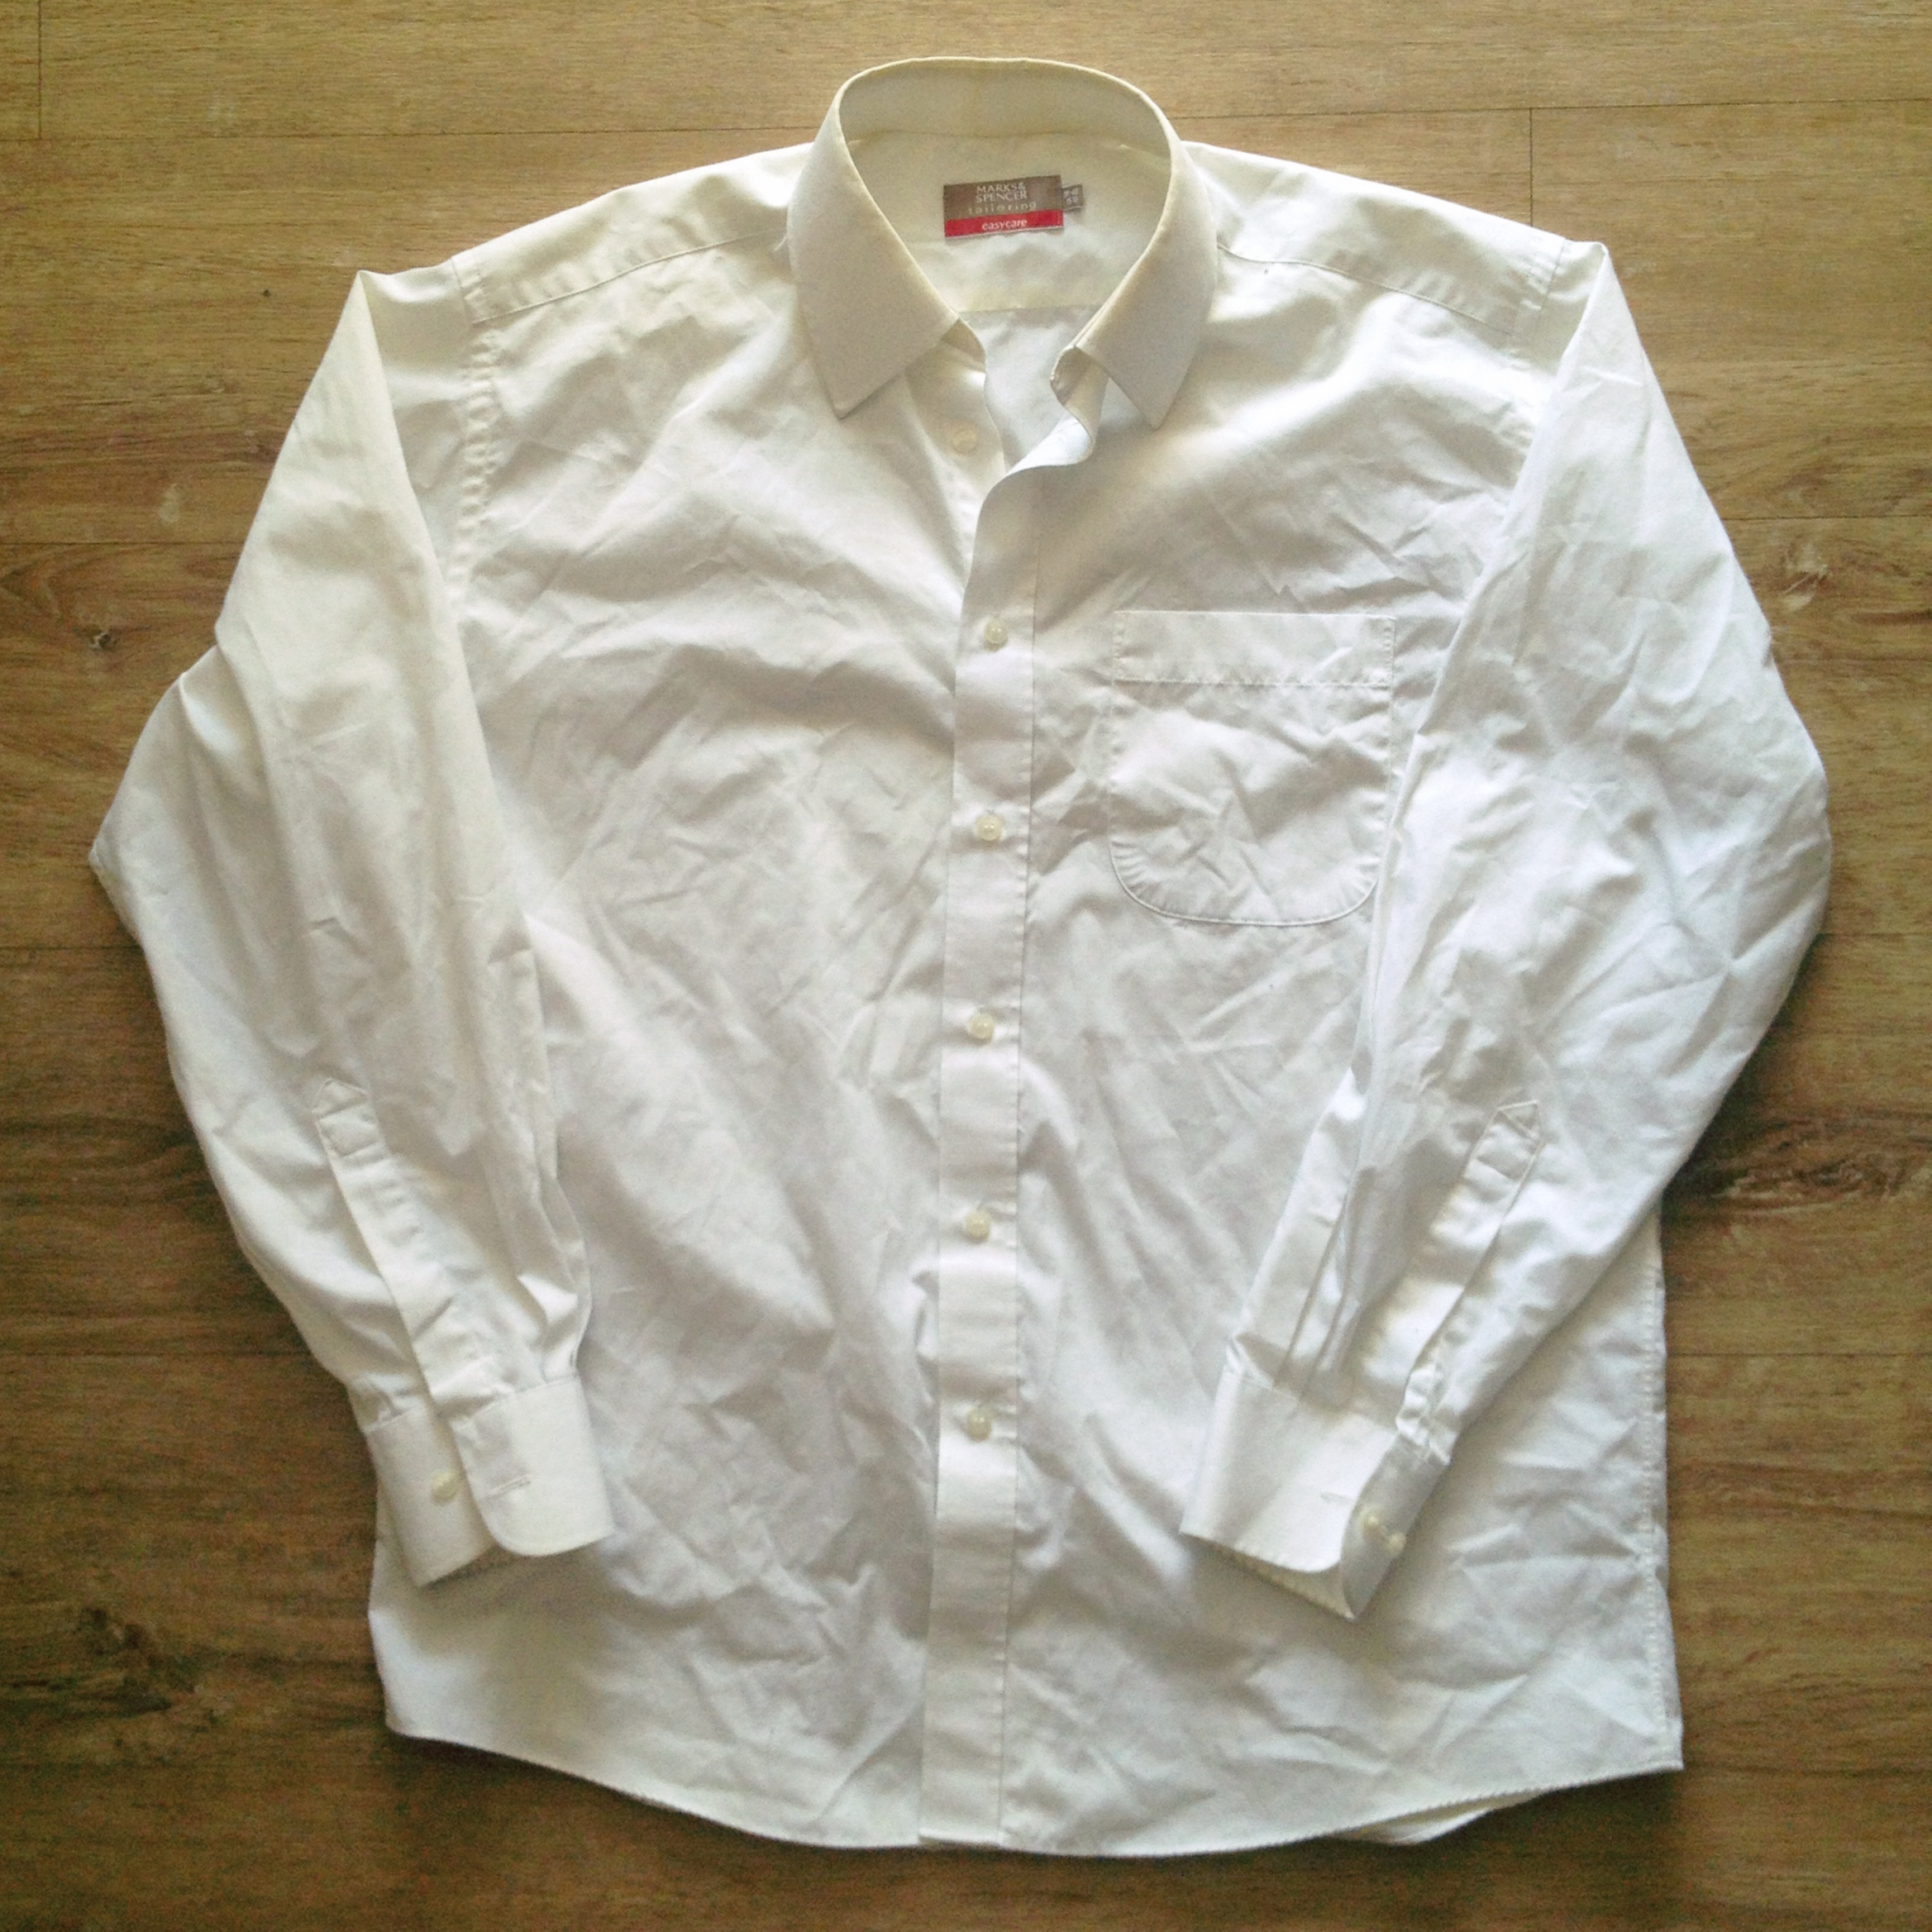
We’ve been doing a bit of Spring cleaning and decluttering, including purging our wardrobes. In the course of this, the husband tossed out an old shirt, and I thought it would be perfect for up-cycling in to a doctor’s coat for The Boy. Like most kids, he loves dressing up and his little doctor’s bag usually comes in to action at least once a week at the moment. Time for the perfect outfit to go with it.
Here’s what I used:
- one old white shirt
- scissors
- pins
- sewing machine
- white and red cotton thread
- white bias binding
- white sew on Velcro
- red felt
What I loved about this project, is that it cost me nothing but time (about 2 hours in total), as I had all the various scraps needed – thread, bias binding, Velcro, felt – in my sewing box, left over from other projects. But even if you had to go out and buy a few bits and pieces, it will probably still work out cheaper than buying a ready made dressing up costume. Or maybe you have a friend who can share the necessary bits and pieces with you.

Step 1: Get your kid to try on the shirt, then mark how long you want the sleeves and the length of the coat to be, adding a few centimetres for hemming.
Step 2: Cut off the excess sleeves and bottom of the shirt, along with the collar.
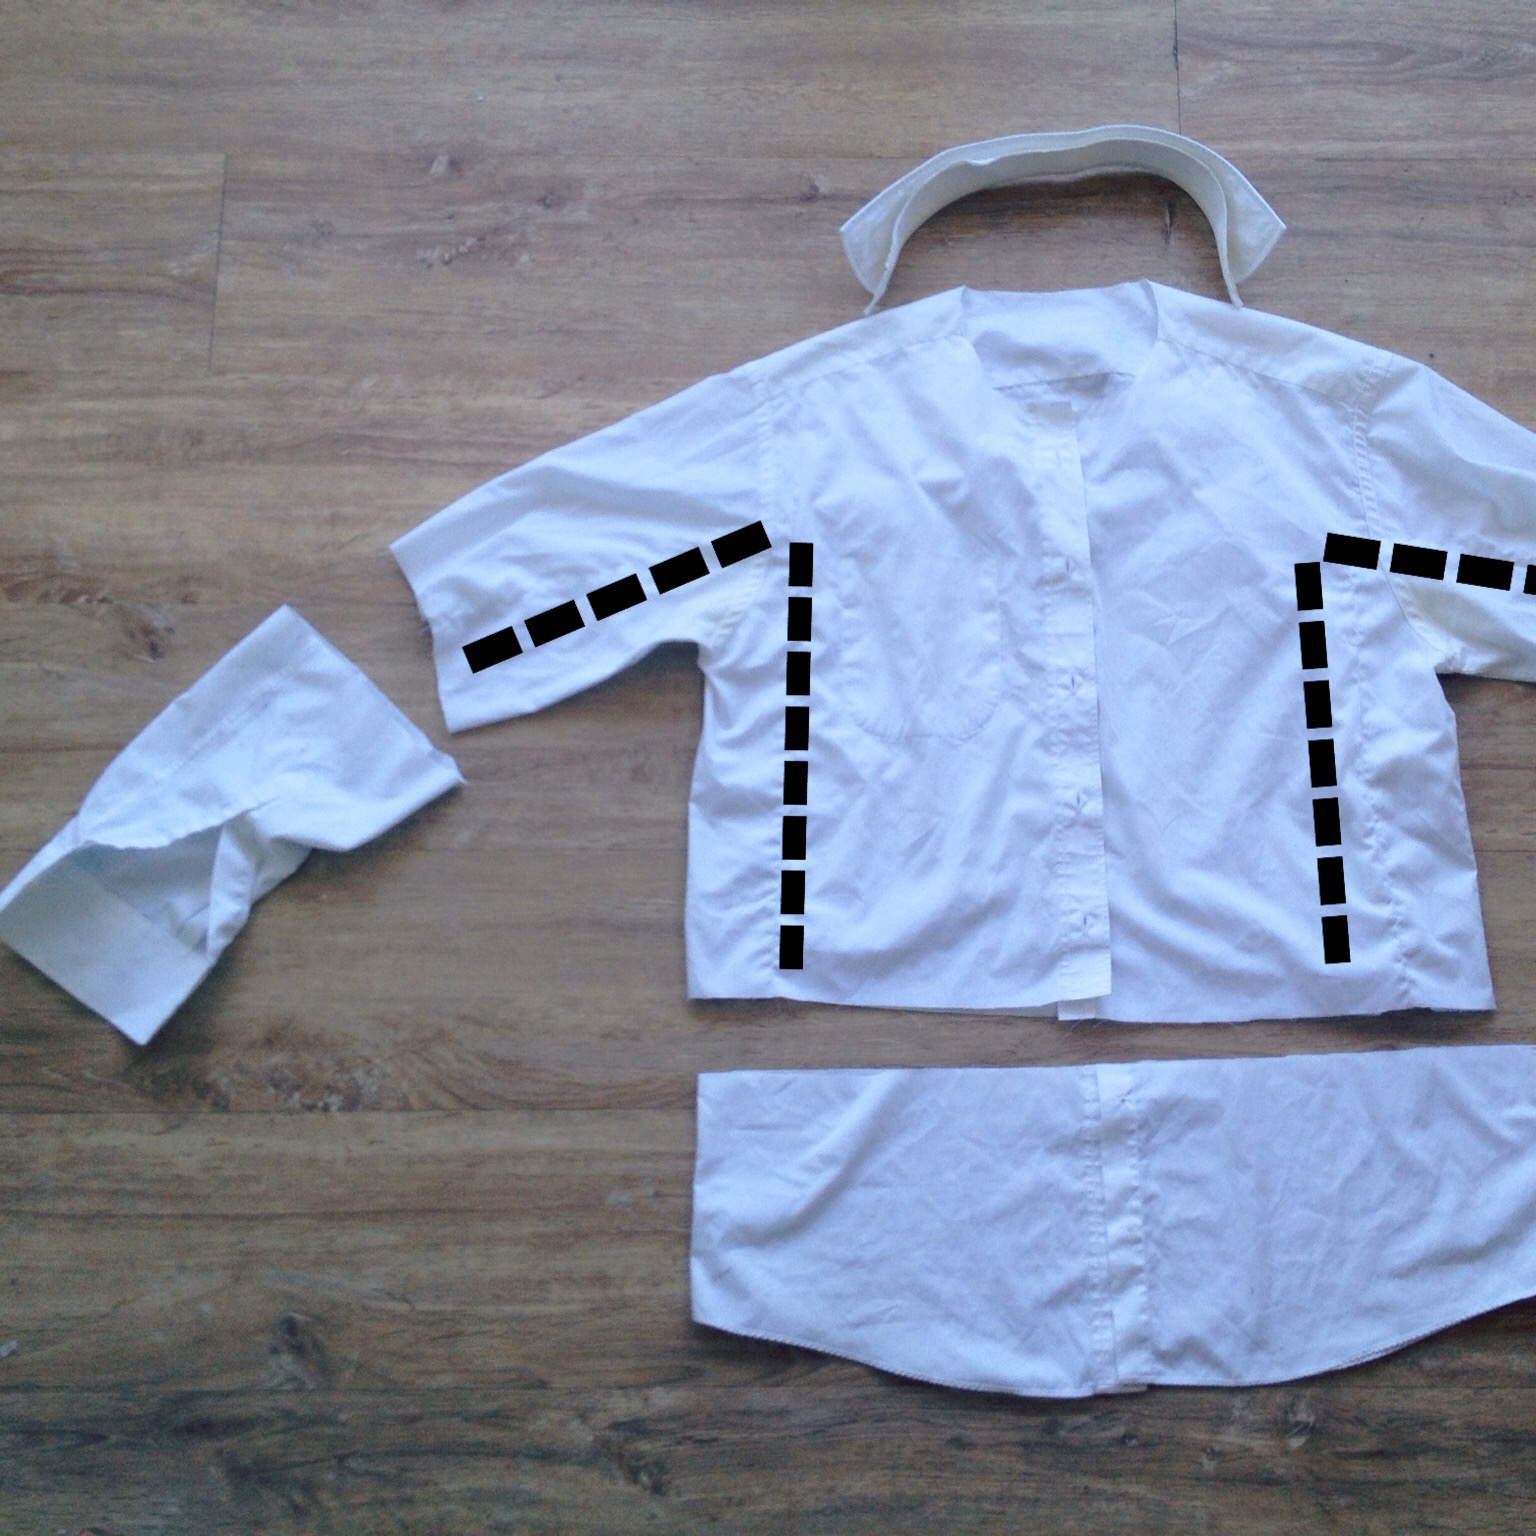
Step 3: Turn the shirt inside out, get your kid to try it on again, and pin along the sleeves and the sides to make it small enough to fit. Then sew along the lines you’ve pinned (as indicated by the dotted line in the photo above). Don’t worry if it’s not 100% symmetrical on both sides, it’s just for dressing up after all. I eyeballed it a bit. As long as both sides are roughly the same, it will be fine. Once you’ve sewn along both sides, cut off the excess material on the outside edge, leaving about 2cm material next to the line you’ve sew along (i.e. don’t cut too close to the new side seam). I hope you understand what I mean, if not, just give me a shout.
Step 4: Hem the ends of the sleeves and the bottom of the coat so that the material doesn’t fray, by turning the edge inwards twice then sewing along the edge.
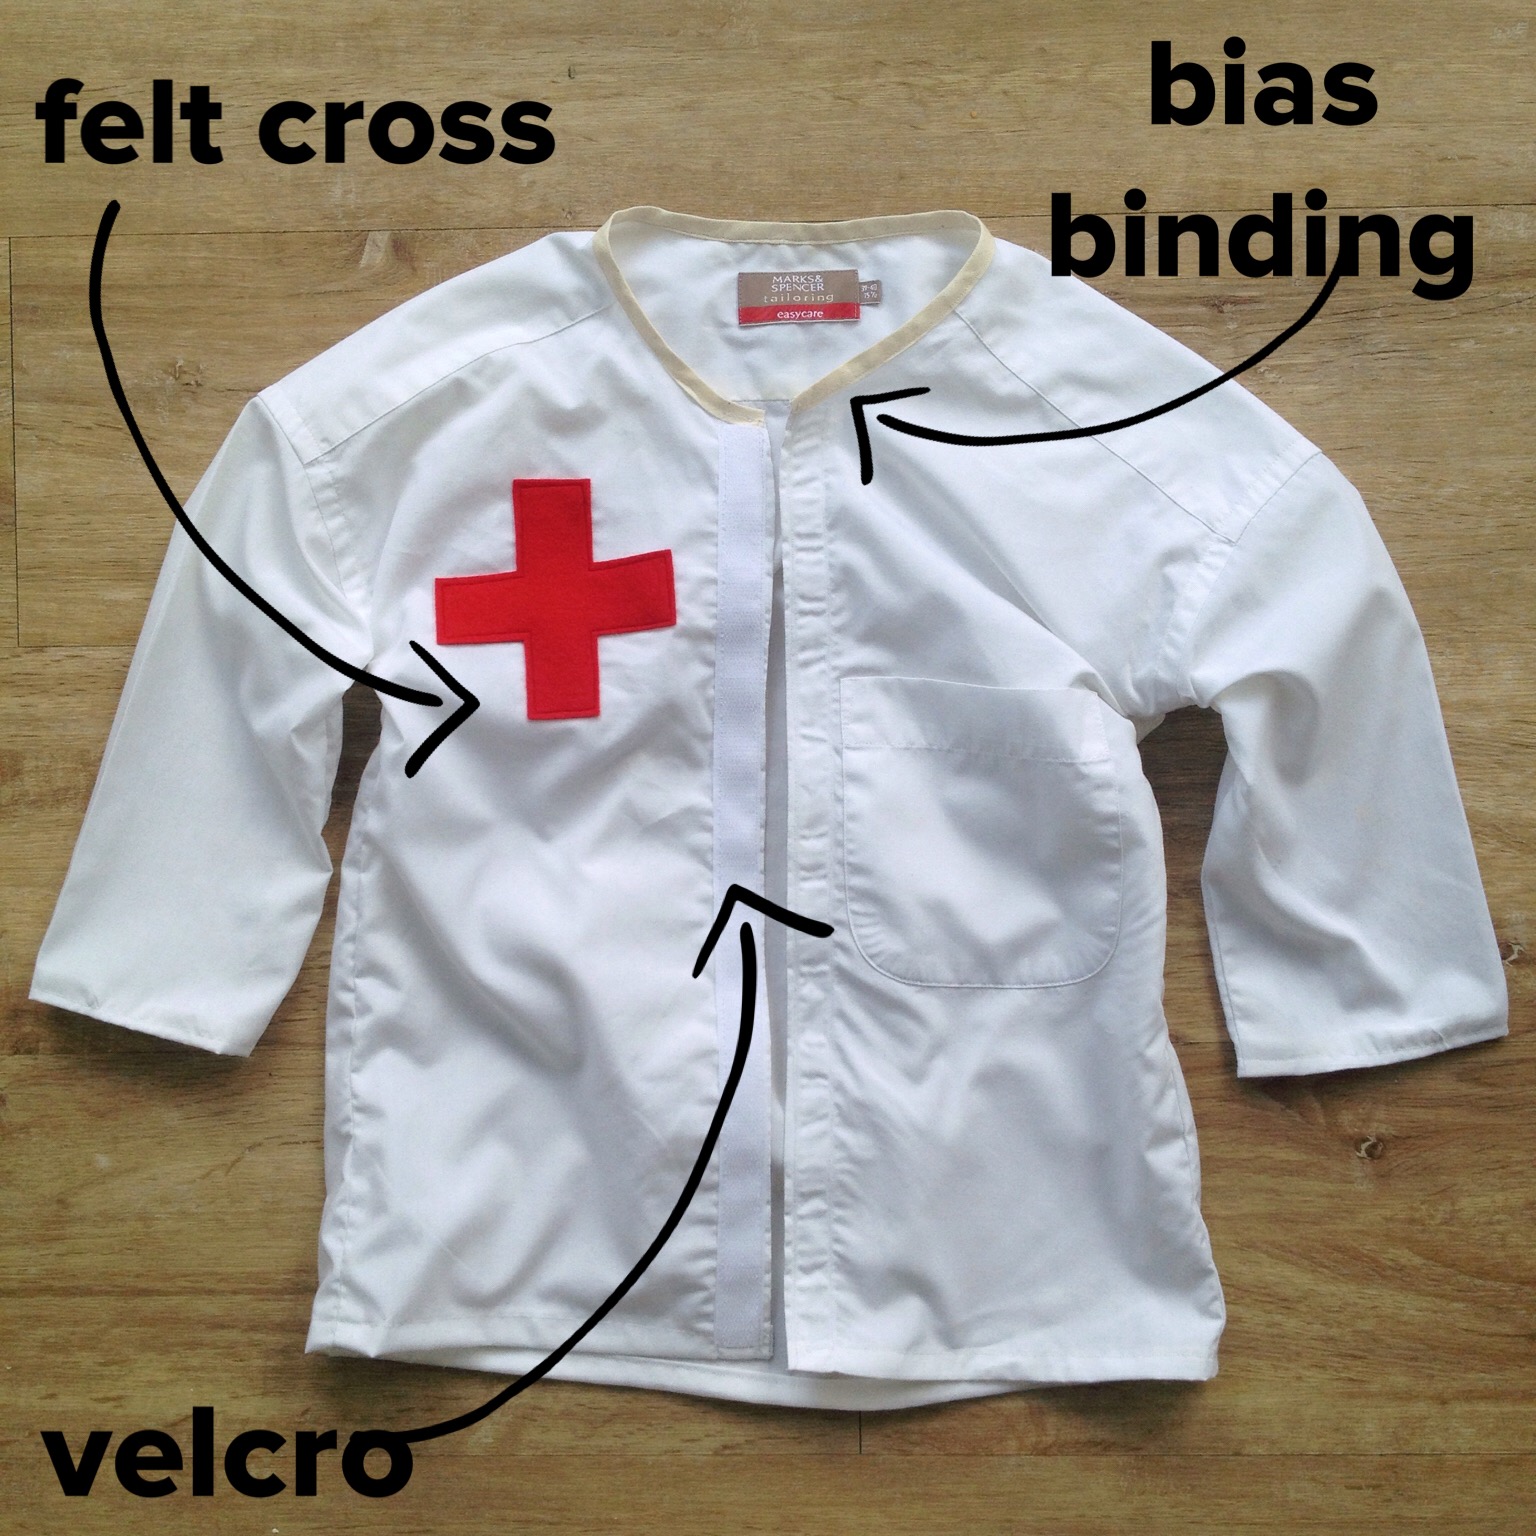
Step 5: Sew some bias binding along the edge where the collar was, to stop it fraying. If you don’t have bias binding, you could also just leave the collar in place instead of cutting it off, but I felt it looked more office worker than doctor and this shirt’s collar was also quite worn and not very nice. Hemming the collar edge didn’t really work, because of the way it curves, which is why I opted for bias binding instead.
Step 6: (optional) The Boy is old enough to do up shirt buttons, but it takes him a while and I thought for dressing up a Velcro fastening would be more practical. So I cut off the buttons and button holes, hemmed the edges, and sewed a line of Velcro in to place. If you don’t have Velcro, you can leave the buttons in place.
Step 7: (optional) To give the coat that extra little doctor’s touch, I sewed a big red felt cross on to one side of the chest. The other side has what used to be the front pocket of the shirt, and will be perfect for popping in the thermometer or whatever else a doctor needs during role play :)
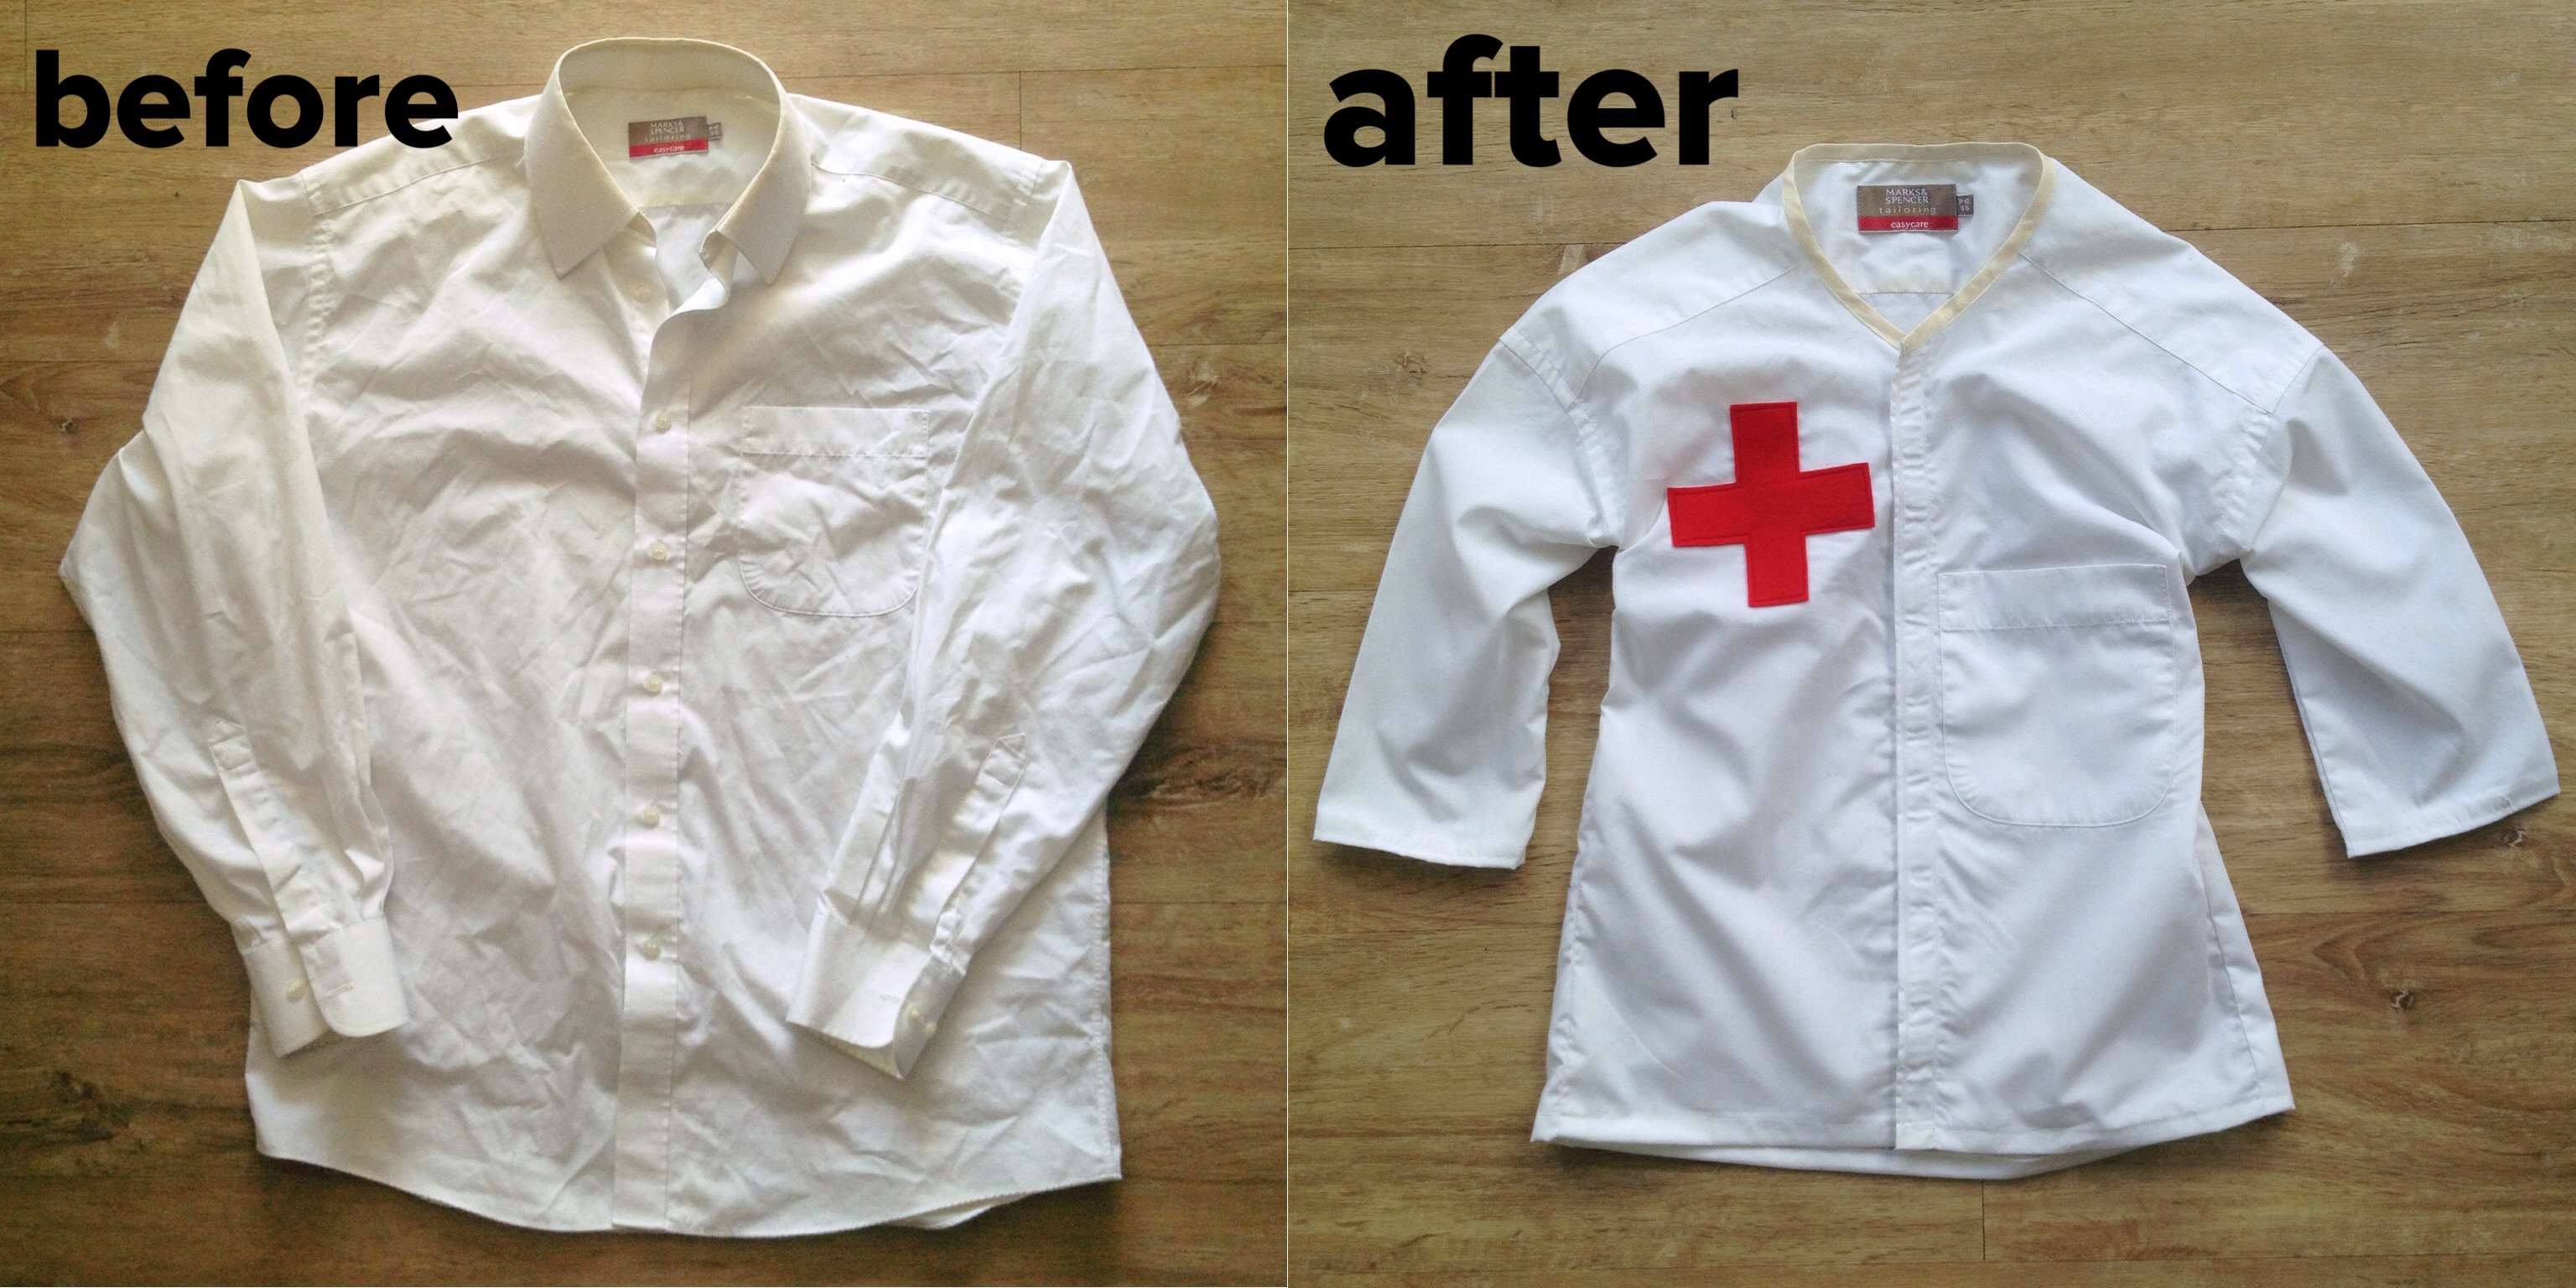
And that’s it – finished! As I said, it took about two hours in total, with all the taking it on and off, pinning things in to place, and of course the sewing itself. I gave it a quick iron at the end, and the doctor was ready to make his house calls.
Pingback: This Weekend | Dejlige Days
Eve
This is such an awesome idea. I have a sewing / Patternmaking blog – and work part time as a nanny – but I have NEVER thought about using my fashion skills to ‘refashion’ costumes for the girlies in my care. Thanks for the inspiration! :)
Anne Rowlands
great idea my granddaughter loves playing vets and this will be ideal. Off to
raid her daddies wardrobe,thank you
Debbie Denyer
What a brilliant idea! I love it!
Mash
Brilliant. Tq so much.
Lara
So eine coole Idee mit dem upcycling und man sieht gar nicht, dass es eigentlich ein altes Hemd ist!
Liebe Grüße
Lara
Pingback: Carnival Costume Ideas – The Bear & The Fox
Pingback: A Basic Kit for Little Scientists – The Bear & The Fox
Pingback: DIY Halloween Costumes on a Budget – Flipp Tipps