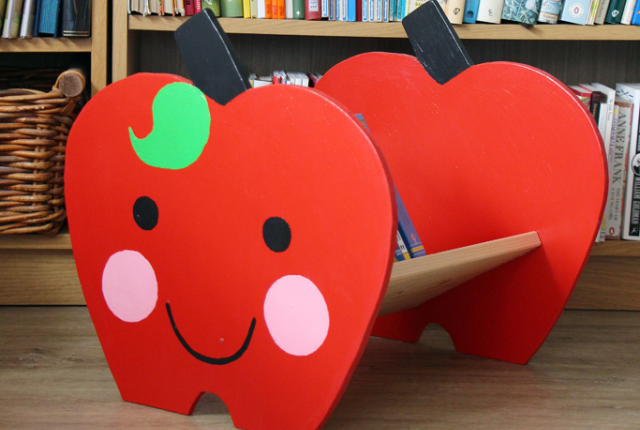
DIY Apple Themed Kids Book Shelf
Today I have a cute DIY to share with you, for building your very own kids book shelf, which I think fits really well with Autumn as it’s apple picking season, but would suitable all year round. We actually built this kids book shelf several years ago, when Mr Fox was just a baby, and it previously featured on my old blog but got left behind when I launched this blog four years ago. So I thought now would be the perfect time to re-share it. This would make a great Christmas gift too, if you are looking for personal or unique gift ideas for kids.
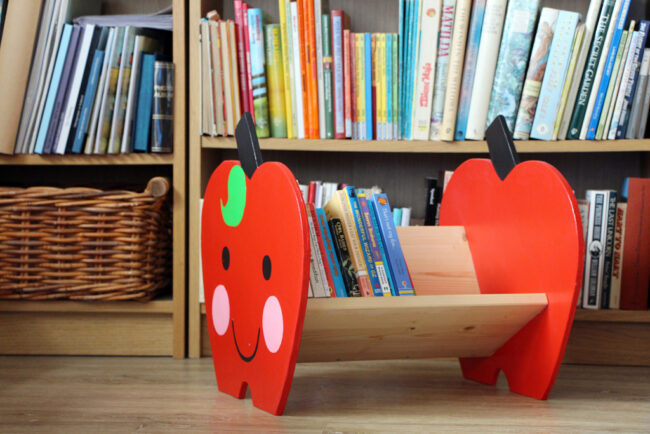
Our boys actually have a bookcase full of books in their bedroom, and this little apple bookshelf sits in the living room and it’s where we have all our seasonal books that we rotate throughout the year.
Here’s what you’ll need:
Materials
- 2 sheets of MDF or plywood, roughly 50 x 50cm, and 10mm thick
- 1 plank of wood, 20 x 80cm, and 12mm thick (it came in this size at the DIY store, you could also just get two 40cm long pieces, if available)
- wood glue
- 12 nails (45mm long, 5mm head)
- non toxic acrylic paint in red, black, white and green
- clear varnish suitable for use on children’s toys and furniture*
- some felt (optional)
Tools
- a jigsaw
- a hammer
- a drill (optional)
- a large and a small paintbrush
- some fine sandpaper
- paper, a pencil and scissors
- a black pen
- a piece of chalk
We made this shelf when we were stilling living in Berlin, and used a “2 in 1 Klarlack + Grundierung” in “Seidenmatt” from the brand “Vincent”. It had the locomotive logo that says “geprüft nach DIN EN 71-3”, which means it’s safe for children, and t also had the “Blaue Engel” logo, meaning its more environmentally friendly. I’m not sure what the best equivalent in the UK would be, but a DIY store should be able to advise. I bought a 0.125 litre tin and used about 3/4 of it.
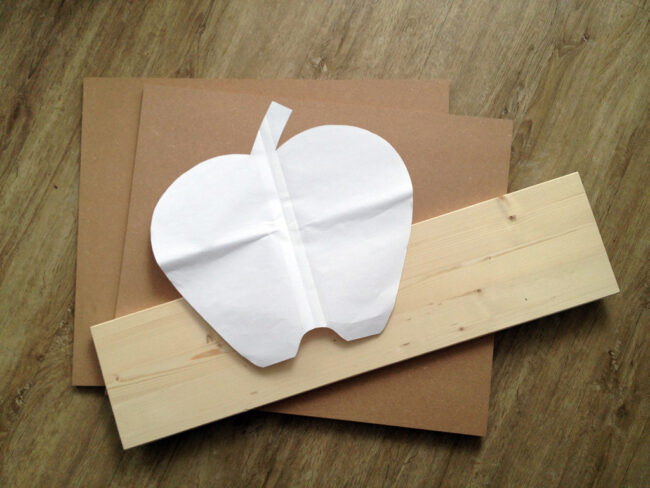
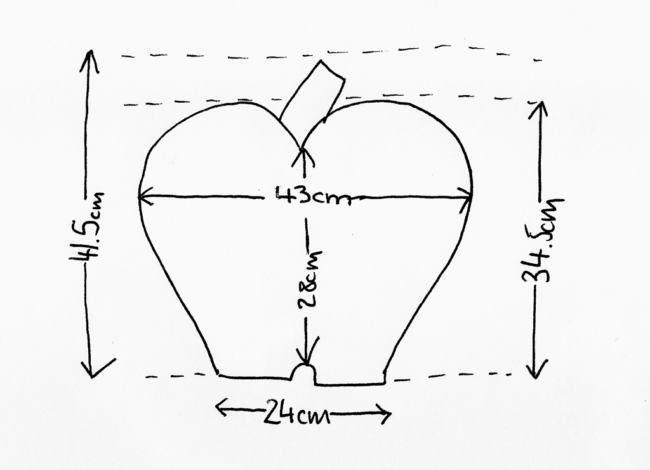
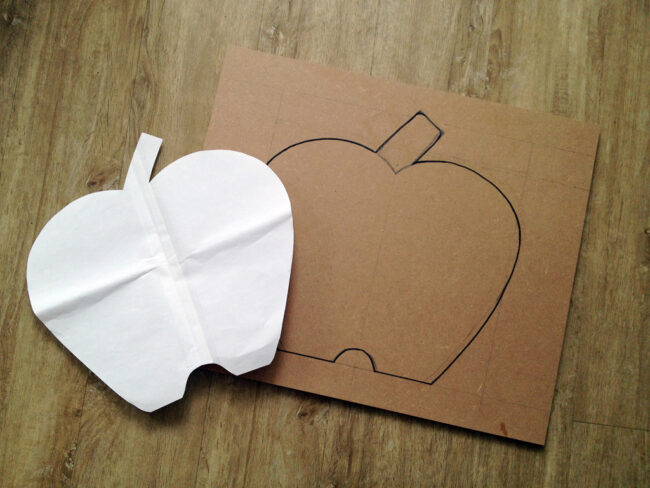
Step 1: Prepare your apple template (this is what you’ll need to paper, pencil and scissors for). I was aiming for the apple to be 40 x 40cm at its widest measurements, but it ended up 43cm wide and 41.5cm high. Oh well… The template was too big for my scanner, so I couldn’t offer it for you as a download, but I’ve made a sketch for you showing all the measurements (see below). Tip: I folded the apple in half length wise before cutting it out, so that the two halves were symmetrical (apart from the stem, of course).
Step 2: Transfer the apple template on to your two sheets of MDF, by drawing around your template. I used a black pen, so that you could see exactly where you needed to saw. Confession: I let The Husband do the sawing.
Step 3: While you have the saw out, saw your plank of wood in half so that you have to pieces each 40cm long. Unless you had two 40cm long pieces to begin with, then skip this step.
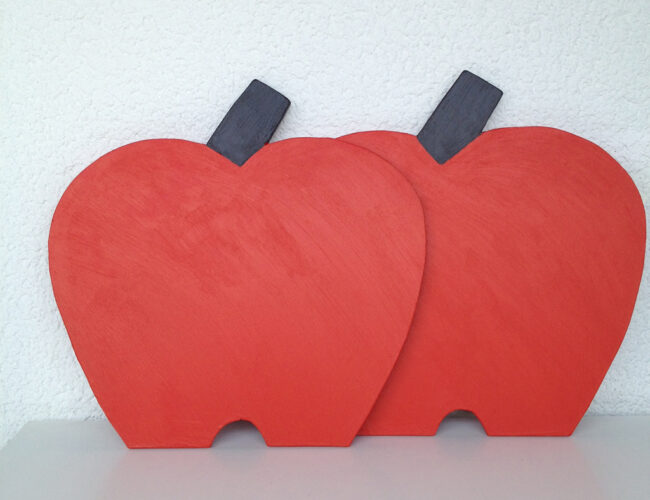
Step 4: Paint the two apples from both sides, using the acrylic paint. I went with red for the apples and black for the stems. You can of course use different colours if you so please, e.g. a green apple with a brown stem.
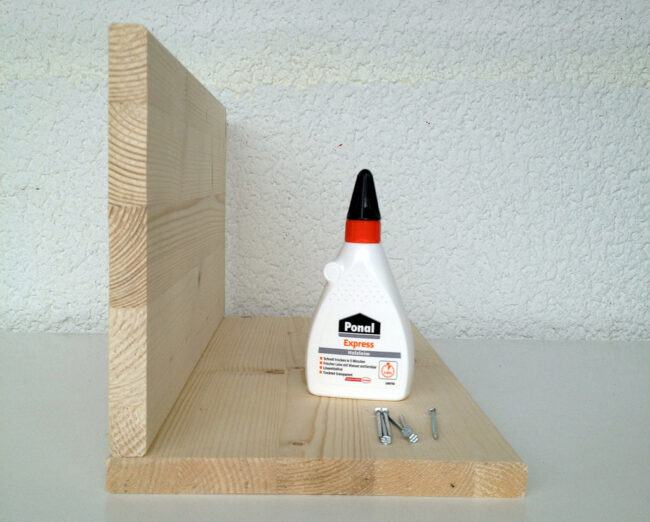
Step 5: Fix your two 40cm long pieces of wood together at a right angle. I used some express wood glue to hold them in place, then added four nails for stability.
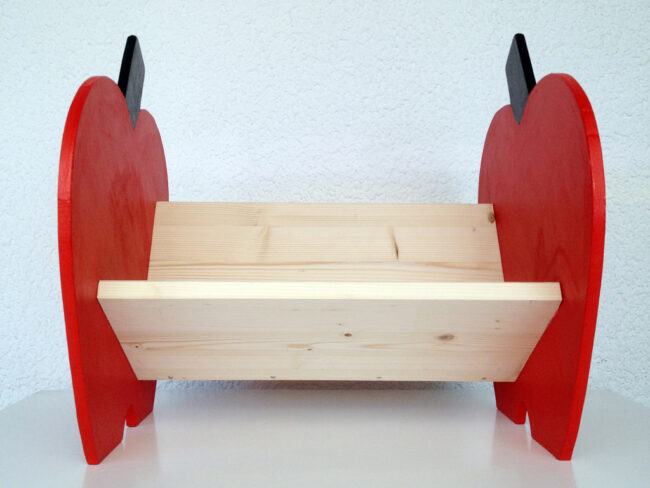
Step 6: Decide what angle you want the shelf to be at. We tilted ours slightly, so the books sit in it kind of like a cradle, but you could make it more straight up like a regular book shelf if you wanted to. Then glue and nail the two apple ends in place – making sure that they are level and aligned with each other! It may require two people for this. We measured out and marked where the nails would go, and pre-drilled some holes in the apples in advance.
Step 7: Paint a cute face on the outsides of the apple ends. I added a green leaf, which looks like a lock of hair I think. If you sketch out the features in chalk first, than you can easily correct it until it looks just the way you want, then paint over it. Once the paint is dry, you can just wipe off any chalk residue with a damp cloth. You can just see a few chalk lines around the eyes in the photo above.

Step 8: To seal in the paint and to make the shelf a bit more robust against knocks – and more safe for younger kids who might lick it, as they tend to do with everything – varnish over it using a varnish specifically intended for children’s toys and furniture. I gave a few tips at the beginning about the varnish I used, but you can just ask a member of staff in the paint department at your local DIY store, who should know these kinds of things!
Step 9: (optional) You can also stick some felt under the ‘feet’ of the apples, to stop it scratching your floors if you have wooden floors.
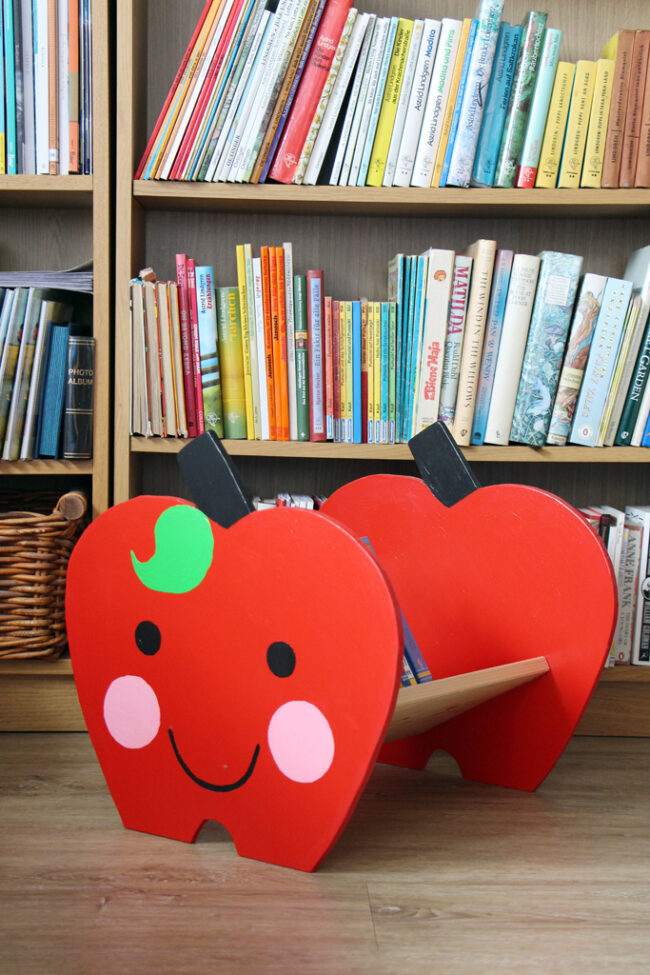
And voila! A cute little apple themed kids book shelf, for displaying your little ones’ favourite books, for seasonal books, for keeping your library books in one place, I’m sure you can think of other uses too. If you make one of these yourself, I would love to see a photo of it, so please feel free to tag me in on Instagram or Twitter.
Check out our other DIY and craft ideas too!
Claire
What an absolutely adorable idea! I can imagine this being the perfect addition to any child’s bedroom x
Rebecca Smith
Oh my, that is super cute! My little girl would love a bookshelf like that in her room!
Annette, 3 Little Buttons
Oh wow – how precious is this! And what a way to encourage little ones to read with a bookshelf made by mum