
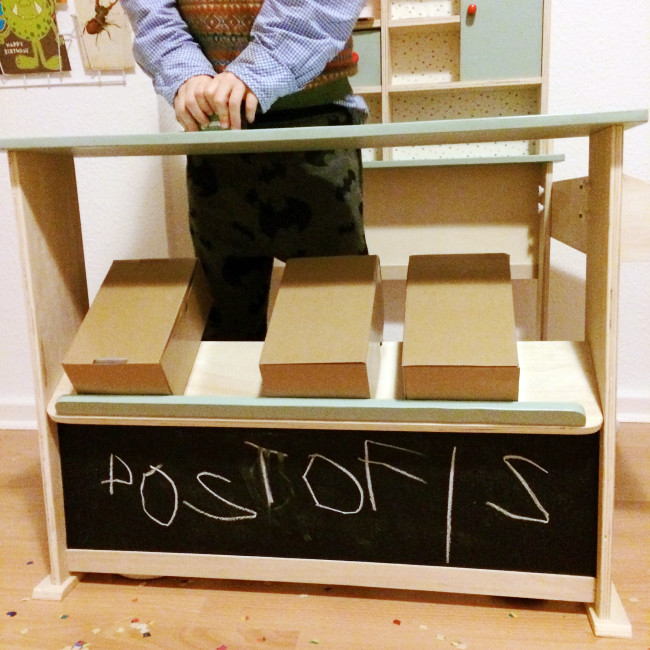
You’ve Got Mail! DIY Mini Post Office
I’ve been getting quite a few questions about the little grocery store in our playroom, that keeps popping up in my Instagram feed, so I thought I would write a post about it and how we revamped it. I’ve previously blogged about it on my museum blog, but I’m in the process of redesigning that and moving things a round a little, so now the post can find a new home here. We actually originally created the grocery store it as a mini post office for my older son’s 5th birthday – inspired by the children’s gallery at Copenhagen’s old Post & Tele Museum – though since we have quite a lot of play food in our play kitchen, it now serves multiple purposes.

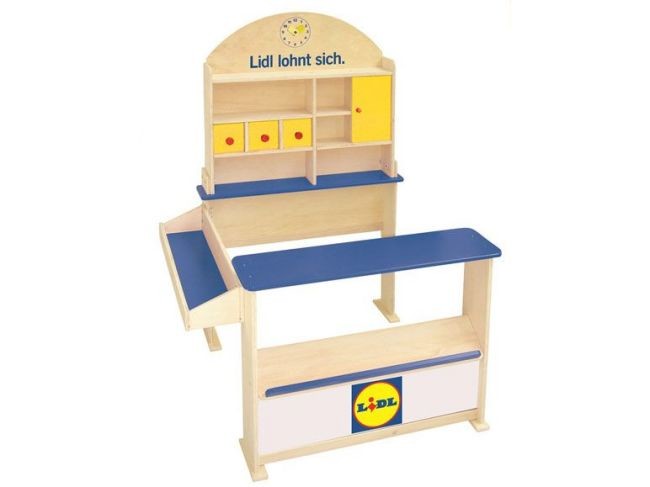
It all started when I picked up a wooden children’s grocery shop on sale at Lidl. It only cost around 30 Euros, less than half the original price, and I couldn’t get myself to pass on such a bargain, even though I had no idea where we were going to set it up (we were living in a much smaller apartment at the time). But then I thought, how boring, everyone has a grocery shop – well, in Germany they seem to, a so called ‘Kaufladen’ for kids is very popular here – so I wanted to do something different with it. Then I remembered the museum we had all been so enamoured with.
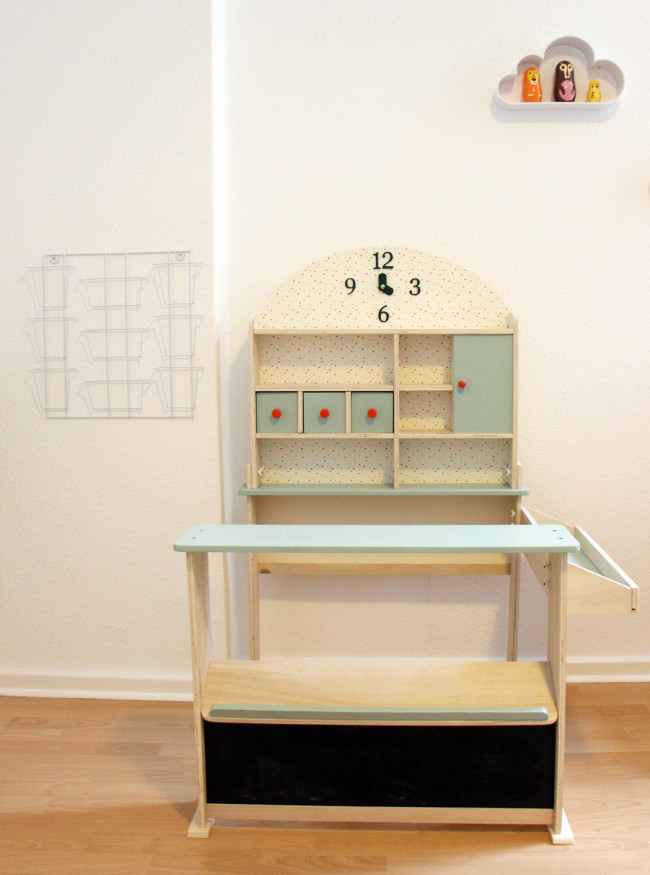
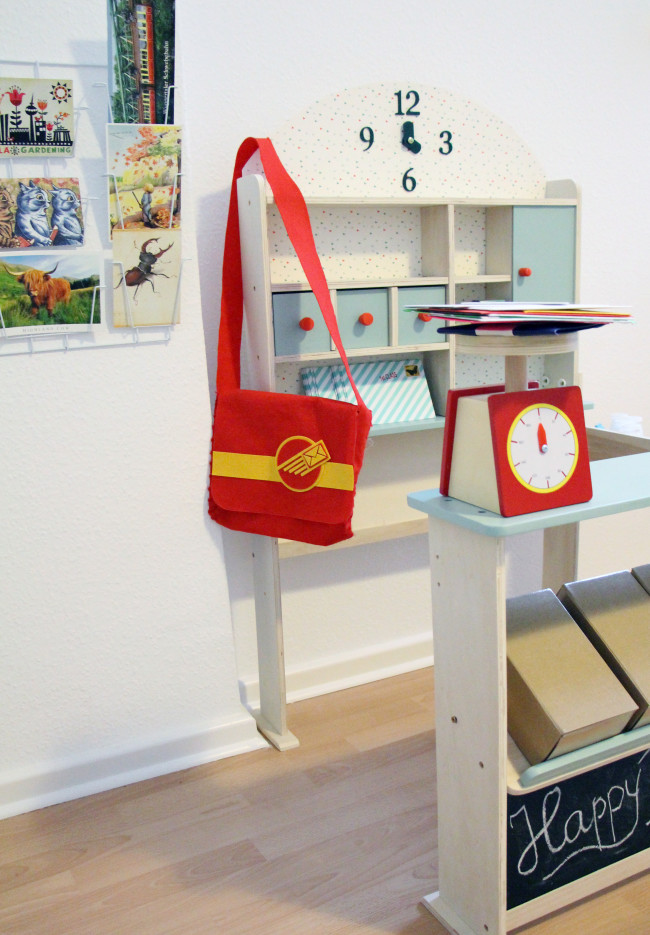
We wanted to give it a bit of a makeover, and deliberated for a while whether to go for a yellow ‘Deutsche Post’ colour scheme, or a red ‘Royal Mail’ colour scheme, but in the end we decided to go for something altogether different and keep it neutral, so that it could be whatever the boys want it to be: a German post office, a Scottish post office, a grocery store, a cafe, or anything else their imagination might come up with. Above you can see how our final post office looked after we were finished with the makeover, and below you can see the original as it came from Lidl (image source: www.lidl.de)
I knew I wanted to cover the back panel with some nice paper, so I went along to our local craft store and as soon I saw this one with the triangles, I knew it was the one! The paper then became the starting point for the rest of the colour scheme. It turned out, that the red drawer and door knobs were exactly the same shade as the red triangles, so we just kept those as they were. Then I took a scrap of the paper to a DIY store and had it custom matched to a shade of grey-green paint that matched one of the other triangles. We used that to paint all the blue and yellow varnished pieces of wood in the original, which we (when I say we, I mean my husband, lol) sanded down first after some experimenting showed that they were too shiny to just paint over – the new paint wouldn’t hold and cover it properly.
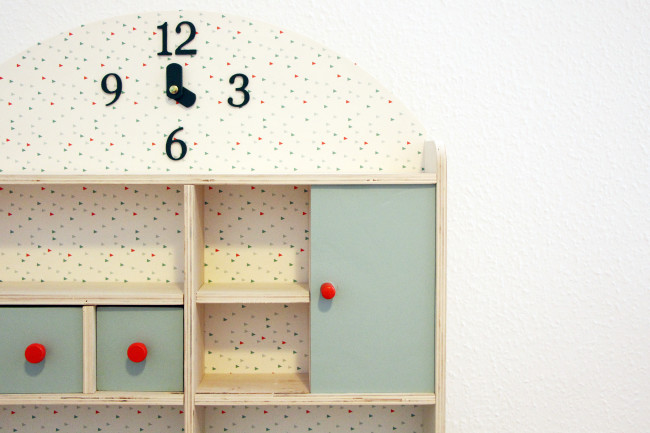
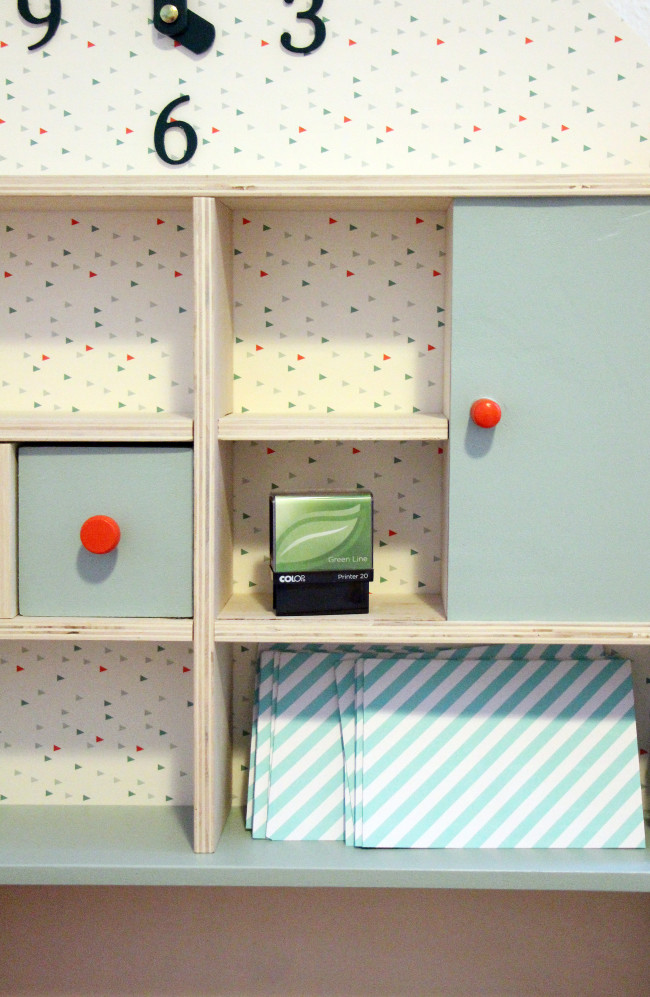
Since we had papered over the clock face, I bought some wooden numbers to make a new clock. The new clock was also slightly bigger, so I had to drill a new hole for the clock hands, as they had to sit slightly lower. For the clock, I just bought a tiny taster pot of dark green paint (it looks black in the photos), since it would not have been worth getting a tin mixed up just for those few pieces. And that was pretty much it. After all the sanding and painting and gluing on of paper, we put the whole thing together. Then came the fun part of filling it with post office supplies!
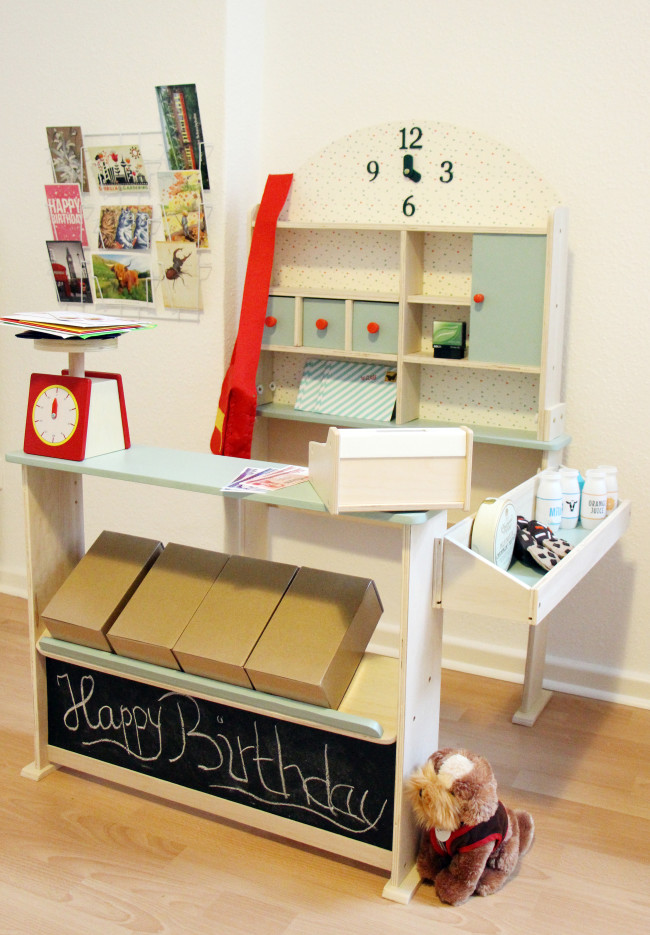
Oh, I almost forgot one thing! The front panel we painted with blackboard paint, so that we could change the signage to say post office, or shop, or whatever it was being used for – for the big day itself, I wrote a birthday message on the front.
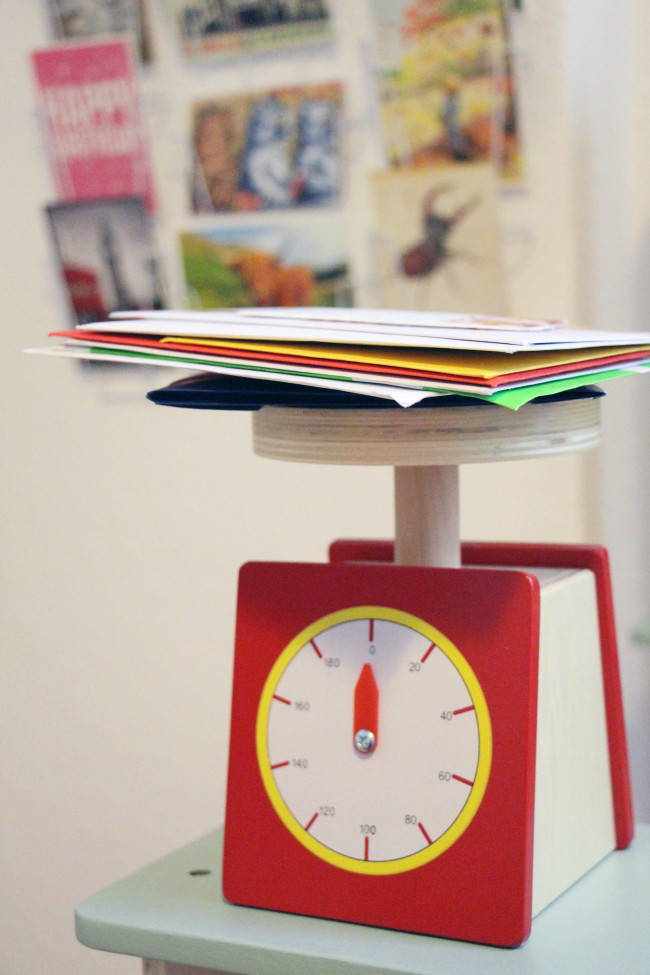
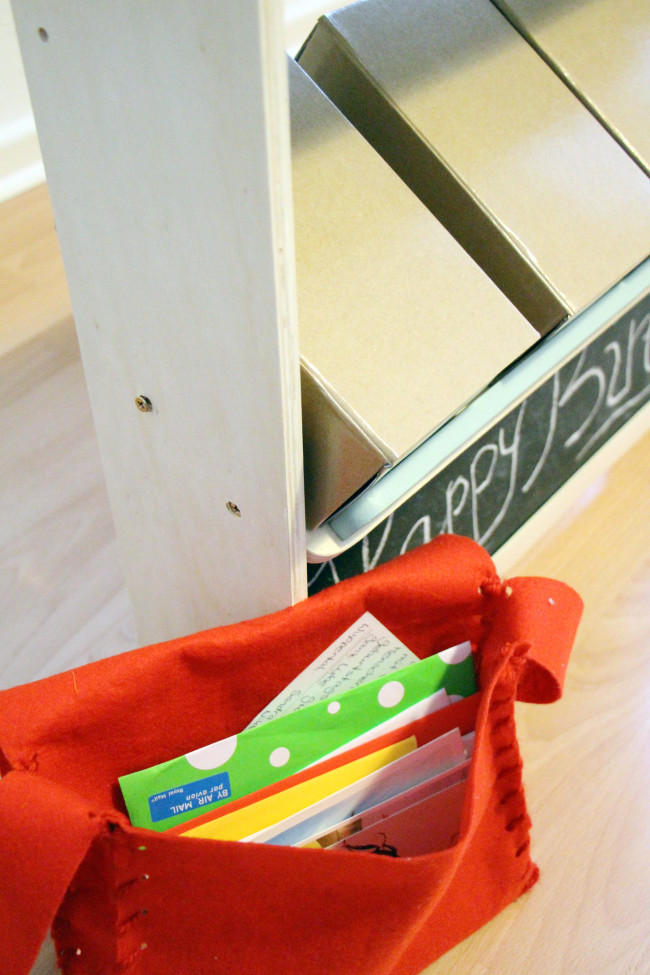
When I was looking around for things to put in the post office, I found a set of scales, that I thought were perfect for weighing letters, and didn’t look too much like grocery store scales. By the way, those letters you see piled on top of the scales, and all the colourful postcards in the postcard rack behind? I have the most amazing friends! I mentioned on Facebook what we were planning, and that a post office really needed some post, and soon postcards, letters, and even some parcels started arriving. Over 30 pieces of mail from 8 different countries. We had to spread them out over a week so as not to overwhelm our little postmaster. Best birthday surprise ever! THANK YOU so much, all of you!! You know who you are.
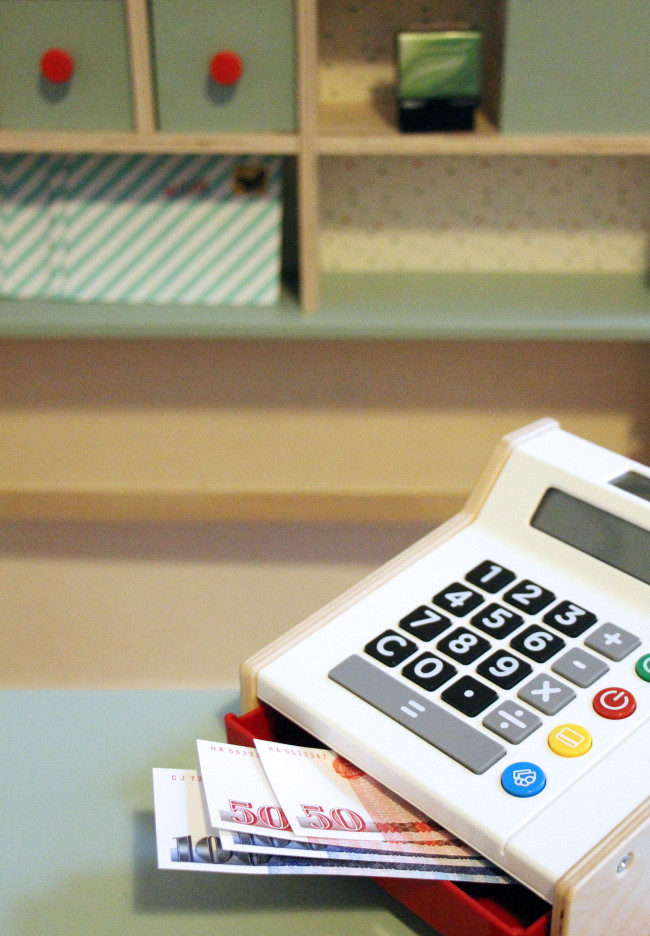
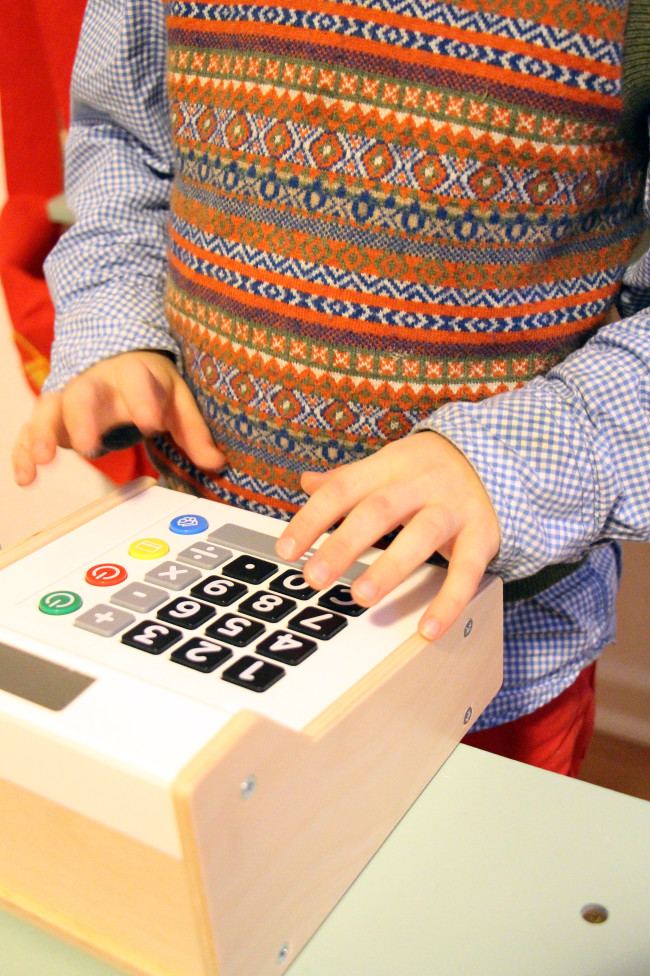
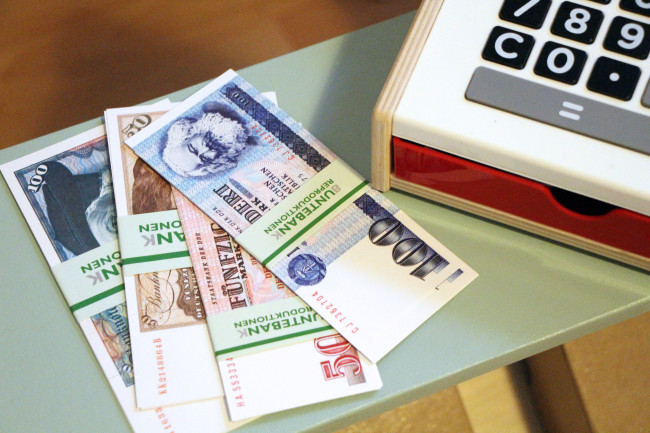
Of course, a post office also needs a till. This one I picked up from trusty old Ikea, and the for money I got some replicas of old East and West German bank notes from the gift shop at the Museum für Kommunikation in Berlin!
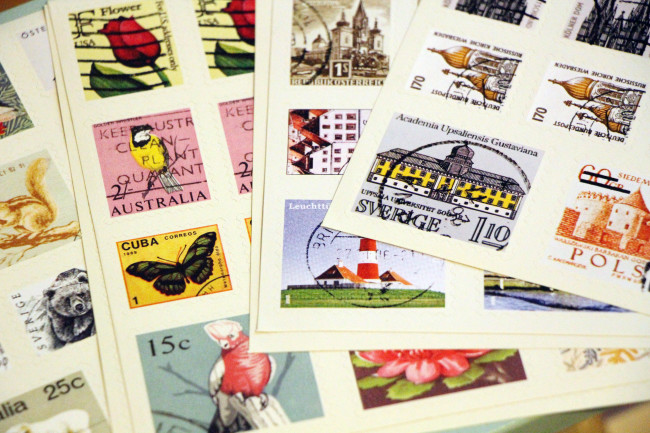
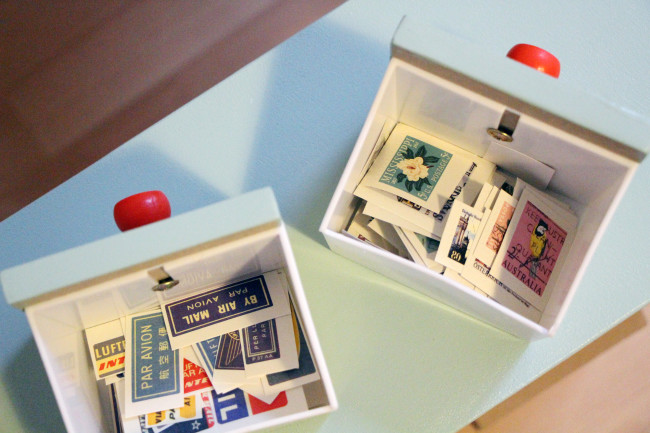
Next to sort out were stamps. I initially found some play stamps for children’s post offices online, but goodness they were so ugly! I mean, I know they are just going to be used up playing and eventually land in the bin, but do they need to make such ugly stuff for kids. Also, they looked nothing like real stamps, more like a kidified twee version of ones. Then I discovered some sheets of beautiful replica stamps in the scrapbooking section of one of the craft stores I had been to, and at a reasonable price too, so I loaded up on those. I cut them up, and filled one of the little drawers with them.
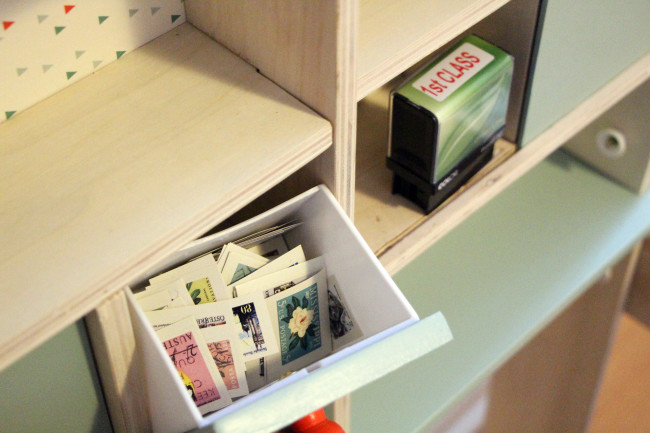
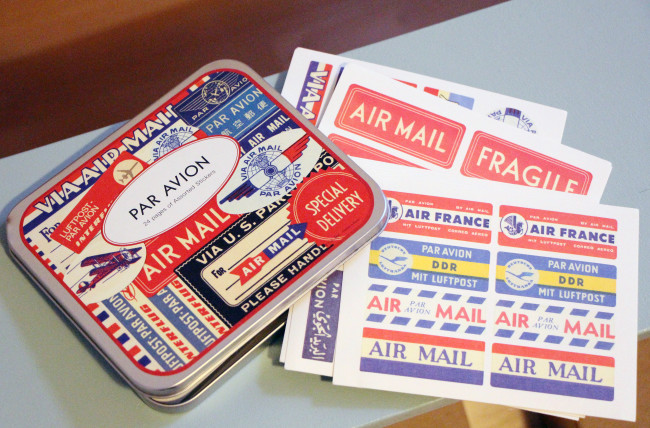
One of the other drawers I filled with some air mail stickers I had picked up ages ago in a book store because they looked so pretty, long before our post office even became an idea. I knew they would come in handy one day! The third drawer contains some chalk and a cloth for wiping, to change the signage on the blackboard.
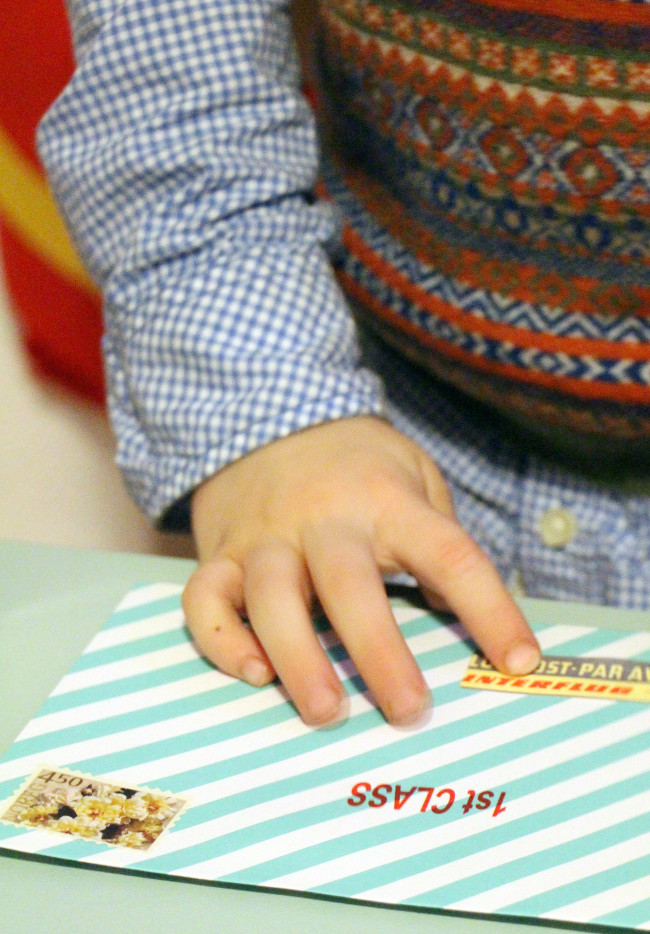
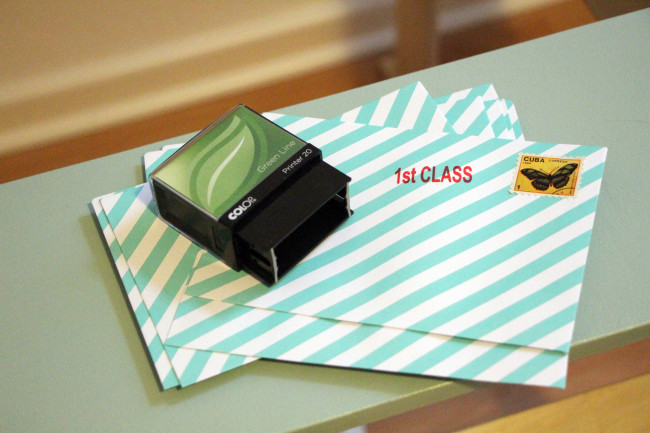
Of course, we also needed some envelopes. Again, I could have picked up a bulk packet of plain white envelopes for a dirt cheap price, but once I spotted these mint striped ones there was no going back! The other thing I really wanted, was some kind of ink stamp. But I didn’t want anything that required an ink pad (too messy!) or self inking stamps with a lid (would inevitably get lost on day one), and after a bit of online research I found the perfect one: a self inking stamp without a lid, that flips down when you press it, then flips back up. No lids to lose, no open ink pads left lying around the place…and looks like all the mail is going to be sent by first class :)

I wish all MY mail looked this pretty!
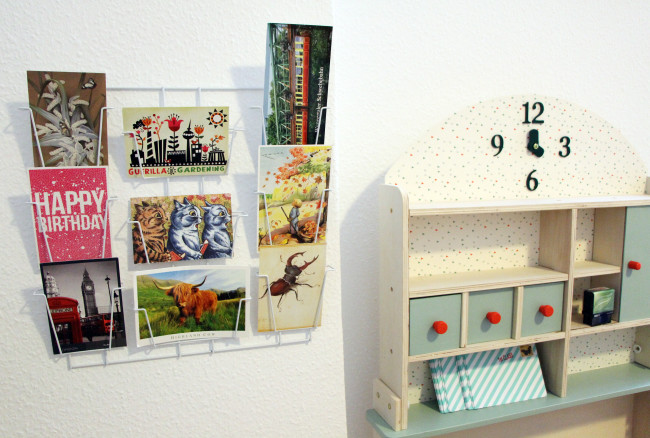
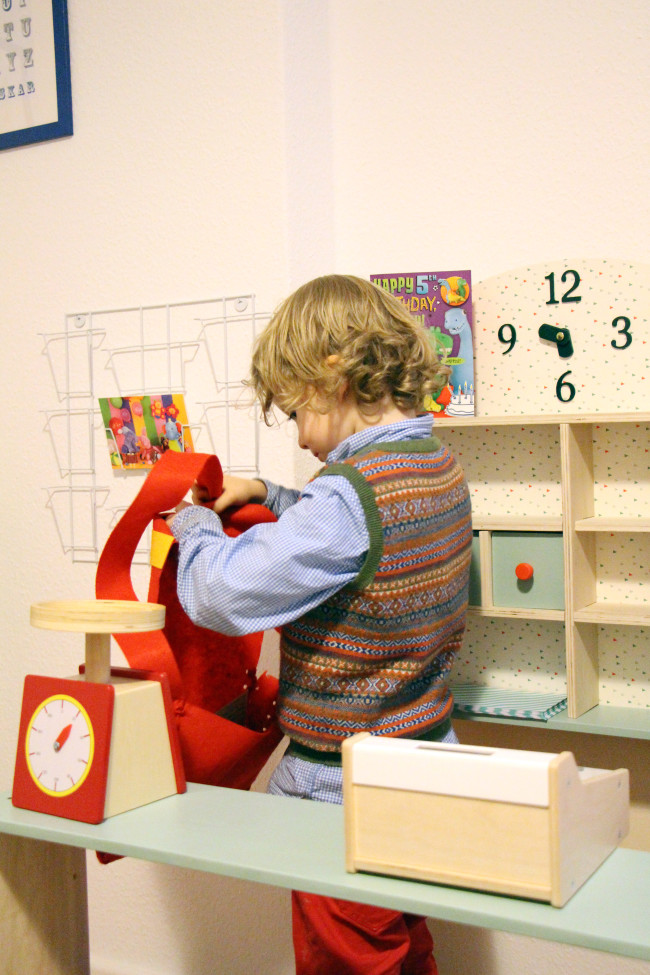
Here are a couple more close ups with the postcard rack, showing a small selection of the many wonderful cards that were sent (did I say THANK YOU already?). We actually hid the first batch we were handing out in his Postman Pat mail bag, which he already owned, and hung that up in the post office. What a surprise when he looked inside!
Oh yeah, parcels! I found some really small ones, that were a perfect fit for the front shelf and that have lids that open and close really easily. We’ve had a lot of fun in the last 18 months, posting things inside them from one end of the house to the other.
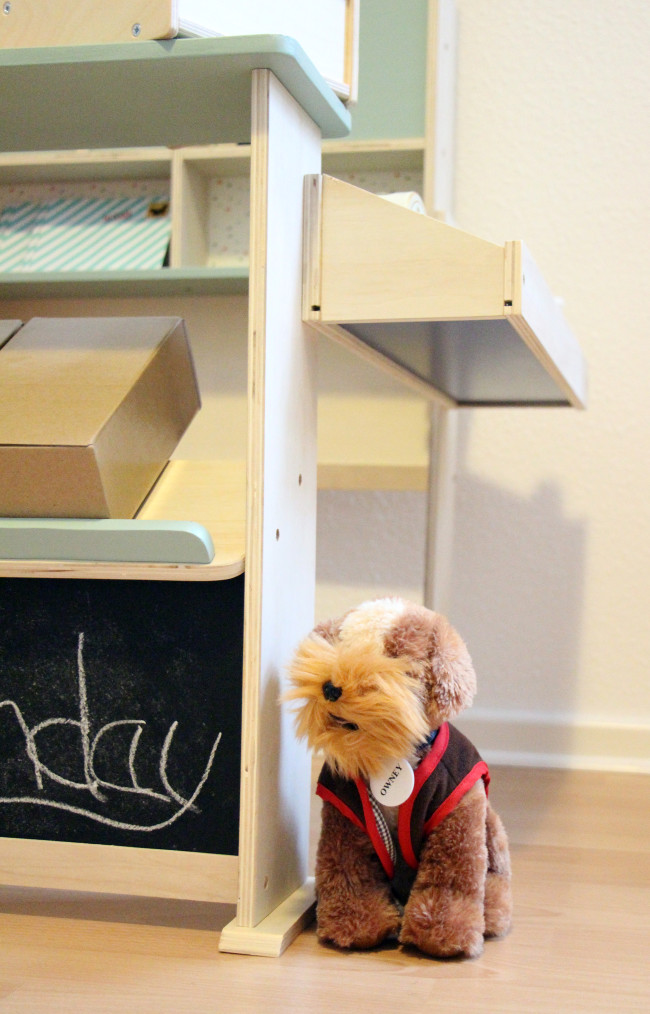
I added in one other little detail, which we also already owned, and that was our Owney the Dog! Owney is the mascot at the Smithsonian National Postal Museum, and we went to visit him when we took our boy to Washington DC for the first time and bought our own Owney as a souvenir from the museum gift shop. Now he gets to live in a post office too :)
The final detail was adding some of the items from our play kitchen to the side board of the post office – we reckoned it looked perfect for a little tuck shop. So when you come to mail anything, you can also buy a selection of chocolate, cookies, and drinks!

Our boy absolutely loved his present! He spent the rest of the day happily stamping envelopes, delivering parcels, and was very quick to wipe off the birthday message and give the post office its official title! Now, 18 months later, his little brother is following in his footsteps. Both boys love playing with it, and use it as a post officer, grocery store, cafe…we have since added a little wooden play coffee machine, and our 2 year old loves making cups of coffee for daddy. Bless. I’ll have to take some new photos of it all soon…
Cathy Wassell
Love it!
Jenni
Thank you!
Clare
This is brilliant! I wish I was half as creative.
Jenni
Thanks Clare!
Karen Laing
Hi Jenni. I love this. I have a dolls house to paper and would love to know what glue to use.
Jenni
I just used some kind of generic white craft glue, but I applied it with a wide spatula to avoid lumps.
Paula
I think Mum enjoyed creating it as much as your little Post Master likes playing with it! It’s fabulous!
Jenni
Haha, yes, you got me there! Such a fun project to put together.
Valentina
Wow! I love how you transformed it. Great eye for details x
Liz
This is fantastic, I love how you’ve covered every detail! I seem to spend half my life at the Post Office, but even I want to play in it! X
Pingback: How to Stock a Play Kitchen – The Bear & The Fox