Our Wedding Part 3: DIY Notebook Wedding Favours
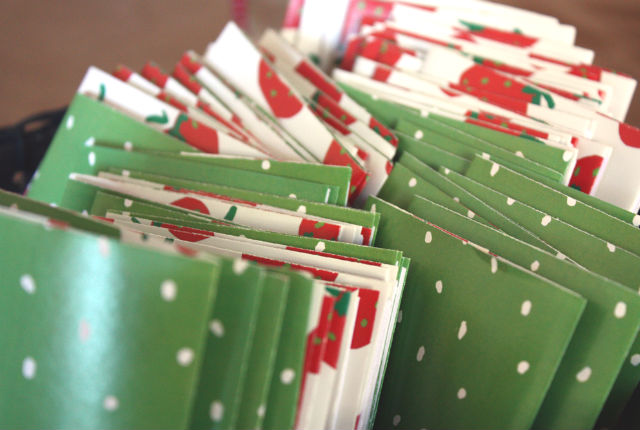
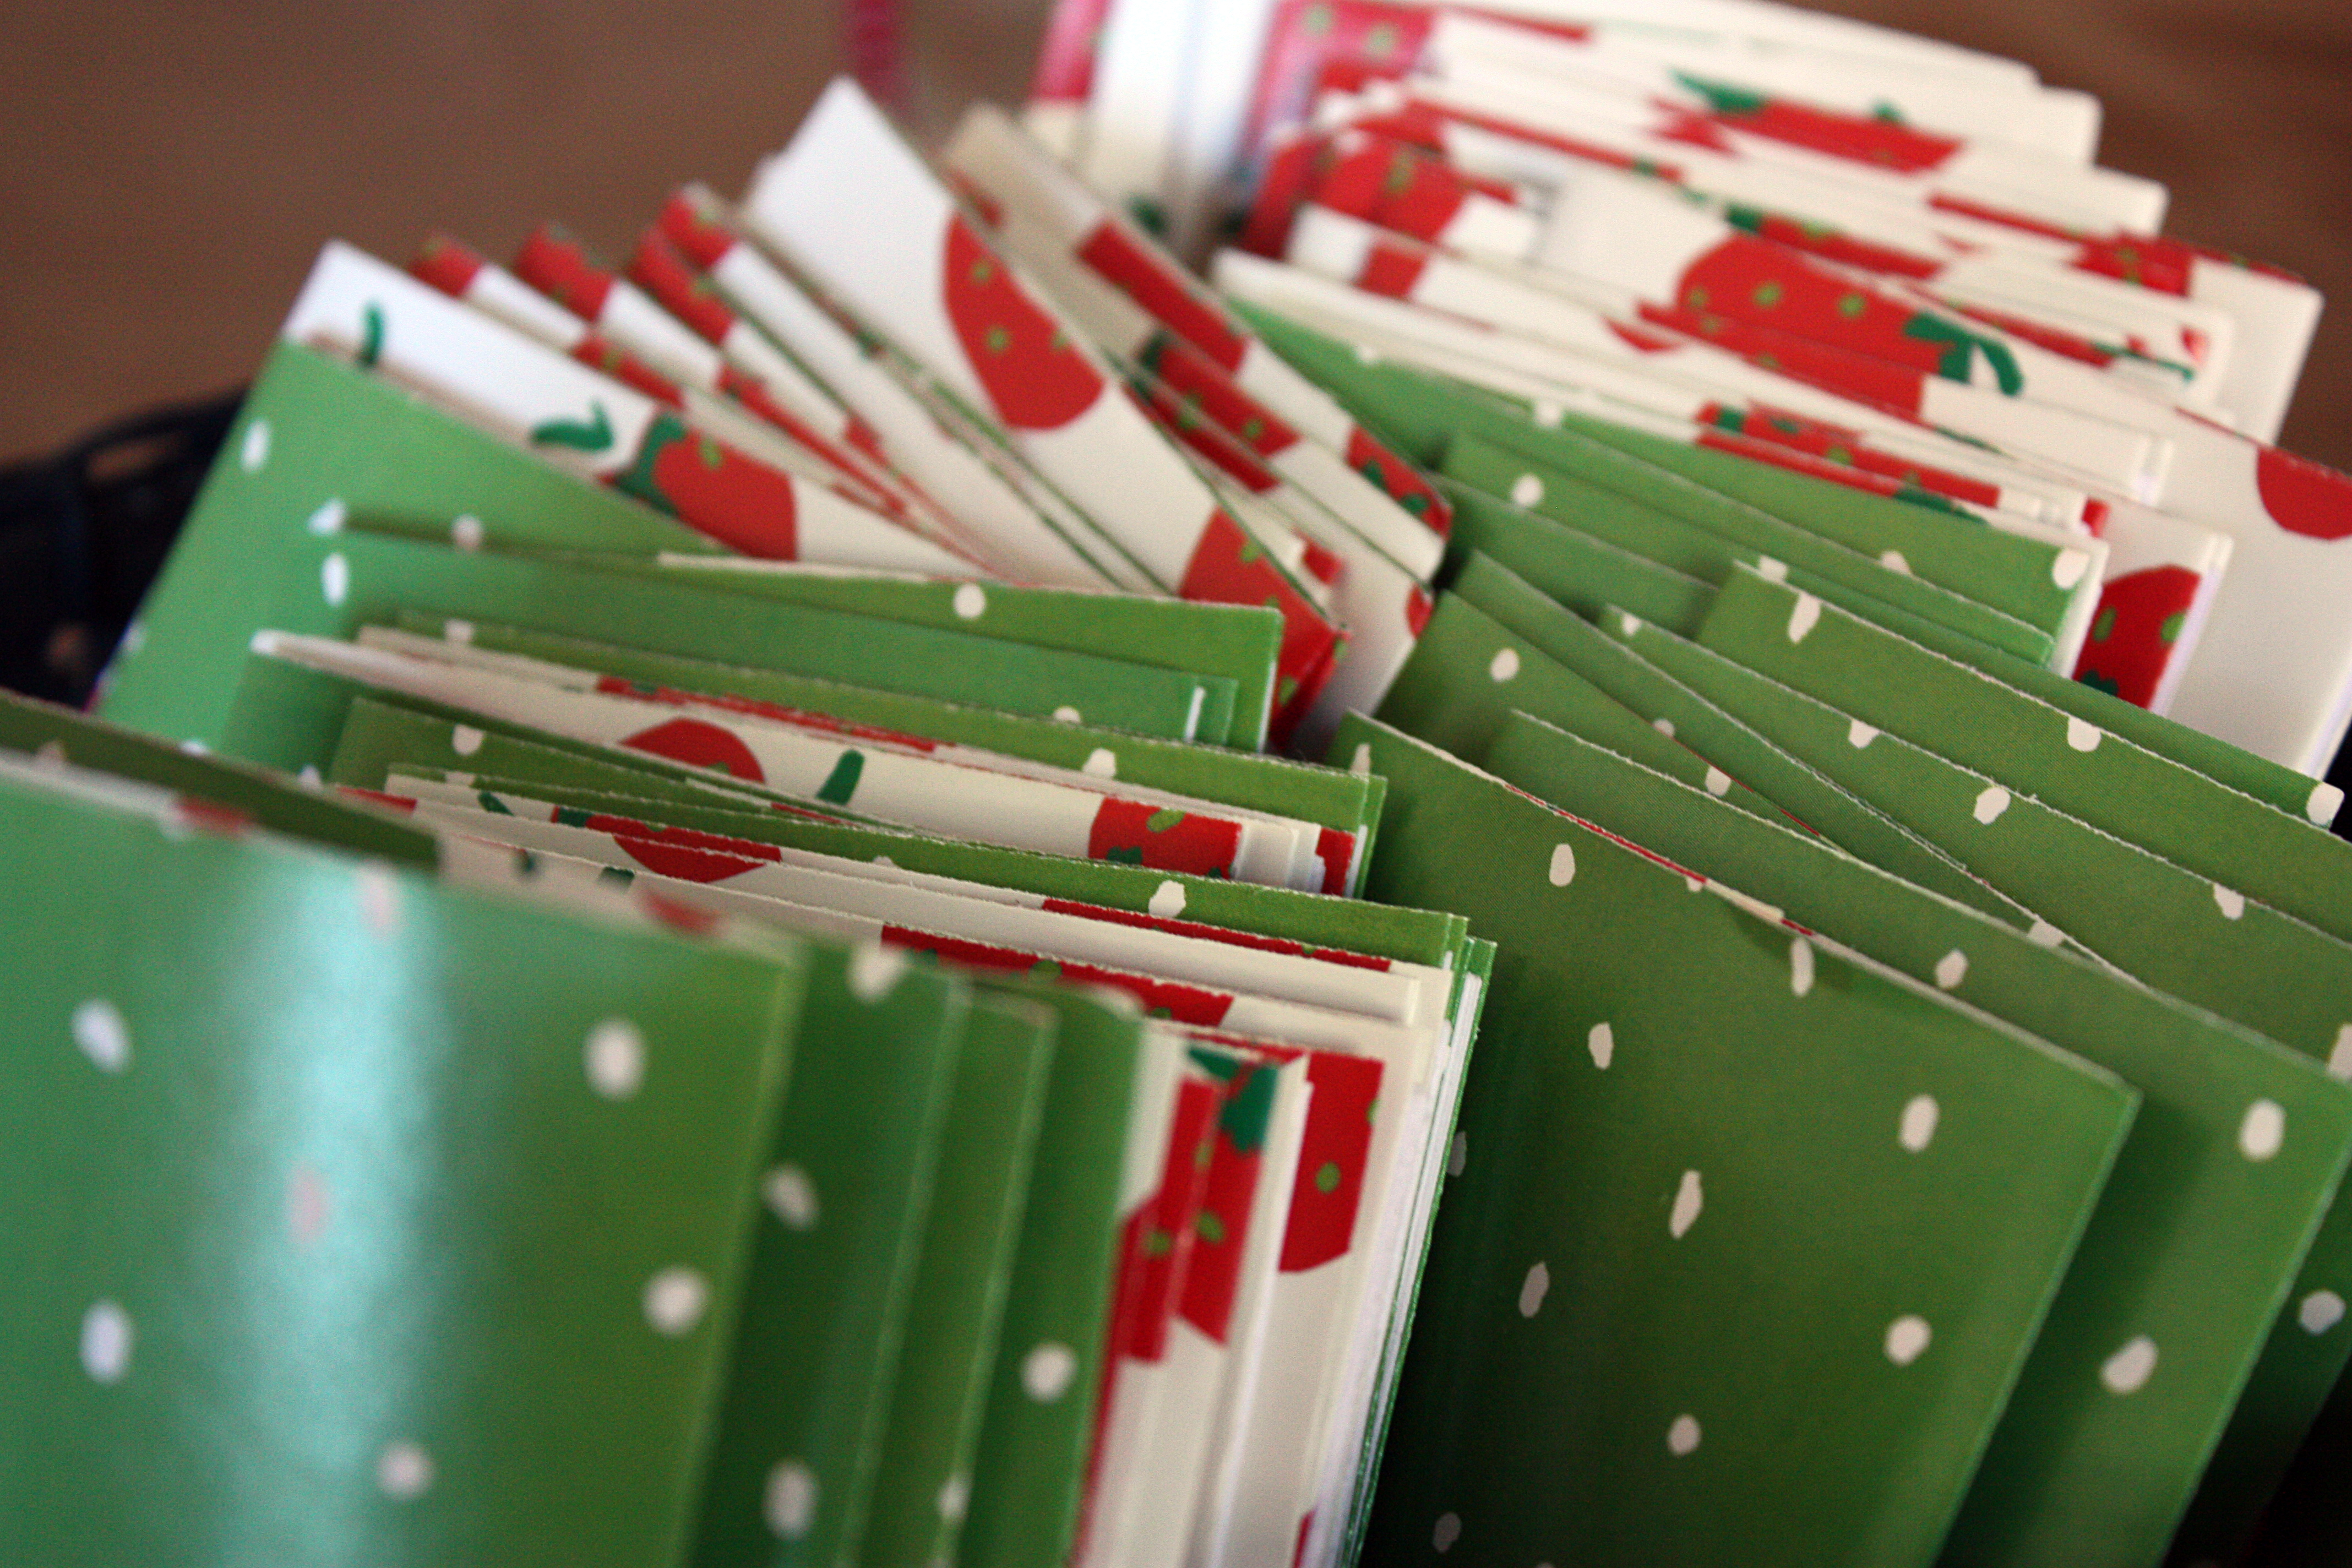
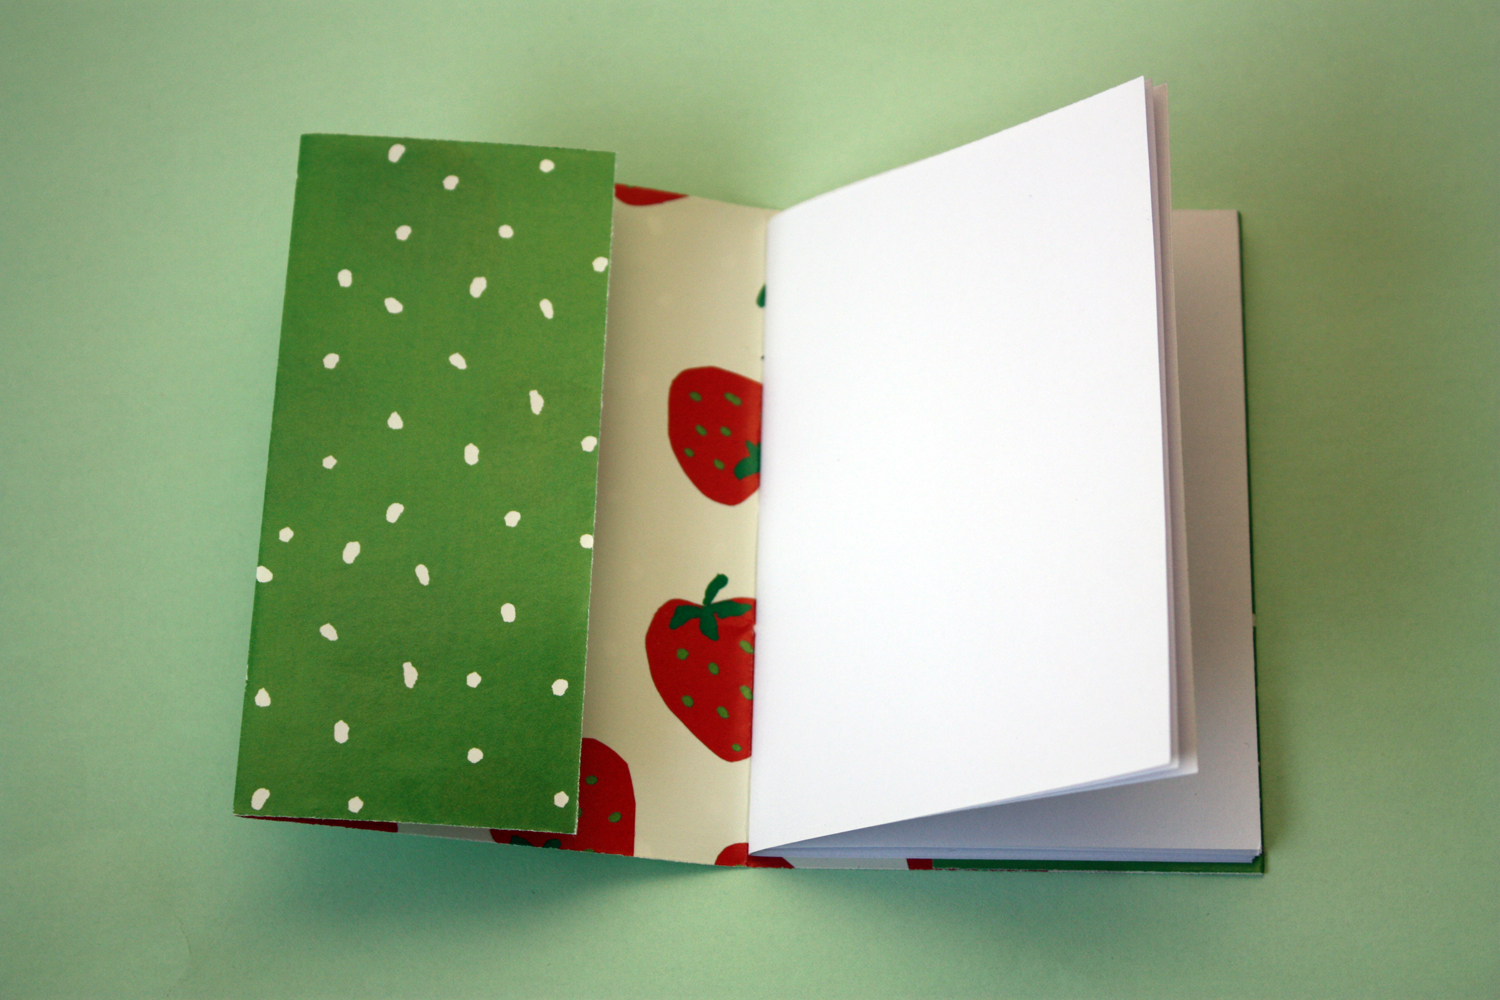
If you’ve been following along on the blog this week, you’ll know I’m blogging about our wedding in honour of our 10th wedding anniversary. So far, I’ve shared our garden themed decorations and our crowdsourced buffet. Today, I’m going to talk about the favours we had at our wedding reception. Since we did not have any assigned seating, we put baskets by the door with signs saying “please pick a favour” (keeping in with the garden theme) for when people were leaving. One basket was was filled with mini rolls of love hearts, the other was filled with hand made notebooks, which I had spent the weeks before sewing. The notebooks are actually really easy to make. All you need is some printer paper, a needle and some thread. And some pretty wrapping or craft paper to make a cover. To go with the garden theme, we chose green and strawberry patterned covers.
If you would like to sew your own notebooks, here’s how to do it. Please note that these instructions are just to show the sewing technique for the pages, you can also include a cover if you like (see end of post for details).
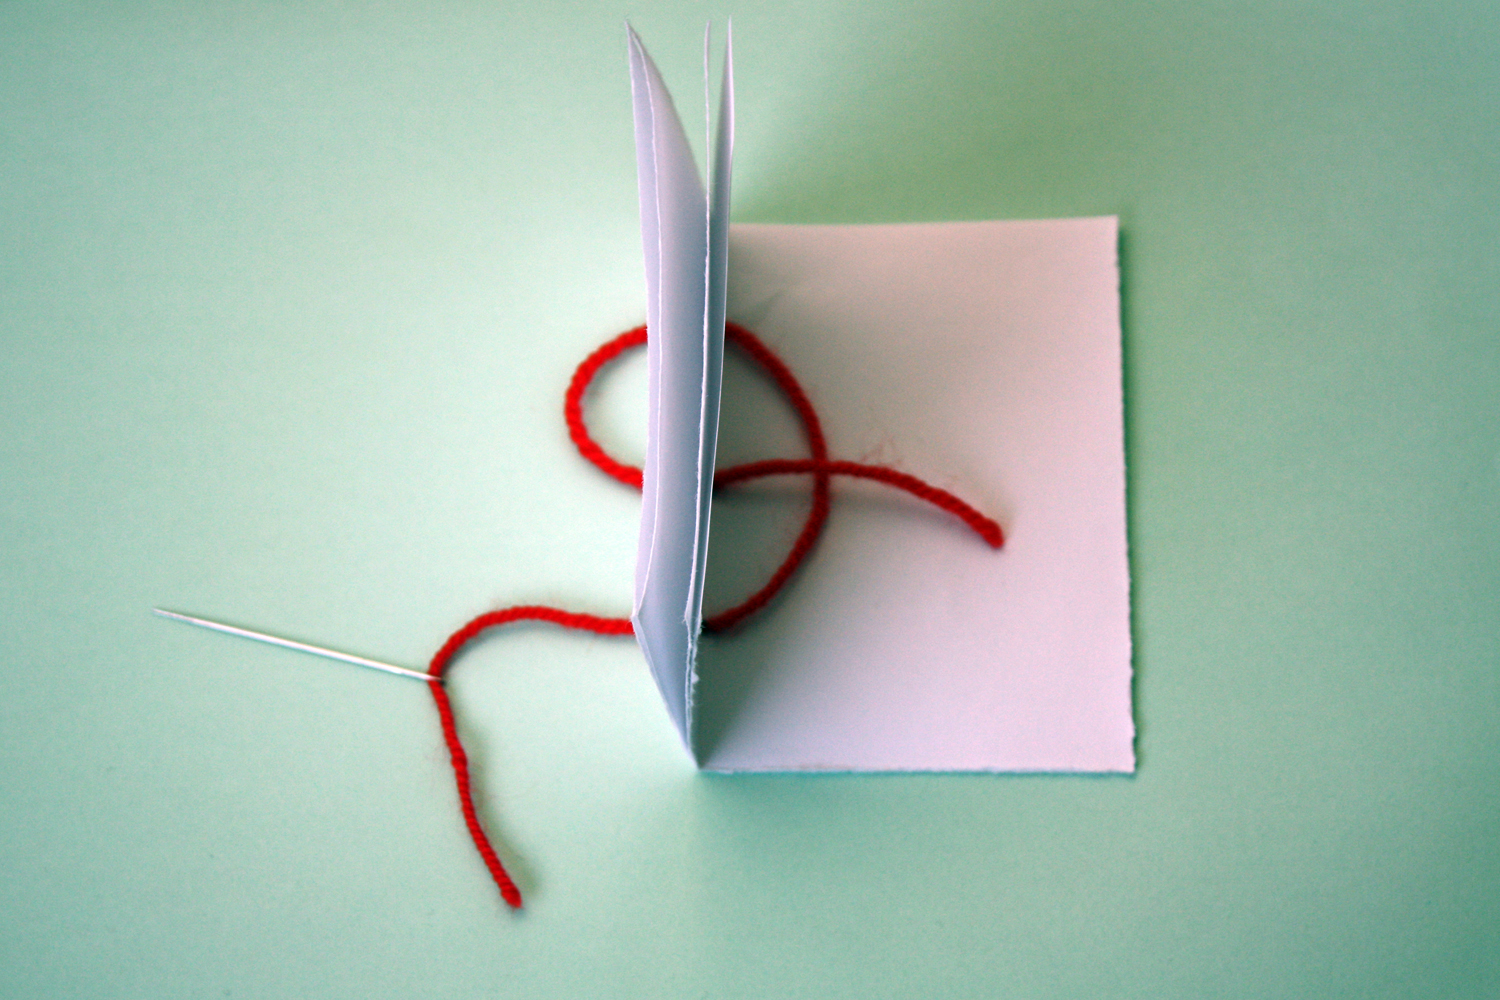
Step 1: Take some A4 paper, fold and cut it into quarters. Fold the quarters in half for your pages. I used 6 quarter pages per notebook, meaning I got two notebooks worth out of three sheets of A4 paper. You’ll also need some thread about three times the length of the spine of your notebook. In the demonstration I’ve used wool. so you can better see what I’m doing.
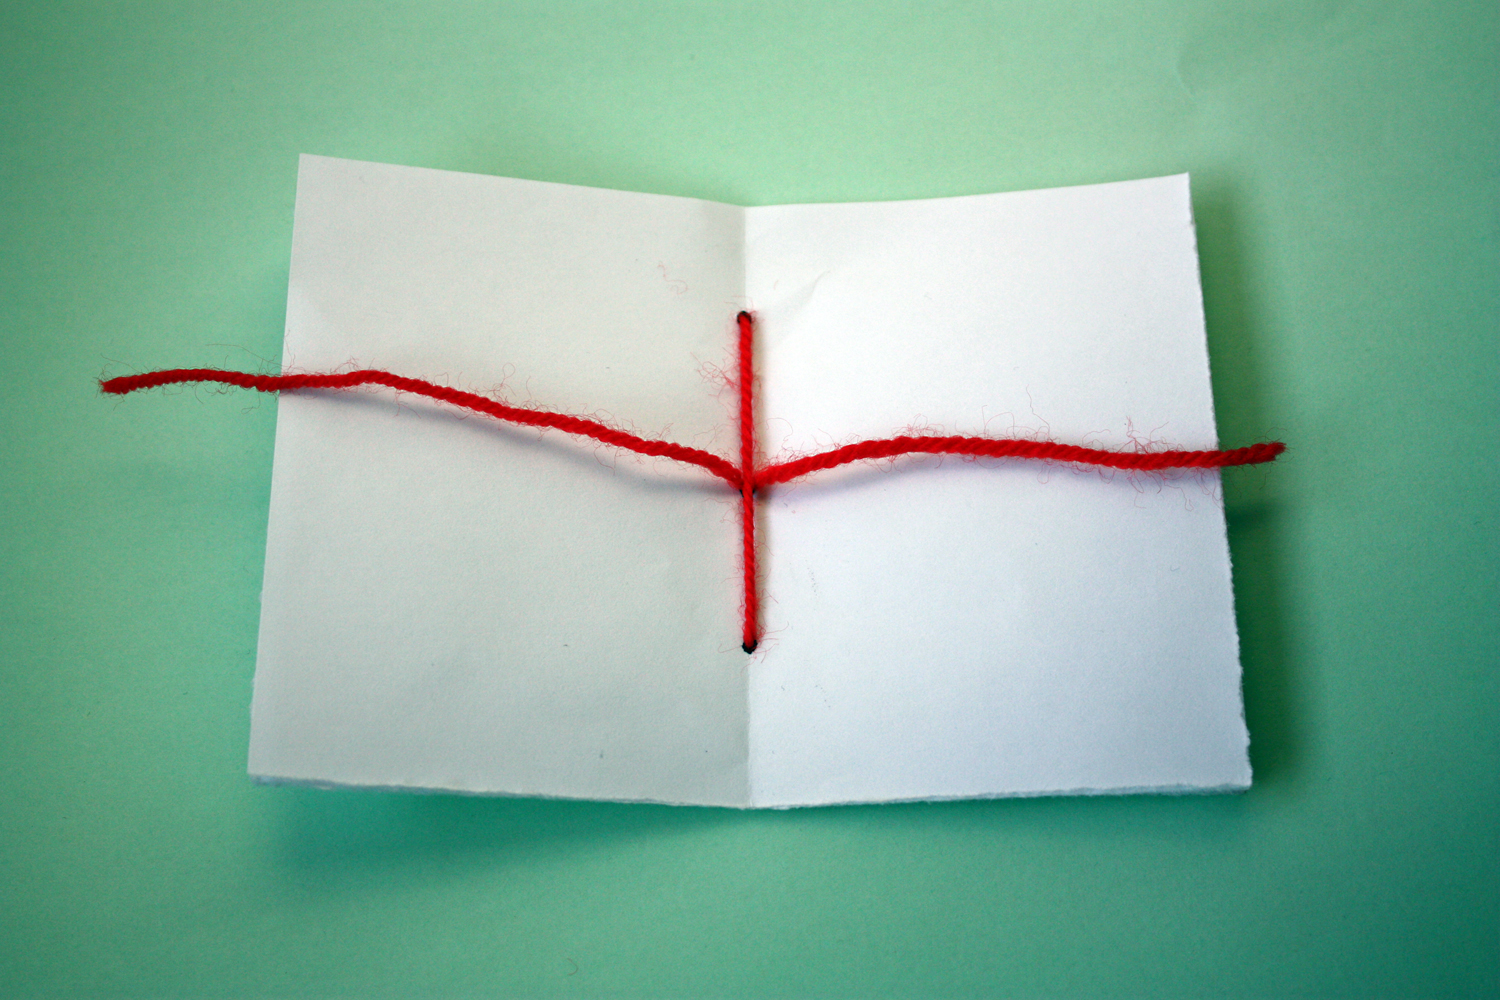
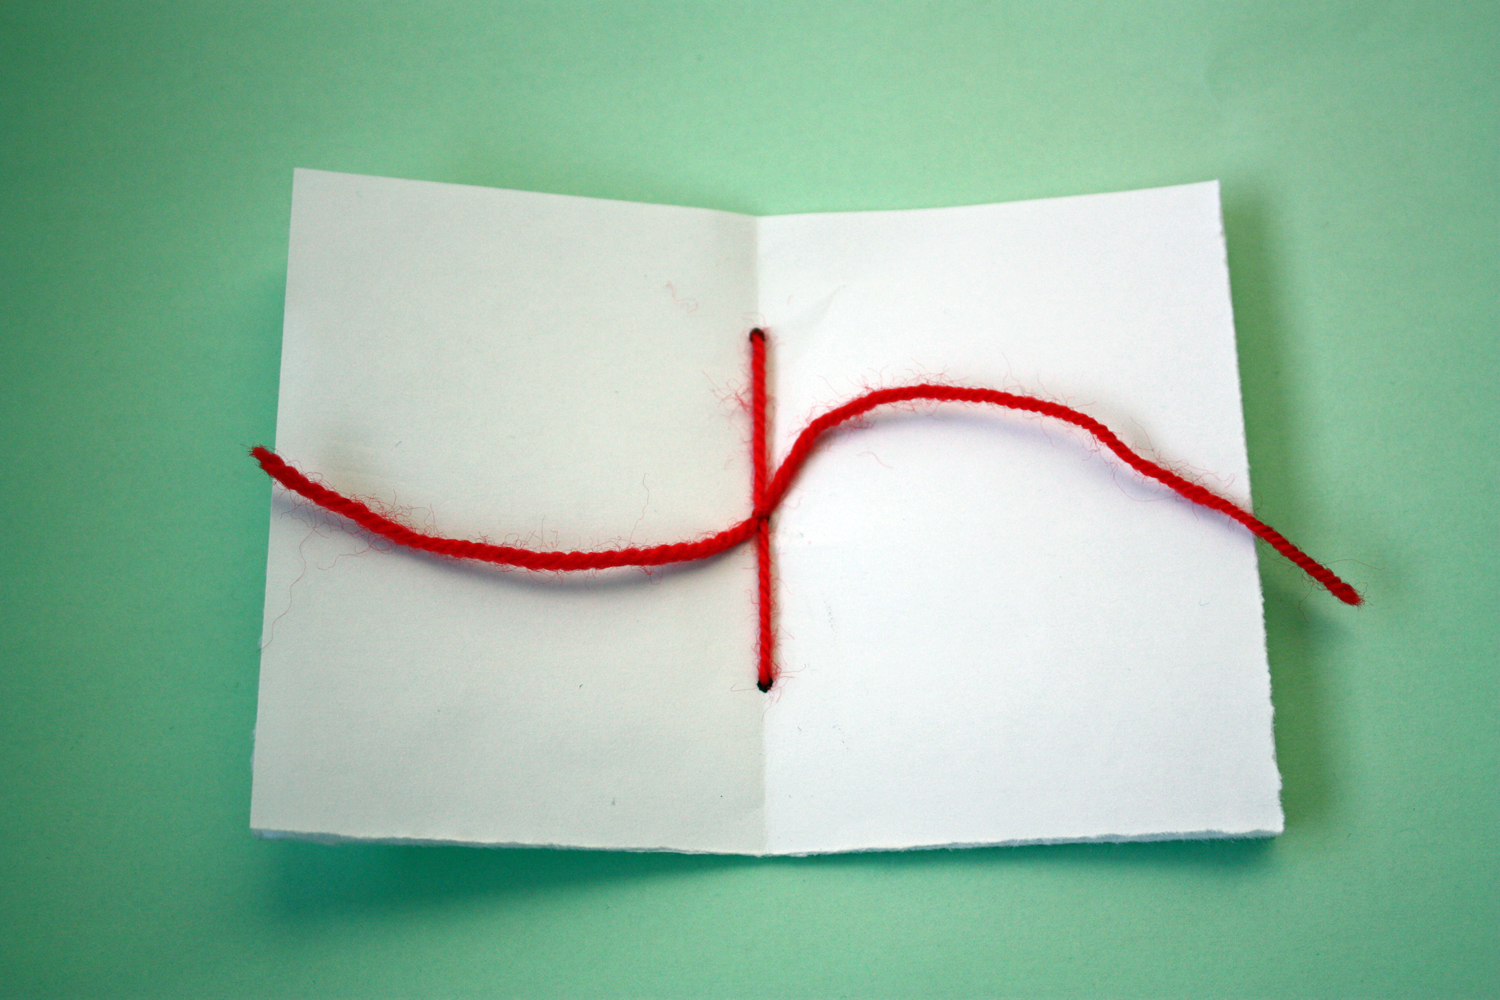
Step 2: You’ll be sewing your notebook via the three spots I have marked with black pen. These are just for your guidance. You don’t need to draw these on when making your notebooks (apart from anything else they look ugly). Begin by going through the centre spot, from the inside to the outside, leaving a length of thread behind as shown in the picture.
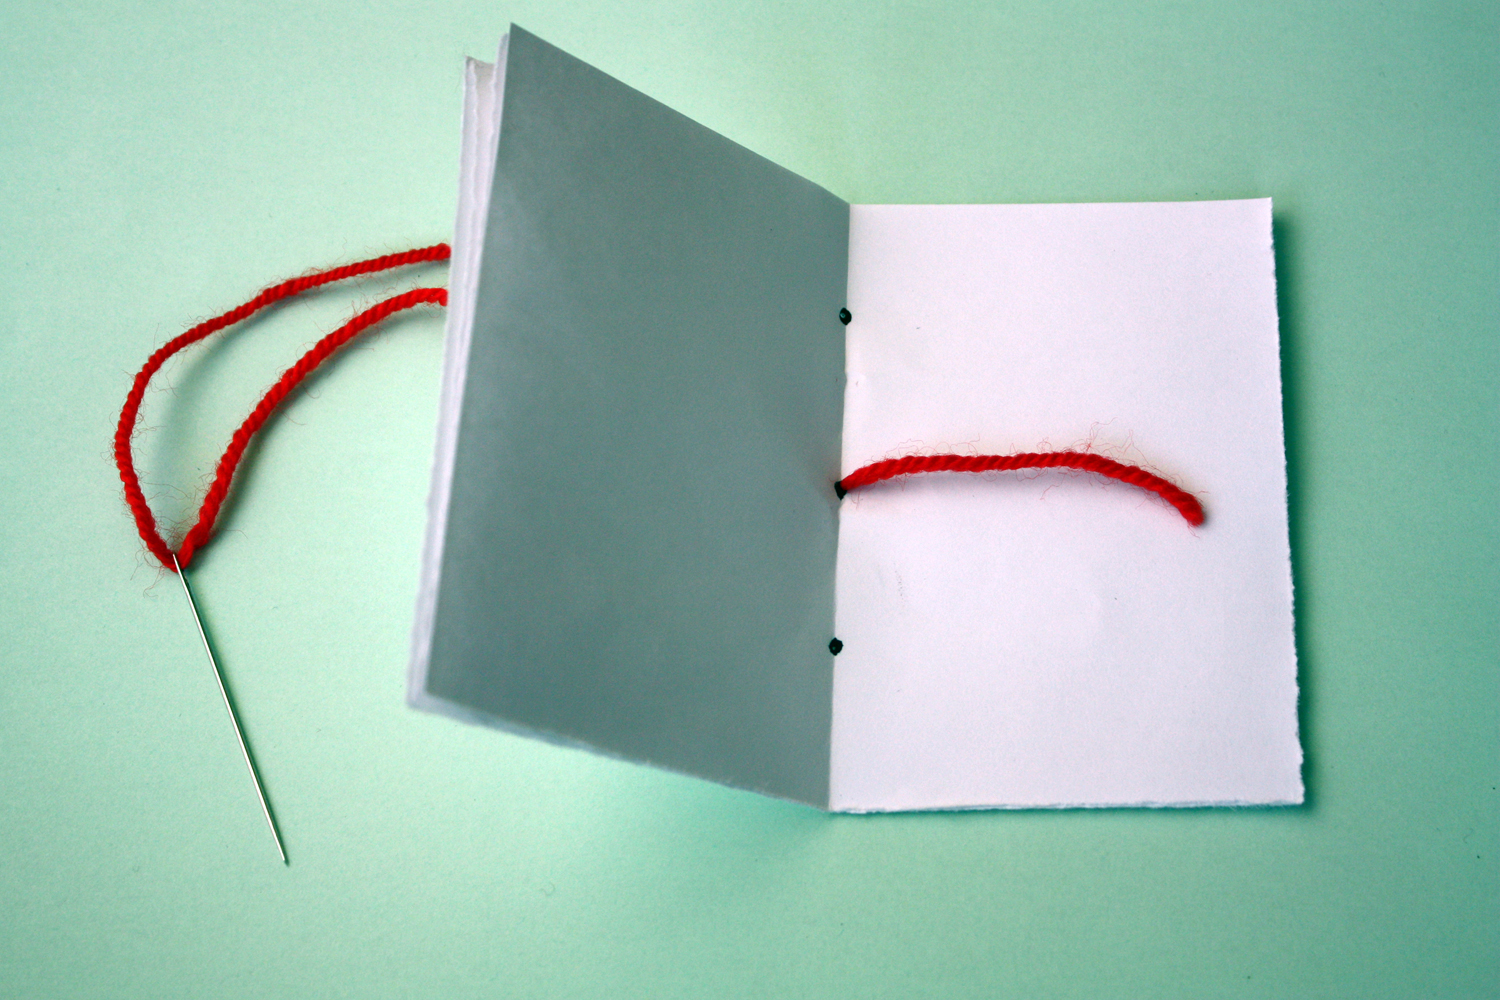
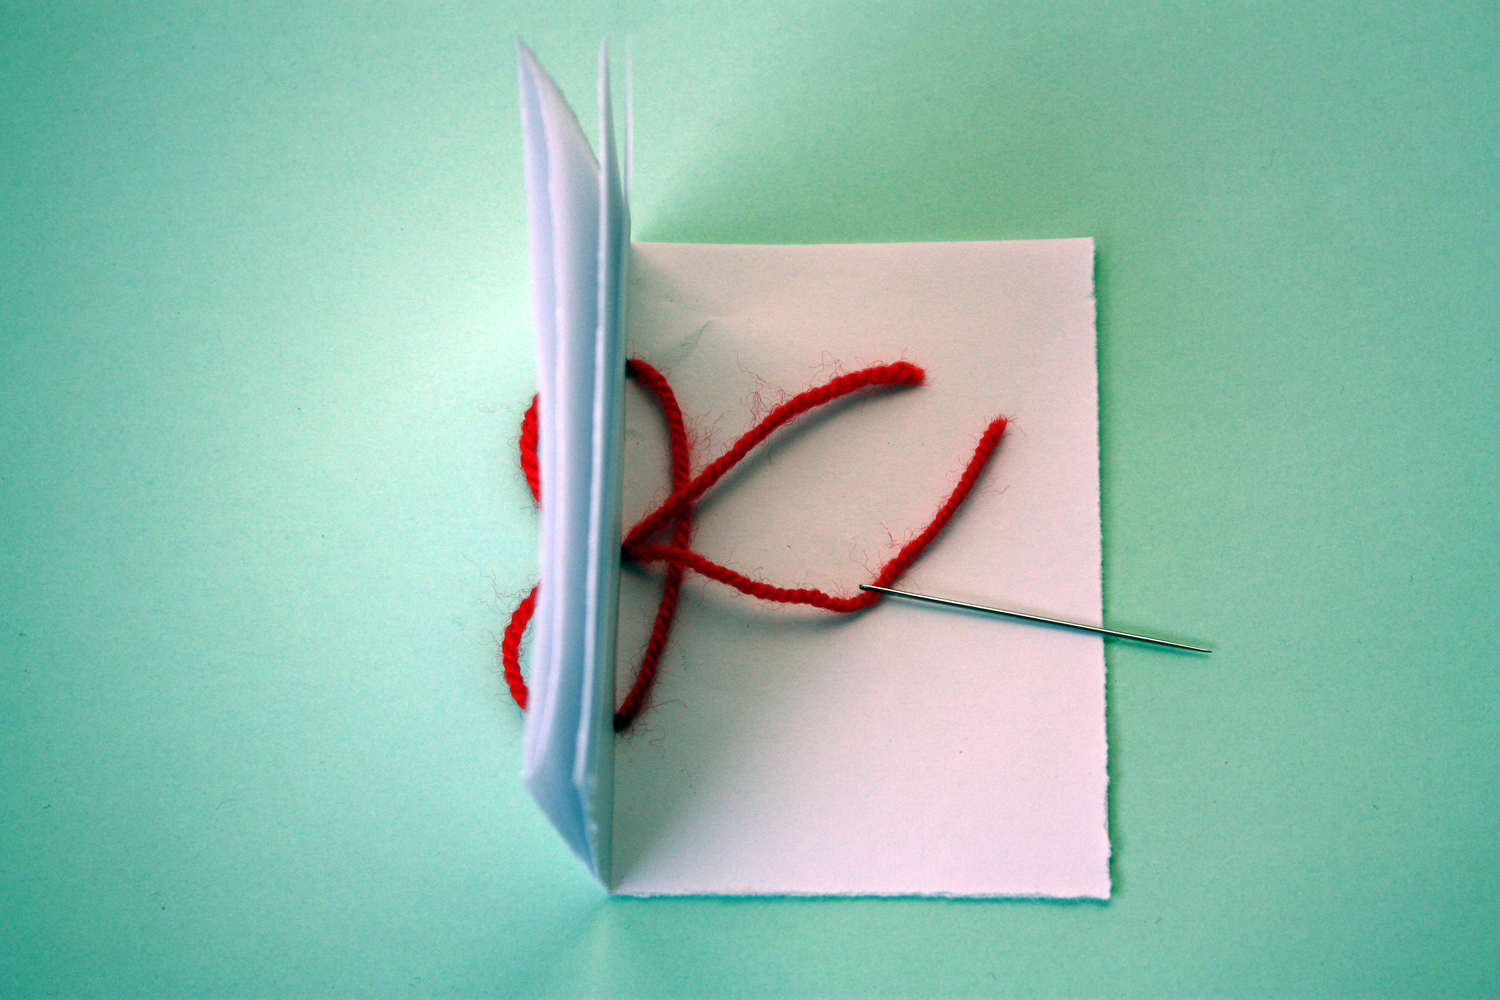
Step 3: Next, come back in from the outside to the inside through the top spot.
Step 4: Now on the inside, go all the way down to the bottom spot and back to the outside.
Step 5: For the final bit of needle work, come back from the outside to the inside through the same centre spot where you started.
Step 6: Pull your thread tight. From the outside it should now look something like this.
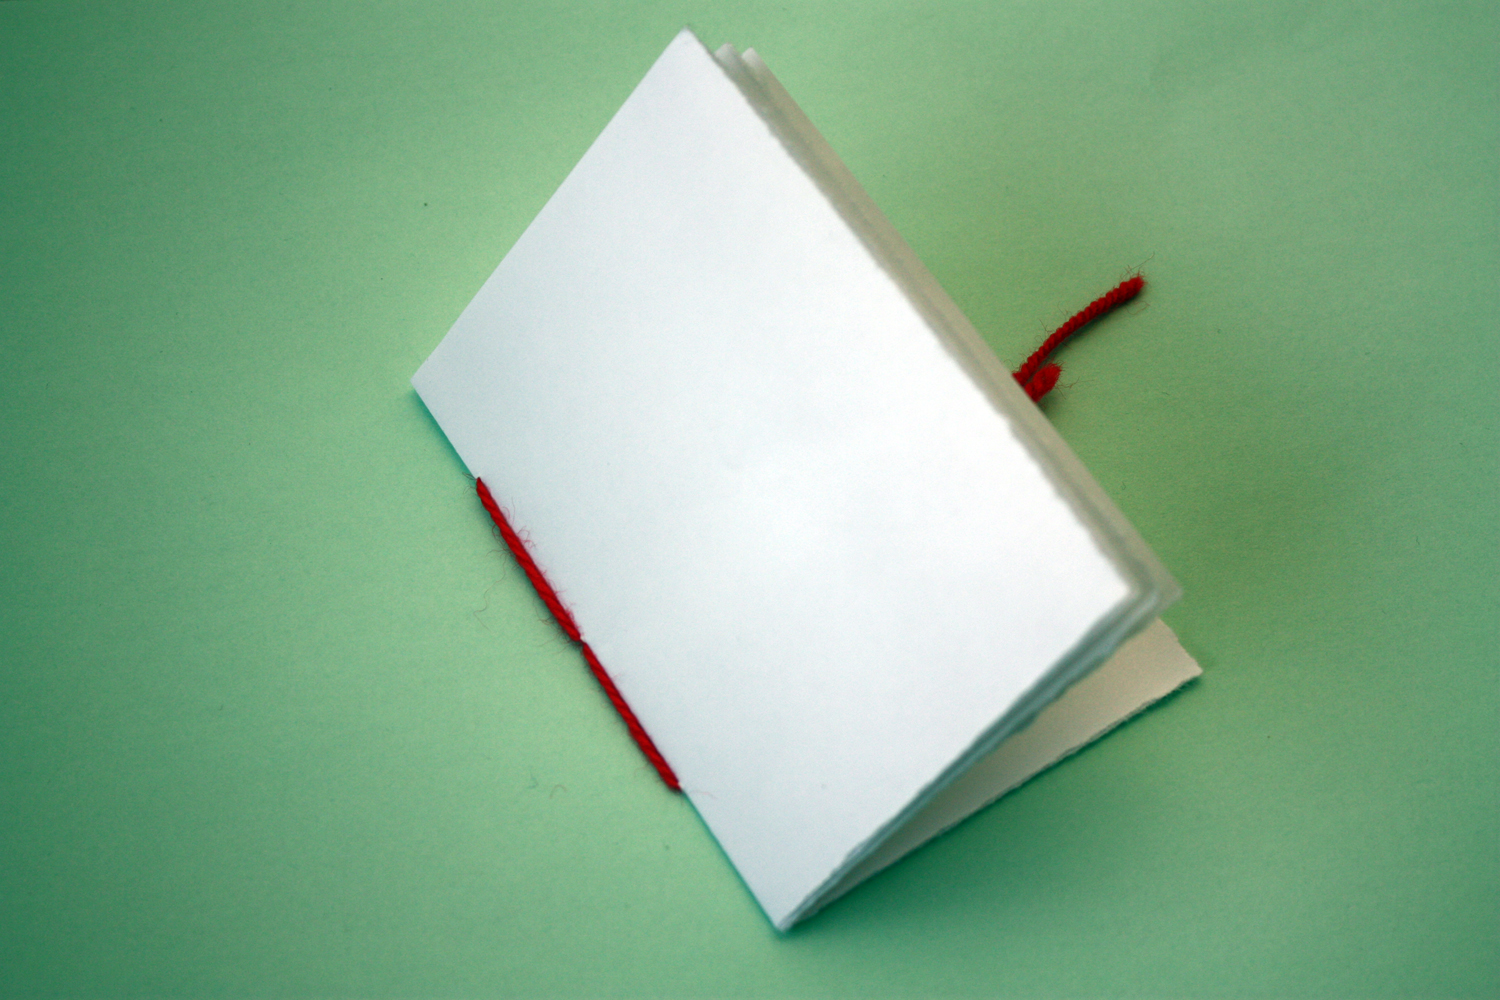
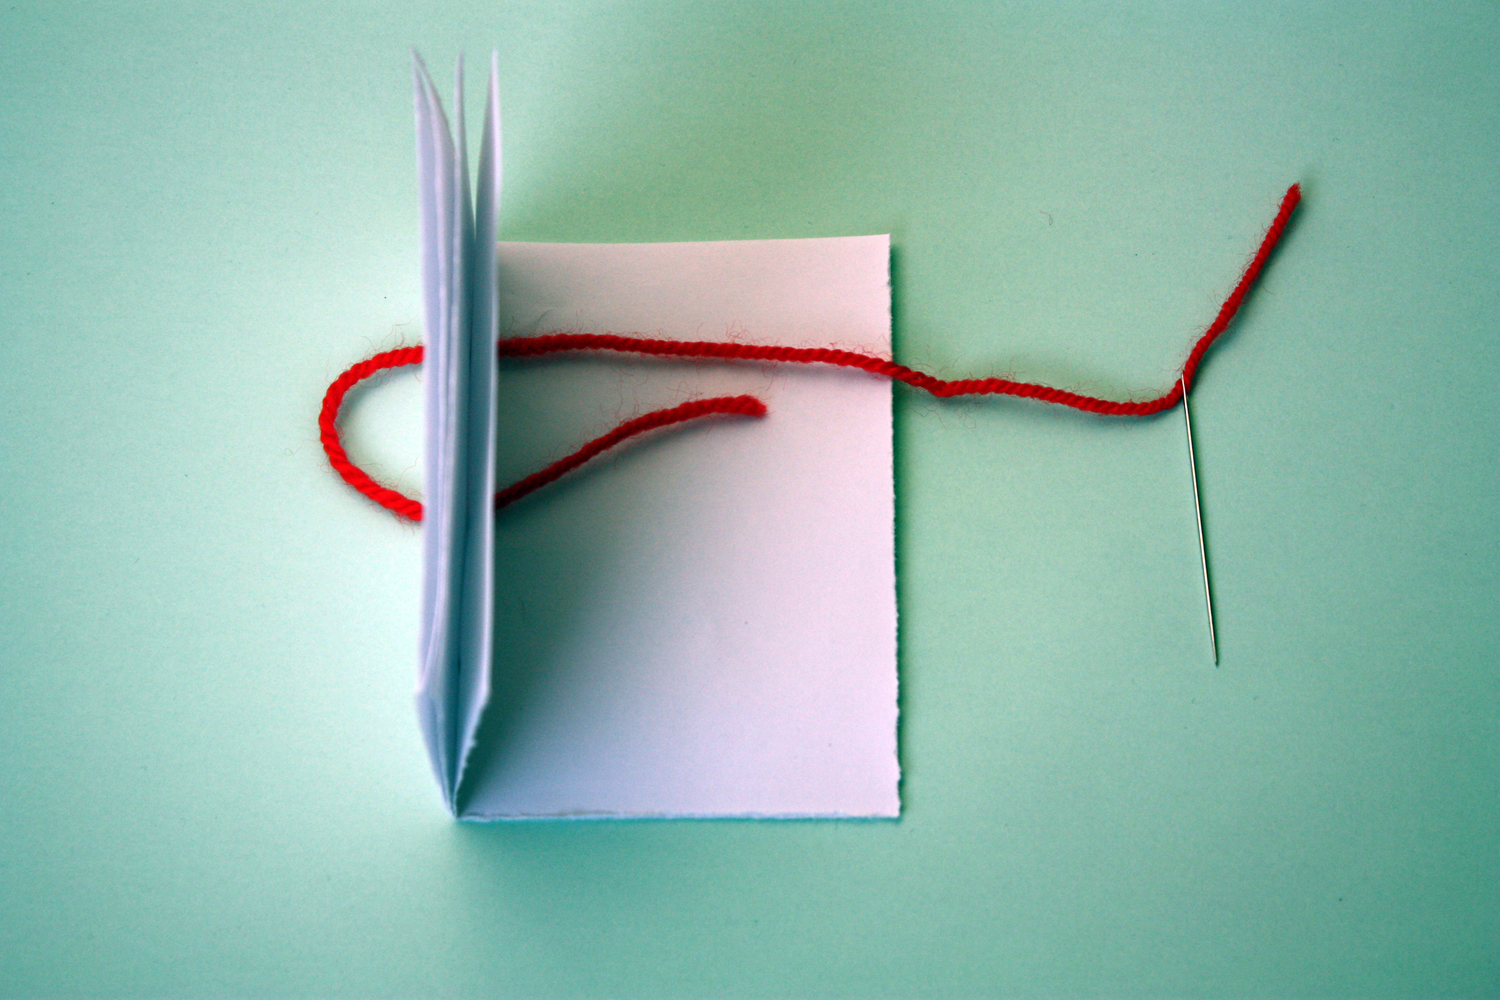
Step 7: Almost done. Make sure that the two ends of your thread are lying underneath the thread that goes from the top to the bottom spot, with one end sticking out either side…
Step 8: …then tie a knot around the central thread. This is what will keep your sewing secure and your notebook from falling apart! If the ends are too long, you can trim them a bit.
I gave my notebooks a binding by choosing some pretty wrapping paper – some nice sturdy paper is best, nothing too flimsy – and cutting it slightly wider than the outside of the pages. Then I folded the excess width inside (see below). It makes your cover a bit more sturdy and gives it a neater edge less likely to fray. Just remember to take the cover in to account when working out how thick the total volume of paper will be for the stitching.
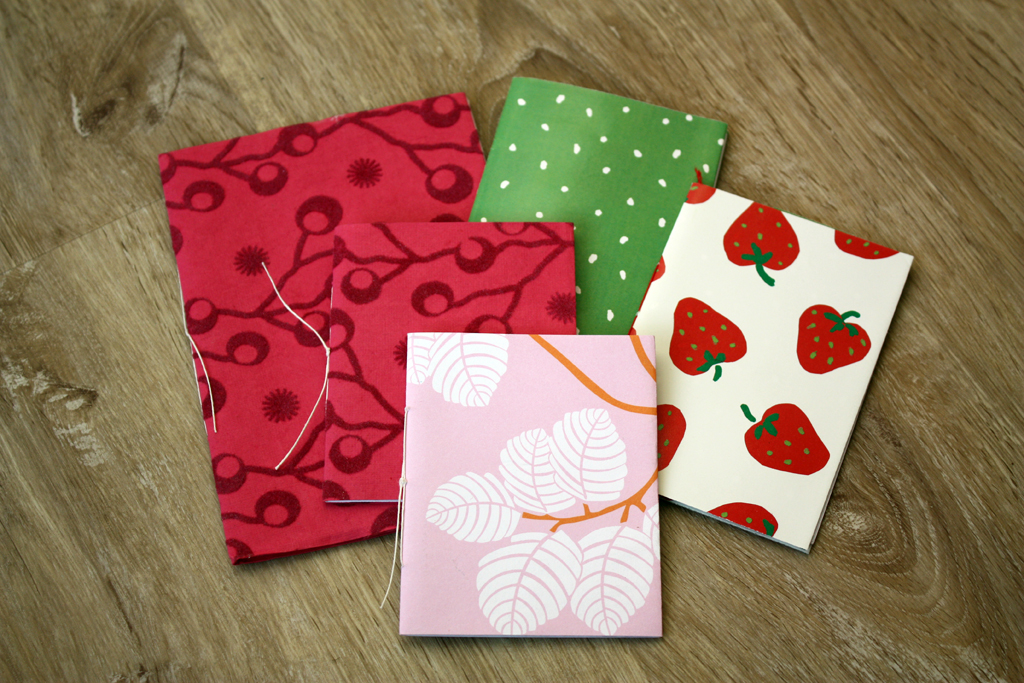
You can also do the stitching in reverse, i.e. start by going from outside to inside, so that you end up with the tassels on the outside of your spine. Whichever you like best. And of course you can make bigger notebooks. Here’s a selection of notebooks with different spines and sizes that I made.
Claire
These are so unique, what a lovely thing to do for your guests. I am sure they all really appreciated the hard work you went to x
Lyndsey O'Halloran
These are really cute. I love how unique they are. It’s nice to have something that thought has been put in to.
Pingback: Our Wedding Part 5: Party Time! – The Bear & The Fox
Pati Robins
this is such a great diy !! and idea for that matter, you are one mega talented lady my friend x
Stephanie
Its lovely it’s all these little things you’ve made, great ideas
karen reekie
This is such a lovely idea. We did all our own stuff for our wedding (we were poor students) and I made our favours too. It’s a good way to do it on a budget and also really personal.