
Schwebebahn Lantern Tutorial
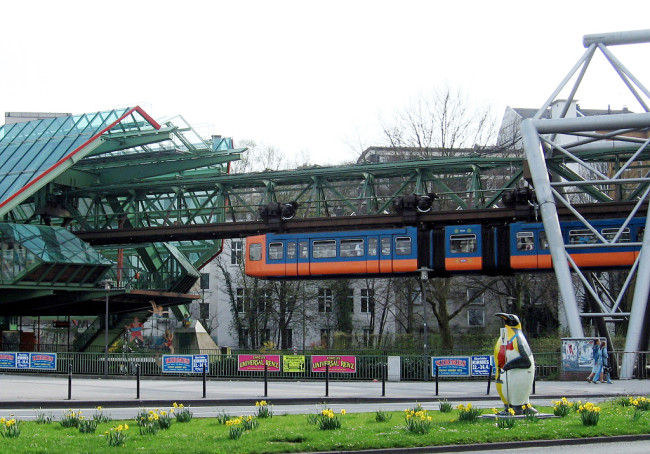
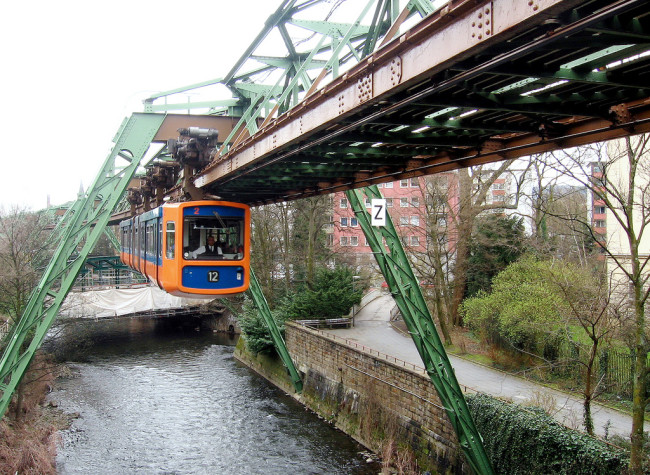
We have the annual ‘St Martin’ festival coming up in Germany this week, one of the main elements of which is lantern processions around town. In the past, the kids have always made lanterns at nursery, but this year neither the nursery nor the school seem to be celebrating so we decided to make our own at home to take to the St Martin procession at the local church. Of course, The Boy had an extra challenge for me. It couldn’t just be any lantern, it had to be a ‘Schwebebahn’ lantern! For those of you unfamiliar with the Schwebebahn, it’s the famous monorail that runs through Wuppertal, where the German grandparents live, and my boys are just a little obsessed with it. Here it is in action:
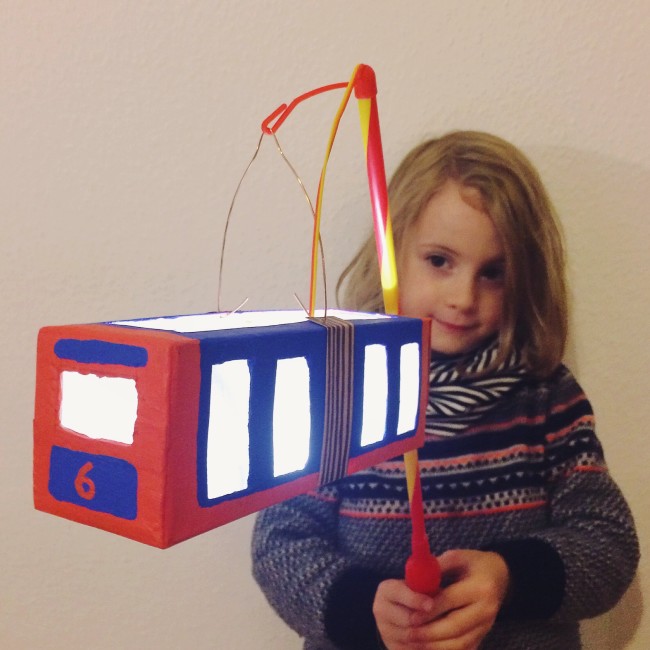
Seeing as the Schwebebahn literally translates as ‘floating train’, it’s actually quite appropriate for a lantern which floats through the night. Of course, I couldn’t help myself and rose to the challenge – one milk carton and some paint later, and voila! One Schwebebahn lantern, and one very happy boy!
So, I though I’d share with you how we made it – and you could also change the colours to match any local trains you may have, e.g. how about a yellow BVG U-Bahn?
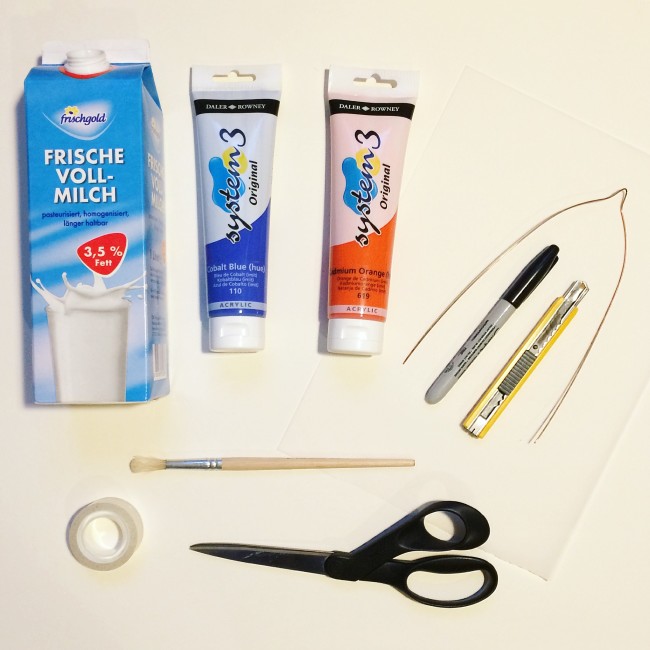
Here’s what you will need:
- one empty 1 litre milk or juice carton – you’ll need a tall and thin one like the one above
- blue and orange acrylic paint*
- a paint brush
- a craft knife
- a pair of scissors
- some sticky tape
- a black permanent marker
- a sheet of tracing paper
- some strong wire**
*Wuppertal has actually recently introduced a new fleet of Schwebebahn trains in a sky blue colour, but we decided to go with the well known blue and orange that have been the trademark colours for the past few decades, as shown in the photo at the beginning of the post. Half of the trains are covered in advertising anyway!
**I used a piece of lantern wire, which are readily sold in DIY shops around Germany at this time of year, but you can replace it with any kind of strong wire, bent in to shape.
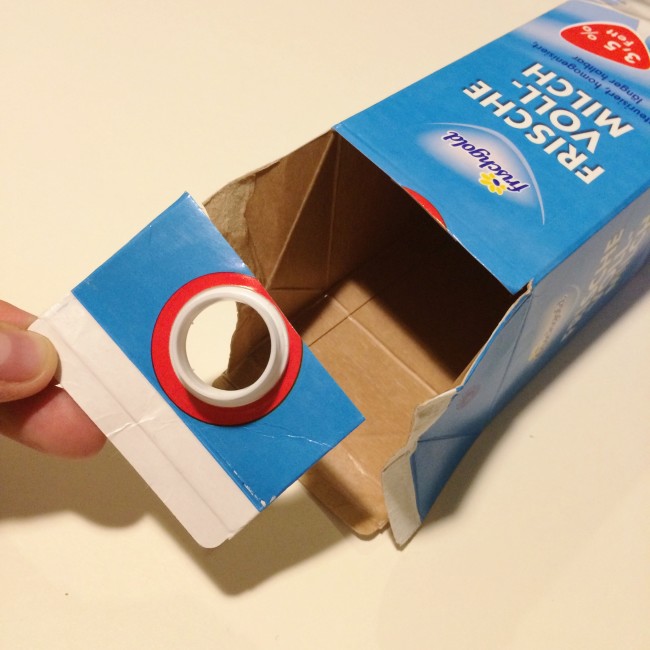
Step 1: Carefully open the top end of your carton, wash and dry the inside, then cut along the edges of the top end so you have four flaps (you can see this in the left of the photo below). If your carton has one of those plastic pouring spouts, cut off the flap with the spout.
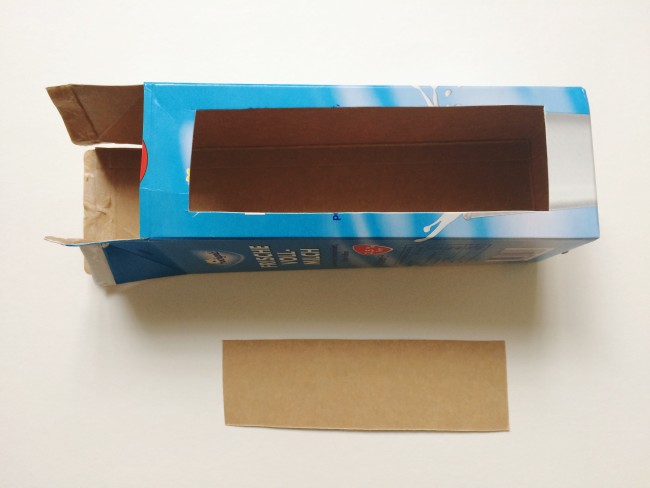
Step 2: With the craft knife, carefully cut a rectangle out of one side of your carton, leaving a rim of about 2cm (see above). This will be the top of your lantern. Keep a hold of the piece you cut out – you will need it later! THIS WAS AN ADULT ONLY STEP!
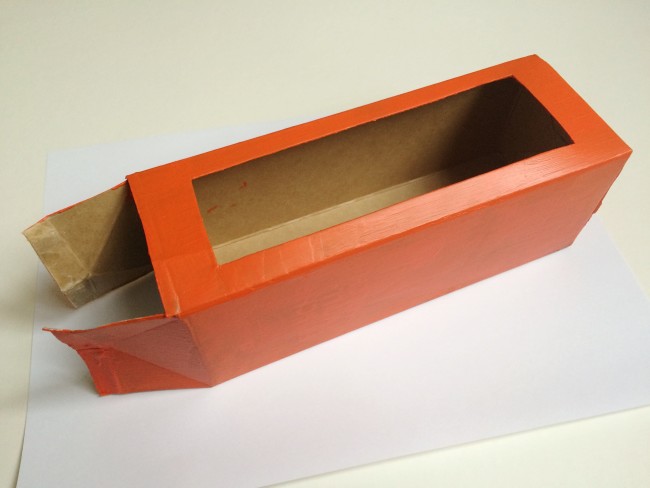
Step 3: Paint the outside of the carton orange all over. You will need 2 to 3 coats of paint to cover up the writing on the carton.
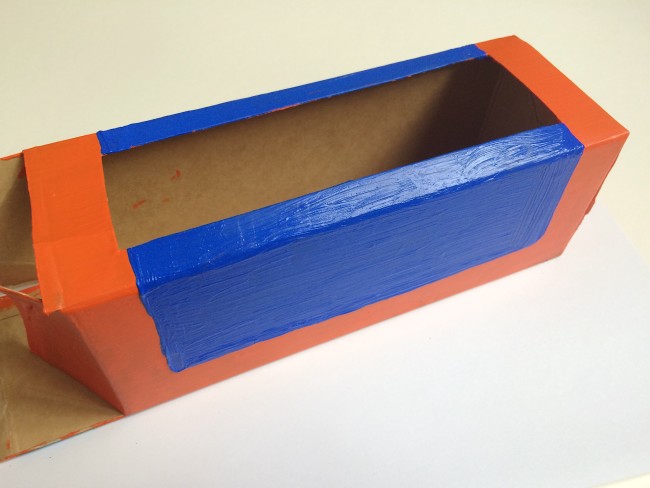
Step 4: Next, on the two long sides of your lantern, paint a blue rectangle leaving an orange rim of about 2cm along the sides and bottom, and taking the blue all the way to the top and over the rim (as shown in the photo above). Depending how neat you want this, you could do the outline and let your kid paint in the rest, which is what we did. We only needed one coat of blue, by the way.
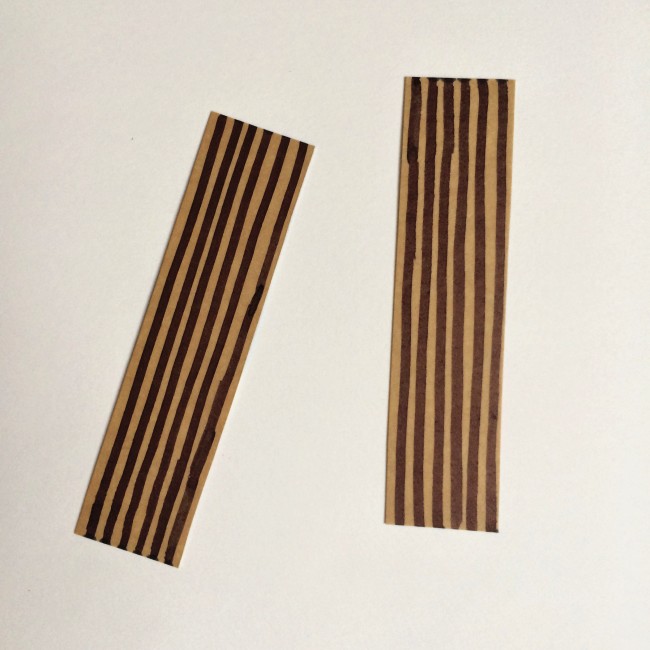
Step 5: Remember the rectangle you cut out to make the top of your lantern? You’re gonna need it now! Cut it in to two strips, roughly 2 – 2.5cm wide and 9cm long. Use the black permanent to draw some lines along the length of it (see above).
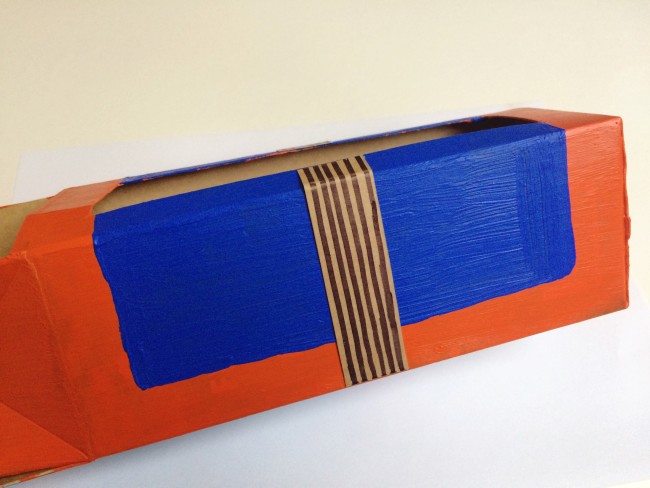
Step 6: Place the strips on either side of the lantern, in the middle of the blue rectangle, fold over the top and tape in to place. If the strips are too long – depends on how big your rim on the top is – just trim them. At this point, you can also fold up the flaps on the end you cut open at the beginning, and stick that end shut with the sticky tape (in case you’re wondering why I didn’t stick it shut straight away – the paint doesn’t hold well on top of sticky tape, so it’s best to paint first then stick it shut).
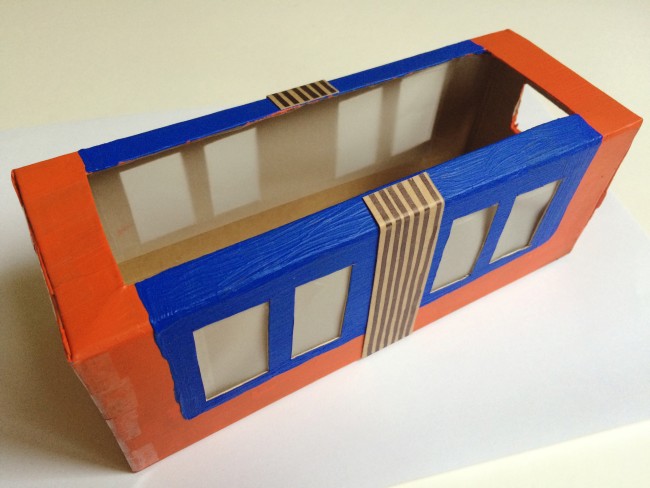
Step 7: Again, with the craft knife (ADULTS ONLY!) Cut out four windows on each long side of the lantern, within the blue space, and one on the top half of each short end – you can see one of the windows in the short ends on the right side of the photo above. You can also see above how the end with the flaps has been stuck shut with the tape!
Step 8: Cut out pieces from the tracing paper and tape them behind the windows you just cut out, as shown above. For the rows of four windows, I just cut out one long piece as that’s less work and less fiddly than doing them each individually!
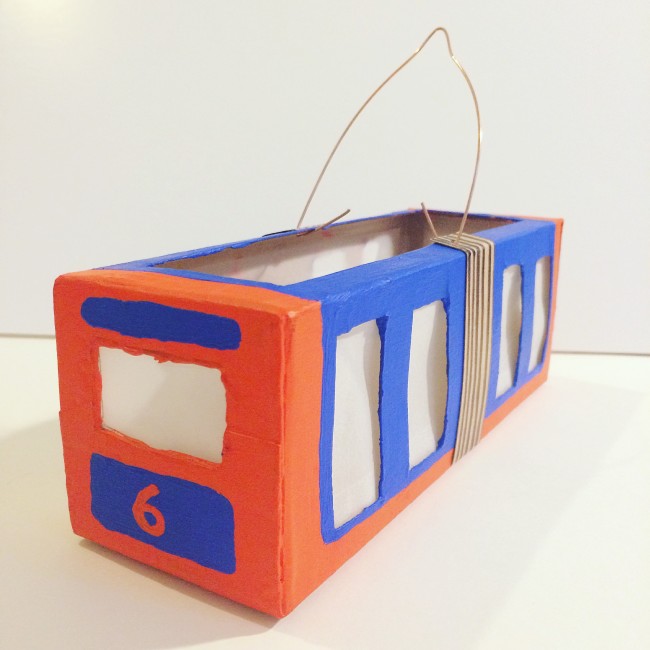
Step 9: Chose one short end of the lantern to be the front of your Schwebebahn, then pain a thin blue strip above the window and a blue rectangle below the window, as shown above. Once the blue paint is dry, use the orange paint to add a number below the window – since St Martin is the day after The Boy’s sixth birthday, he decided he wanted his Schwebebahn lantern to have the number six!
Step 10: The final step is to make a small hole at the top of each long side of the lantern, roughly in the middle, bend a length of wire in to shape, and hook it in (see above). And voila! You’re done.
In Germany, you can buy special lantern sticks with a hook to hang a lantern on and a little lamp that dangles down in to your lantern (as demonstrated by The Boy in the photo at the beginning of this post), but if you can’t get your hands on one of those, you can just hang it off a normal stick – e.g. a bamboo stick from a gardening shop – and sit some of those LED tea lights being sold everywhere this time of year on the bottom of the lantern.
Pingback: Easy-Peasy DIY Cheese Box Lantern – The Bear & The Fox
Pingback: Planning for November – The Bear & The Fox